


Now for those cute puffy sleeves! For each step, (DUH) repeat for the other sleeve. Get the full tutorial after the jump! Lay out your main fabric (MF) and lining, wrong sides together. Then sew a basting stitch (also will be your gathering stitch) along the bottom and curved top of the sleeves. You can pin if you want, but I like to … [Read more...]
the Anna dress Part 2: Bodice and buttons
May 10, 2011 By 3 Comments

Let's get going on the bodice today, shall we?Get the full tutorial after the jump! So to begin the bodice, pin your bodice pieces together at the shoulder seams, right sides together. Sew along the shoulder seam. At this point, the front neckline wasn't low enough for the look I was going for, so I trimmed it down a bit. Just make sure that … [Read more...]
the Anna dress Part 1: pattern and pieces
May 9, 2011 By 11 Comments

Alrighty roo! Day one of the Anna dress sew along! You ready to rock and roll? Pattern time! We'll start off making a basic bodice pattern if you don't already have one, and then altering it for this dress.Get the full tutorial after the jump! So. Find a shirt that fits your child. Lay it out, folded in half like so. I use freezer paper for … [Read more...]
the Anna dress (sew along)
May 4, 2011 By 53 Comments

tada! Another dress! (try to control your excitement) I don't often sew with solids (I'm a print lova), but I fell in love with this little dress when it was all said and done. Something about the simplicity of the design (and slight vintage flair) appealed to me immensely. Plus, I made it with some cheap inexpensive shirting so the whole dress … [Read more...]
Leah tunic Part 4: pockets
April 7, 2011 By 16 Comments

Now let's tackle those pockets. I did them very simply.See more after the jump! First I cut out a pocket pattern-I adapted this pattern. Then I used some more bias tape for the tops. First I folded it over, right sides together, and sewed down, and then backstitched up. (same technique as the binding for the collar) Then I measured 4 … [Read more...]
Leah tunic Part 3: cap sleeves
April 7, 2011 By 3 Comments

On the menu today: puffy little cap sleeves. See more after the jump! So here we go with those cute lil' cap sleeves! Lay both of your sleeves like so and trim a little bit around the edge so it's curved a little bit. Next, sew a gathering stitch about 3 inches from the shoulder seam on both sides. (should be about 6 inches total, to make … [Read more...]
Leah tunic Part 2: button closure and neckline (and guest post)
April 6, 2011 By 22 Comments
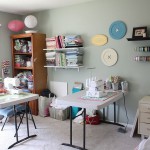
Before we get started today, I wanted to let you know that my sewing/crafty room is being featured today on Craftaholics Anonymous! Also I want to give a big welcome (WELCOME) to any visitors coming over here from C.A.! Moving on to the sew-along! Today we'll work on the button closure and bias tape around the neckline. See more after … [Read more...]
Leah tunic Part 1: making the pattern and cutting it out
April 5, 2011 By 24 Comments

Welcome to the Leah top sew-along! I'm so glad to have you. Let's get started.Ok so for this top, we'll start off making the pattern. It's not hard, just might take a little bit of scribbling and erasering. (yes, I know that's not a real word)See more after the jump! You'll need: main fabric (a yard was plenty for my 2T size) accent fabric to … [Read more...]
lucky dress part 4: faux layered hem and buttons
March 30, 2011 By 13 Comments

Hey everybody! Just a quick note about next month's sew-along-it will be in the beginning of April instead of near the end...due to a super cool radically awesome something happening. hmm, mysterious enough? lol. And a lot of you will be happy to hear the sew-along is the.....Chrysanthemum top! Newly renamed the Leah top. (Now I'm just using … [Read more...]
lucky dress part 3: putting it together
March 29, 2011 By 9 Comments

Let's get started on assembling the Lucky dress together!See more after the jump! First things first, let's sew those shoulder seams, right sides together. On both the main fabric and lining, like so. sew... Press open your seams, and then lay out the main fabric right side up, then lay the lining right side down like so, and pin around the … [Read more...]