Welcome to the Leah top sew-along! I’m so glad to have you. Let’s get started.
Ok so for this top, we’ll start off making the pattern. It’s not hard, just might take a little bit of scribbling and erasering. (yes, I know that’s not a real word)
See more after the jump!
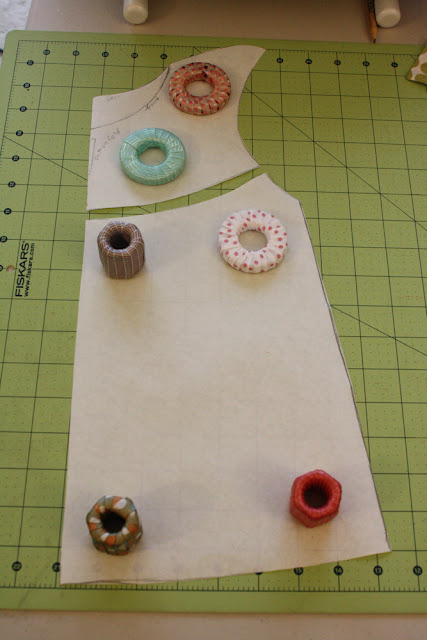
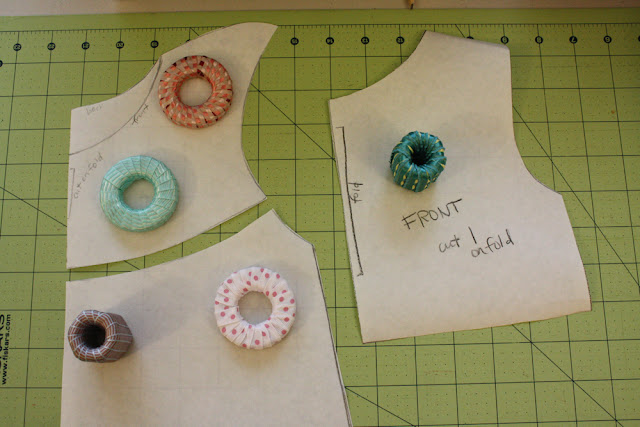
This is what your pattern will look like when we’re done.
Then I cut out two of my bodice pieces, one with the front neckline, one with the back. You’ll also need to cut some strips of fabric on the bias if you’re making your own bias tape.
See that little piece of fabric?
For the back button closure, I cut a scrap 3″ wide, and longer than the width of the back bodice piece.
Let me know if you have any questions!


Hey Jess! Is the arm hole bigger then the original bodice pattern? And then the shoulder seam, it’s the same width, but does it go up higher then the original pattern? Sorry. Patterns are where my down-fall lies. Thanks Jess!!
Seriously you are killing me with the cuteness. I NEED to stop reading your blog because it is taking every fiber of my being to not cease all other activities and ONLY SEW.
I’ve been planning on doing this sew along sonce you mentioned it! Even bought bright yellow bias tape for this. but I am confused about the second last pic.. what are those 2 scraps for?
ok, maybe I’m blind, but where do I get the measurements to make the pattern? Do I need to just measure from your pictures? My little girl is wearing about a size 3 and I want to make sure that this will fit.
Thanks, Heidi
Jess, this shirt is adorable! And so perfect for playing outside this summer. I am totally going to make one! Yay!
@ prarie whisperer – I think you just use a shirt or pattern you have that fits your girl and trace that to get your ‘base’ pattern. (that’s what I’m doing)
Cute, cute, cute!!!
Total cuteness! The colors are great! Perfect this summer.
Homeowner Insurance
@ prairie whisper:Sorry if this part was confusing! You’ll need to trace another shirt that fits your daughter for the general shape (ie that pattern I used) and then alter it like I show in this post. Hope this helps, let me know if not. 🙂
@ .Jen-those scraps are just the parts I trimmed off-you can toss those. The part you’ll need is underneath the bodice in that pic, but shown in the last pic.
@ Nikki-yes the armhole is bigger, you will gather it in later-and the shoulder, or sleeve, does go up higher than the original shoulder seam, and is curved out a bit. Kinda hard to explain, but it’s pretty forgiving when you sew it up, so just try to copy the pattern in the pic as best you can.
This is my first ever sew along & I’m so excited!
Apparently it’s time for lunch, because I thought those were donuts on your pattern pieces. Mmmmm.
done! first sew-along ever… first ‘along’ ever! i held by breath through the whole thing but i did it! i did it!
http://polliwogsinbloom.blogspot.com/2011/04/sew-along-with-cratiness-is-not.html
sue 🙂
Once I put my daughter down for bed tonight I’ll start making the pattern and cutting away.
Just curious, are you going to include those cute big pockets in the tutorial? If not, what pattern did you use for the pockets? I picked out a cute contrasting fabric for the pockets!
This will be my first sew along and i am so excited!
I wrote about it on my blog (hope this is ok for you?!)
http://hanna-herz.blogspot.com/2011/04/leah-top.html
lets have fun sewing the leah top 🙂 🙂 🙂
greetings from Spain,
Sylvia
Hi Jess and other sew-a-long friends!
It’s my first time, too. I’m super excited to join in on the fun.
Put the little one down to sleep, finished my pattern and just about to zig-zag the button flap…but was wondering about the pockets? Should I keep my scraps? Will those be included in a later post?
Thank you again for hosting Jess! I’m looking forward to seeing everyones’ masterpieces at the end!!
-Sheila
I made my pattern and cut my pieces, but I am having a hard time because I can’t squeeze another bodice on the fabric I grabbed! OOPS! I might have to skip the seam allowance, so I hope it works! Excited to do this one- I hope I can finish with y’all since we have a lovely virus and a broken clothes dryer at our house!
I really love this shirt, Jess. I’m going to make one for each of my girls for this summer as soon as I can find some time. Adorable!
Adorable! I’d love to share this tutorial series on the Examiner. Please let me know if you are interested in being featured. I’d just need your permission to use a photo (credited to you) and will link to the blog posts and the Flickr group. Cheers!
Oh, I just found your blog and page over from Noodle head. You will be hearing from me. Love your blog!
Lovely top, just made it for my little one and posted the pics on your flickr group! thanks for the fab tutorial!
emma
I love tunics and wear them in summer spring and fall. I consider myself a Tunic Queen. The tunics are adorable gotta try my hand at this.
More than a year late I sewed along! More of a dress version though and linked to you here. Many thanks
http://carolinecameron.wordpress.com/