


I finally got this post written, and I can’t believe it took so long, because I seriously love this bathroom and how it turned out.
Aaaaand want it recreated in my own home someday, mkay yes? Let’s jump into the nitty gritty of where, how, what, and why oh why would you spend that much time making a dollhouse sink. (yes I spent too much time but was it worth it also yes)
Here is where we were prior to this remodel-click over here to see the full post with details!
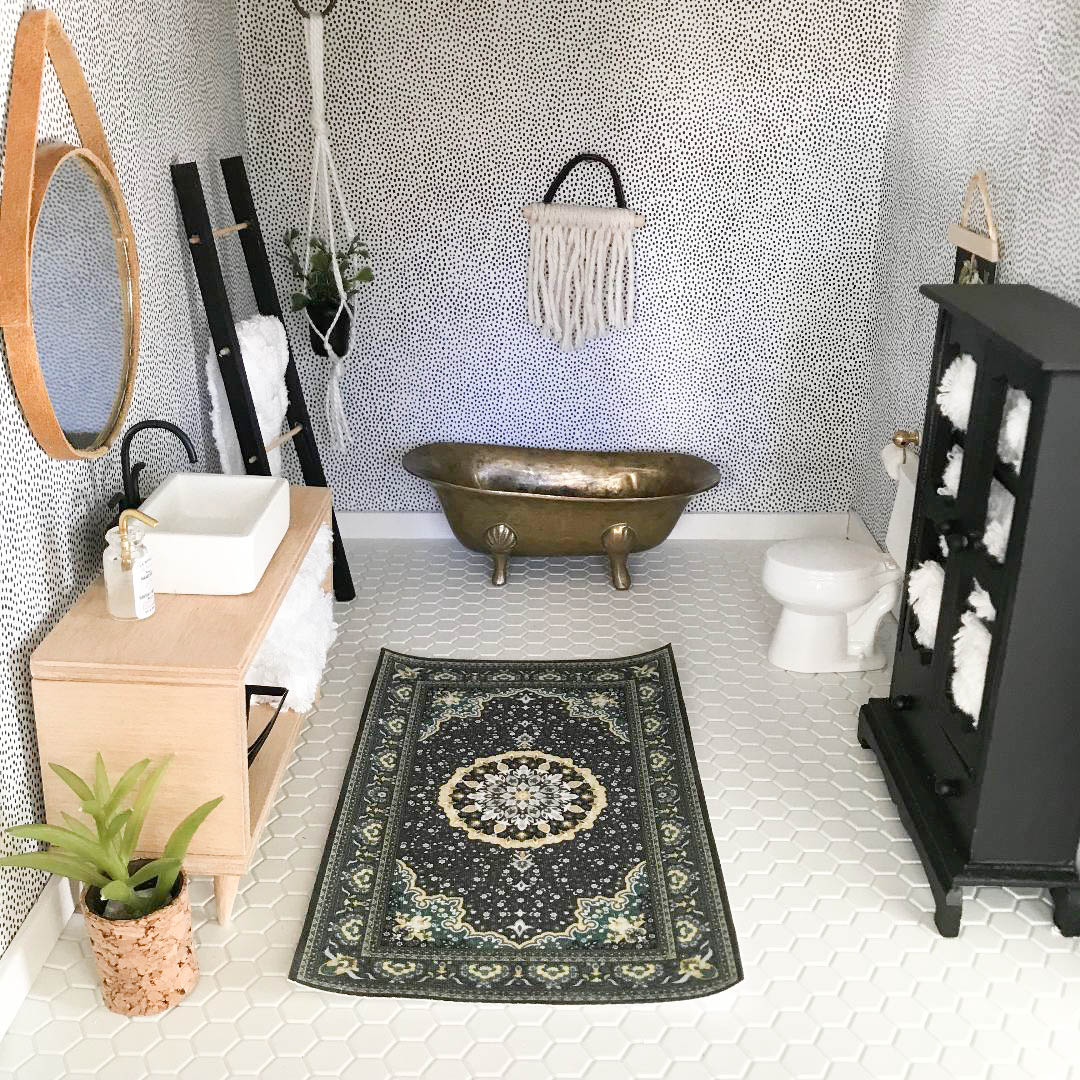
Let’s start with the floors and walls. The hexagon flooring was from the previous room, and I just spray painted it white-before it was a cream and white pattern that I didn’t care for anymore. The walls I papered with some scrapbook paper that I cannot remember which brand it is! I added the molding back on around the bottom.
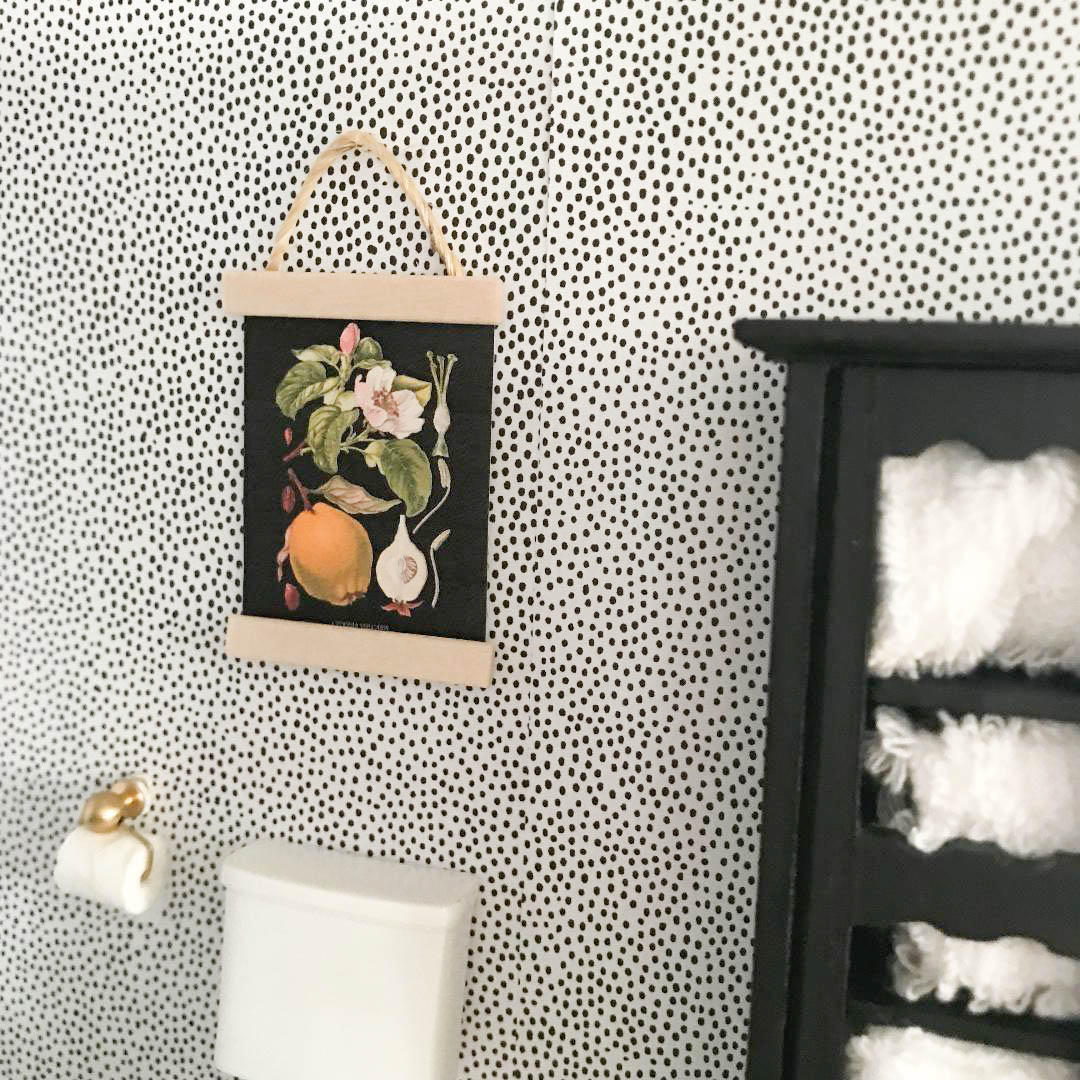
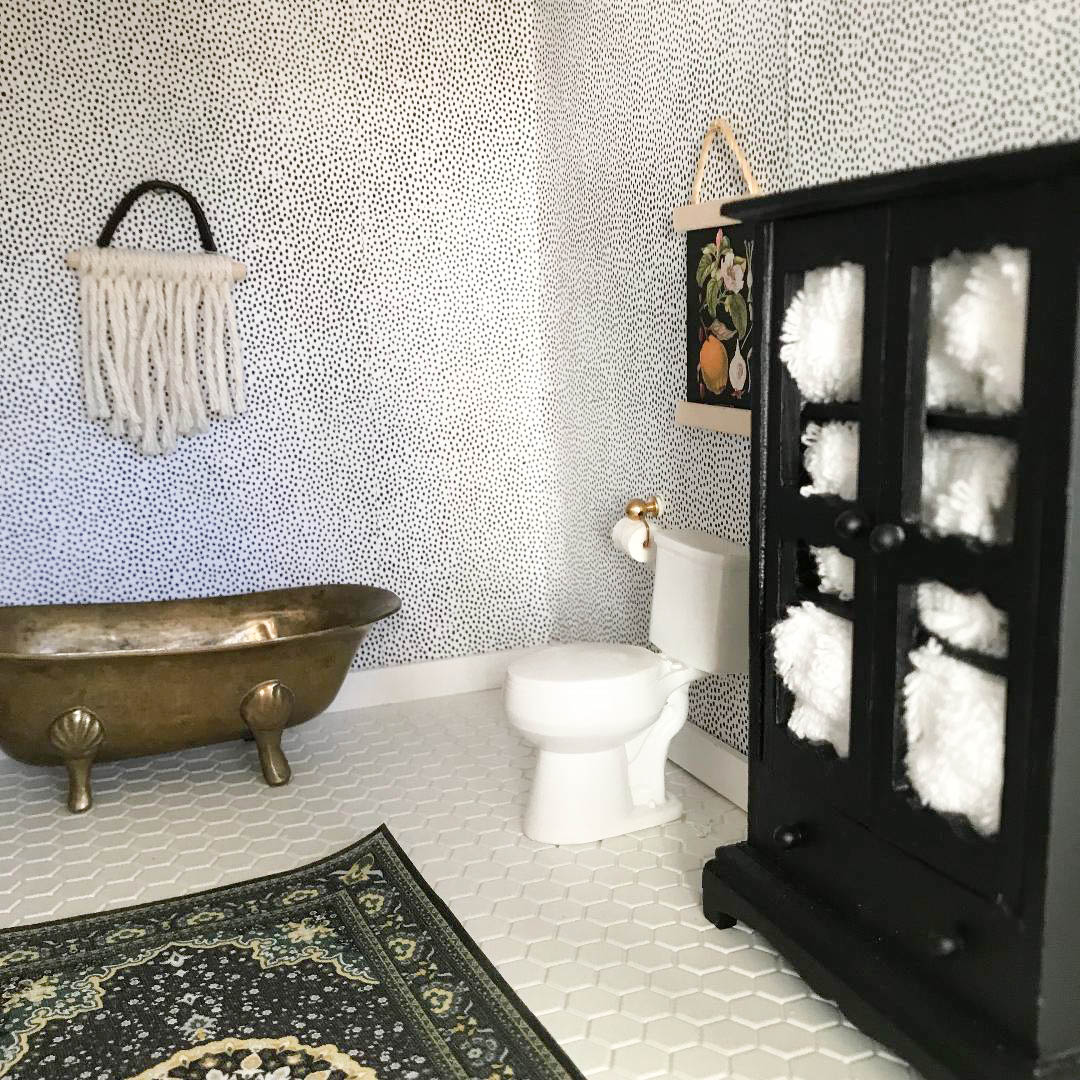
I used the same toilet and got a new brass toilet paper ring!
I also found that artwork somewhere on Pinterest and scaled it down, then added some popsicle sticks on top and bottom and a bit of twine for a cute wall hanging!
I also re painted the original cabinet and added some fluffy new white towels-made with pieces of washcloth that I serged the edges of!
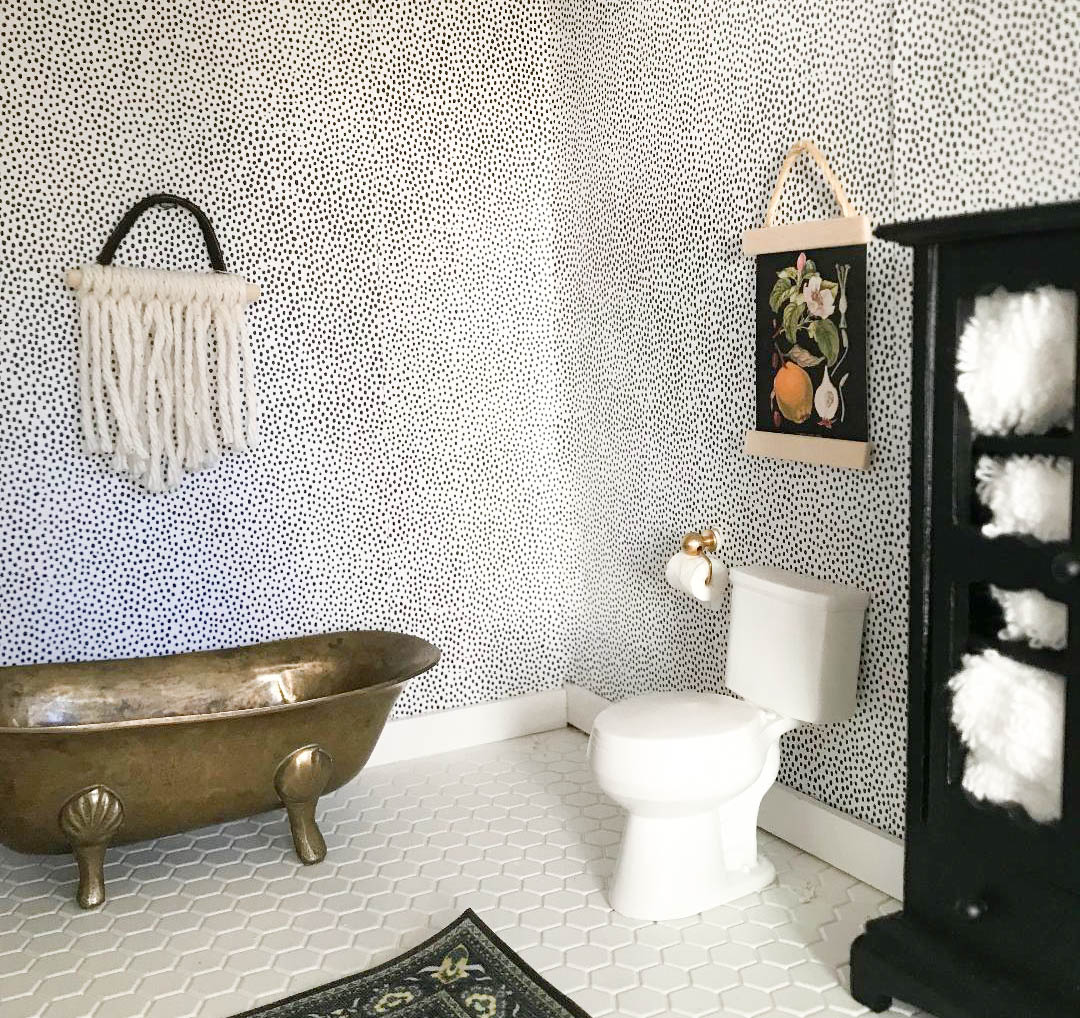
The brass tub is a vintage find from Ebay-the scale is way off, but it’s still adorable I think!
The little yarn hanging was super simple-tied yarn around a bit of dowel and then trimmed it down and added a bit of leather strap.
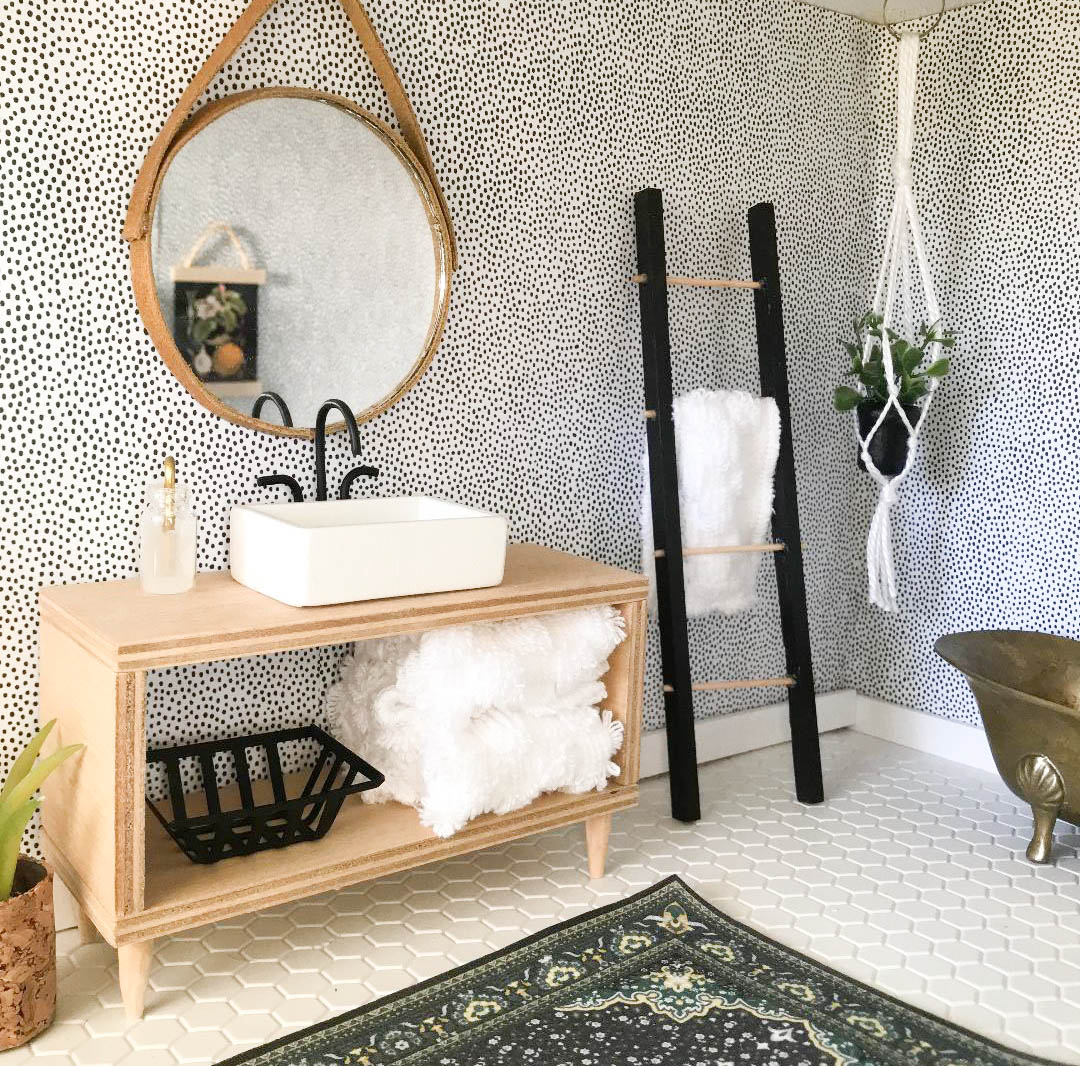
I think this is my favorite shot of the whole post! I made the vanity very simply with some 1/4″ craft plywood and dowels that I carved down and then sanded. I left it natural and loved the raw edges and the layers it added to the room! I added a few of the “towels” underneath and a little metal basket I found at Michaels, and painted black.
The mirror was made by gluing a round mirror to a wood piece of the same size and shape, and then gluing some thin leather strips around the edges, and to make the hanging part. Super easy!
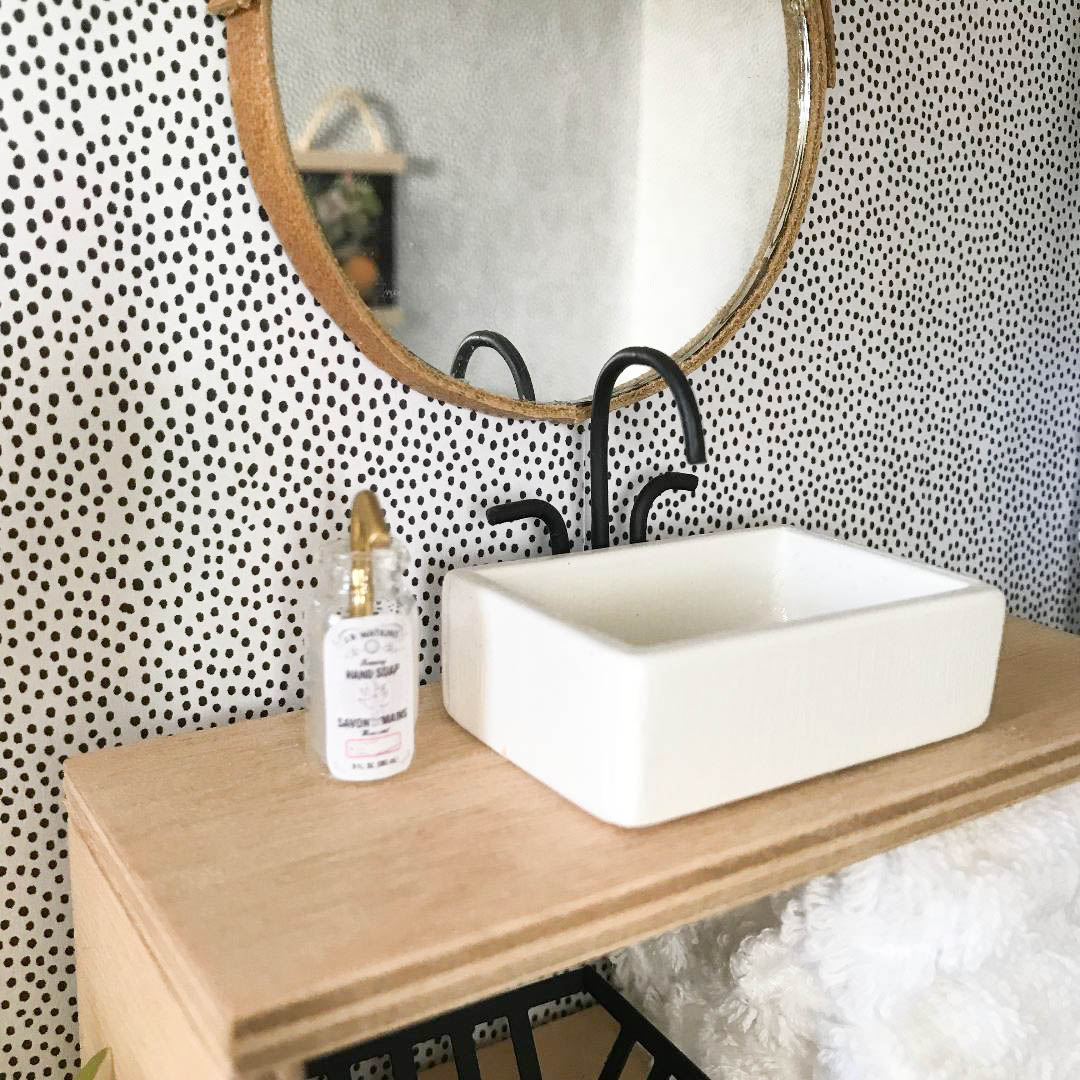
I made the sink with some thin 1/8″ craft plywood that I cut (with my awesome craft cutter), and then rounded the edges by sanding-also filled in the cracks with some spackle. Then I painted the whole thing with white glossy paint! I used a little piece of wood in the back and drilled little holes for the wire that I bent in the shape of a faucet and the handles. I then glued them in and painted it all matte black and glued it to the back of the sink, and then the counter!
I made a teeny label for a soap bottle and then filled the bottle with glue and stuck in a bit of wire. tada!
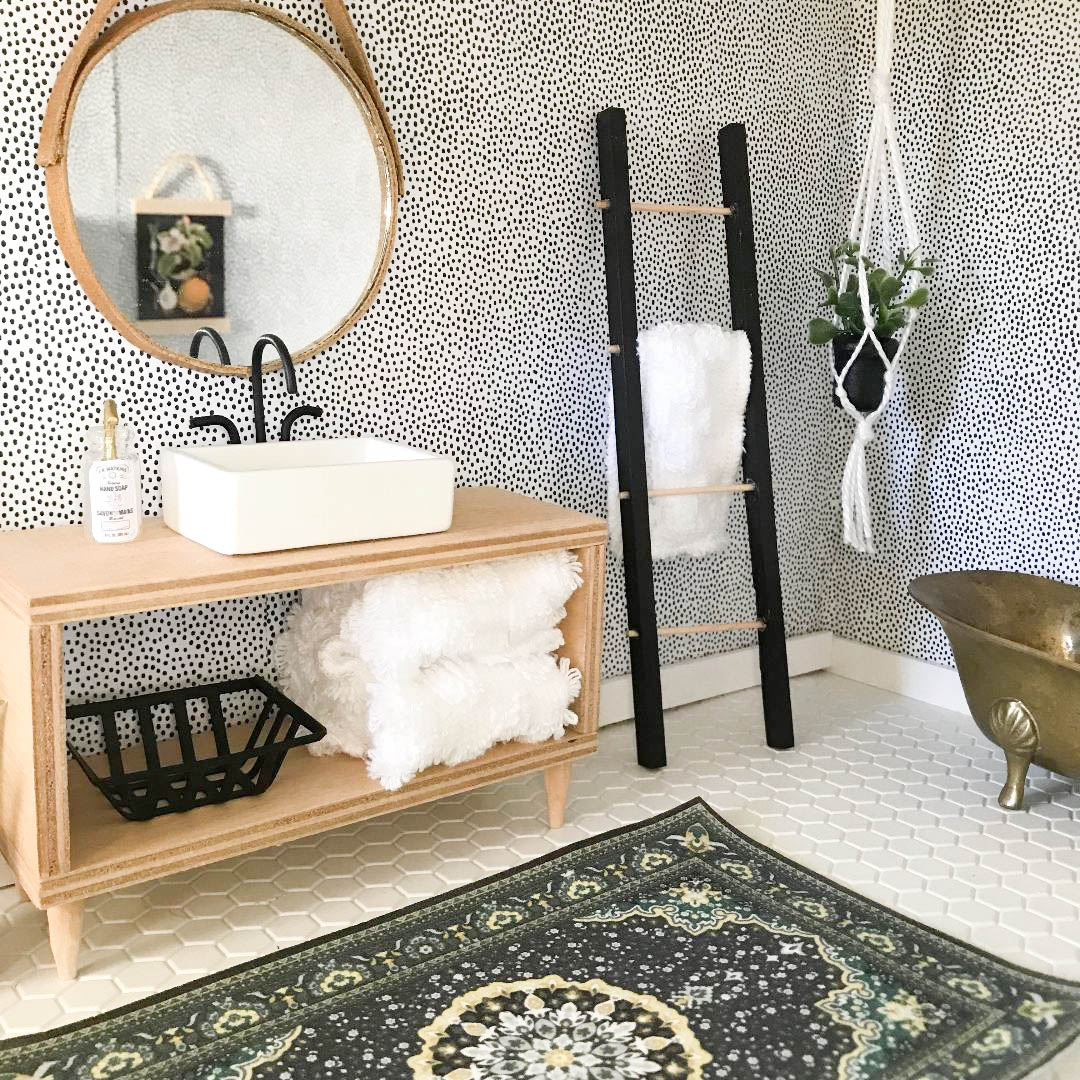
The RUG makes the room amiright? Also another one of those wish-I-had-this-in-real-live situations!
I made the ladder with some tiny dowels and wood pieces. Love the black on wood look here!
I also made a fun macrame plant hanger for the corner!
Now to shrink myself and move on in….
Holy stinking cute!!! Well done ?
thank you!
When you figure out how to shrink yourself, let me in on the secret and invite me over. Please?! I love all the details, but especially the sink. Wow!
seriously! I’d shrink down even for a vacation! hehe thanks!
Wow! This is so cool! Great job!
thank you!
Wow ????????it’s super ador able I’ve been meaning to decorate my daughters doll house for quite some time but couldn’t muster the courage by any chance could u make a tutorial of sorts for reference as always u have done a great job …..
thank you!
May I ask what craft cutter you use? Thanks!
I use a silhouette!
Can I just ask what kind of dolls go in this house? I noticed from before the remodel, the bathroom furniture was 1/12 scale, which I think is the same scale as Calico Critters? I hope. Anyways, just checking to see if I can use your tutorials with my calico critter dolls or if you are making things for barbies or something. Thanks!
Not for barbies, for 1/12 scale dolls but honestly they use whatever little toy is around!