


First off, Happy Valentines Day!
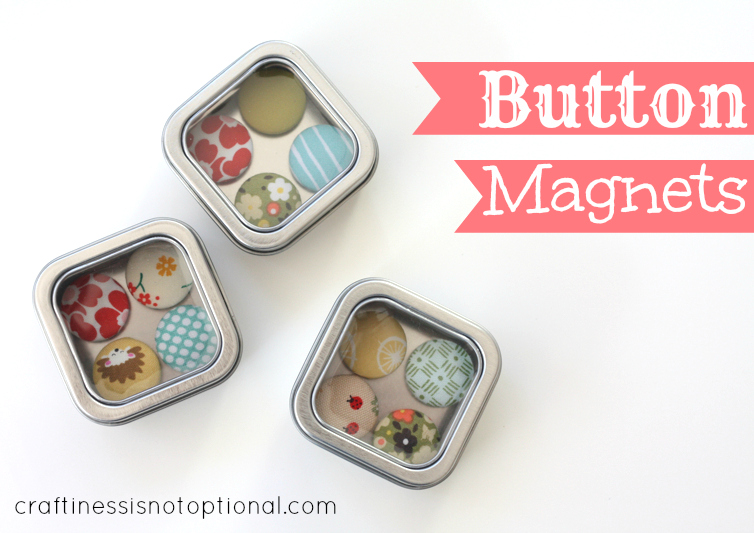
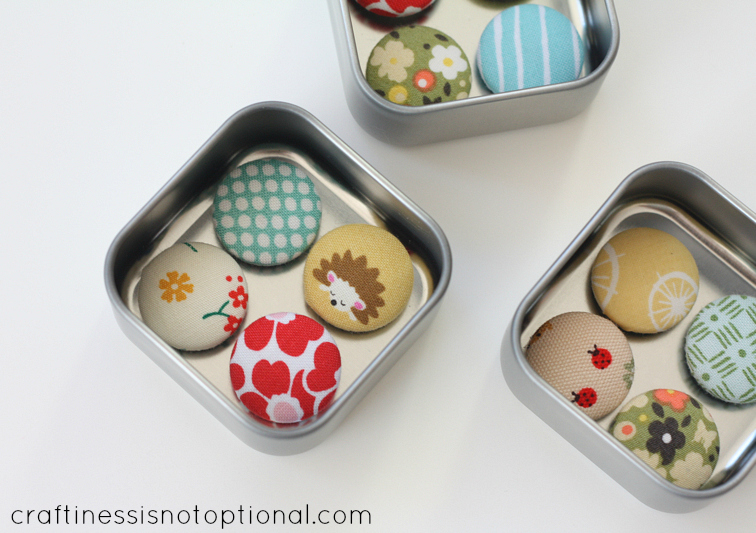
I have more “craft it forward” gifts to share with you today! Cause I just can’t stop with one…gotta share the love! Plus they did double duty as Valentines for my “mommy friends” as Sadie calls them (ok as I call them when I’m talking to her). I decided to make some sets of fun fabric covered button magnets-after all, most people have a fridge right? Although my parents’ fridge isn’t magnetic on the front…so I guess they are the weirdos in the refrigeration world.
I had a few people ask on Instagram (follow me-username is craftinessisnotoptional….I love Instagramming!) about covering buttons-it’s really easy and so fun! It’s the perfect way to get custom buttons. I use these all the time to match dresses, tops, etc. It’s great because you can use the same fabric you sewed it with-a perfect match!
When you’re done covering them, simply hot glue a magnet on the back, and you have a magnet! Watch out world….or….fridge. You’re about to get a magnet makeover.

So here’s a quick lesson in button covering.
1. You’ll need buttons to cover and the tools to do it, too. Most sets come with them-a little rubber white piece and a blue piece.
2. Cut a piece of fabric for your button (most kits come with a guide on the back of the cardboard that you can cut out and reuse…I stick each size of button/guide/tool set together in a labeled baggie so I don’t lose them)
3. Center the fabric on the button and push it into the white rubber piece like so. Tuck the edges in towards the middle.
4. Place the button back on top.
5. Then use the blue piece to pop it into place. Just make sure to press evenly, and that all the edges have been pressed in fully.
6. Tada! Insta-cuteness!

I got these metal tins (and the magnets too) at Michaels…they are 2″ wide so the perfect size for four 7/8″ buttons to fit in. (I get flat backed buttons on Etsy) Plus the magnets stay put. Awesome. I wrapped some pink washi tape around them (plus some truffle chocolates-not shown-and totally not because I ate most of them….), and was done! But wait…it needed a cheesy, Jess-ish saying. hmmm……”You are cute as a button” works. DONE.

Do you like to give your gal pals Valentines? I think it’s a fun tradition! Another question: have you crafted anything forward yet?
Thanks for the tutorial, I really love your crafts
jess! I love these, so sweet! maybe you’ll be my valetine? 🙂 hope you guys have a good one!
So adorable! LOVE this idea!!
I love covered buttons! And they are even more fun as magnets… love the saying you added. =)
muy curioso!!!!
These are adorable! Would you be willing to share what Etsy seller you get your buttons from? Or maybe what to search for? Thanks!
merci c ets genial biz jojo
Cute, I think I might want to do this for teacher gifts
What a good idea…love this.
these are so great. Covered buttons are the best and so easy I feel like more people need to know so they can benefit from their awesomeness!
this adorable button magnets is look easy to make, I definitely pined to my diy board.
I love this! I’ve seen the button cover kits and I bought one, but it had terrible directions and it’s sat in a box ever since… going to have to break it out now! Thank you so much for actually explaining that part of the process! : )
-Mel the Crafty Scientist
So sweet…i love it…;)
These are so cute – love them for end of the year teacher gifts! Just curious, where do you find such adorable fabric?