


If you’re making the Emma dress for an 18-24 mo size, here is the link to download my free pattern! If you’re making another size, read on for pattern making instructions!
*note* Sorry I did mistakenly label the back bodice and front narrow piece wrongly…I’m fixing it right now, but if you already printed it, they are switched. Sorry about that! That’s what I get for making a pattern late at night, I guess.
**it’s fixed! I’m so sorry about any confusion!
Click below for the rest!
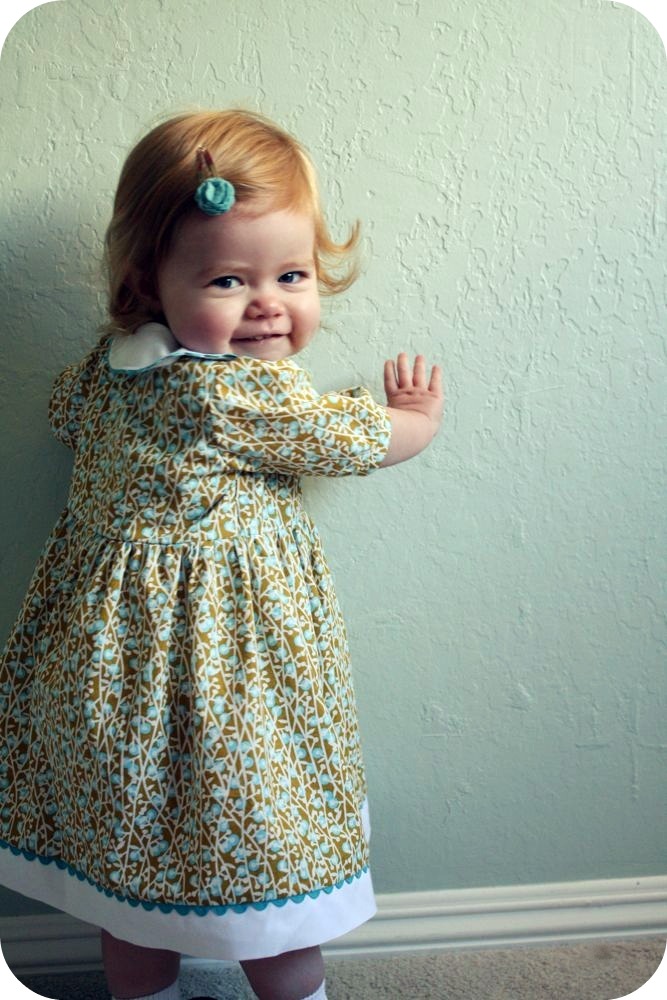
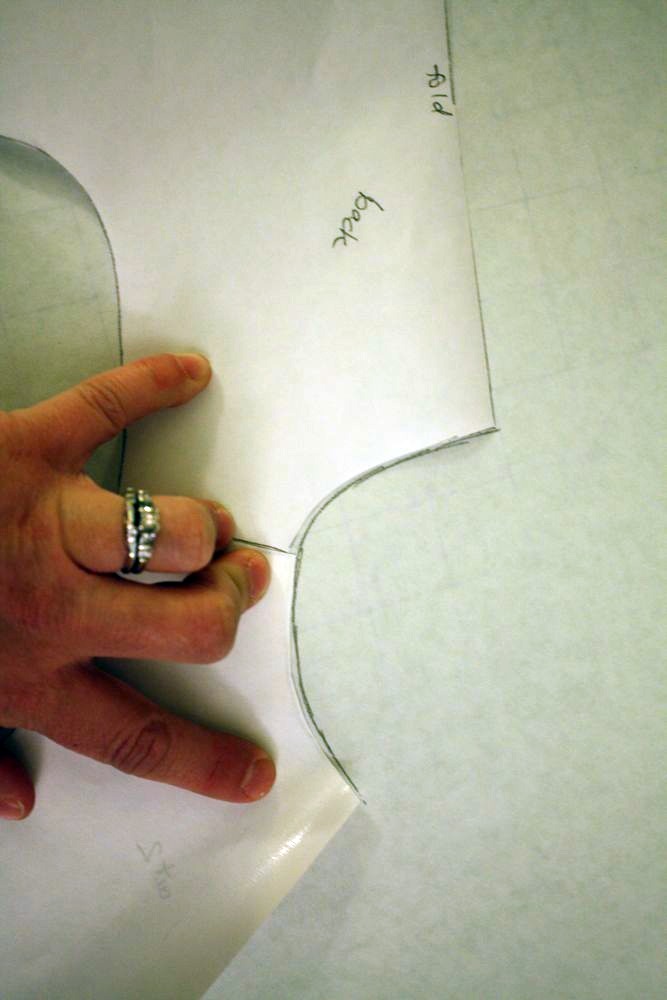
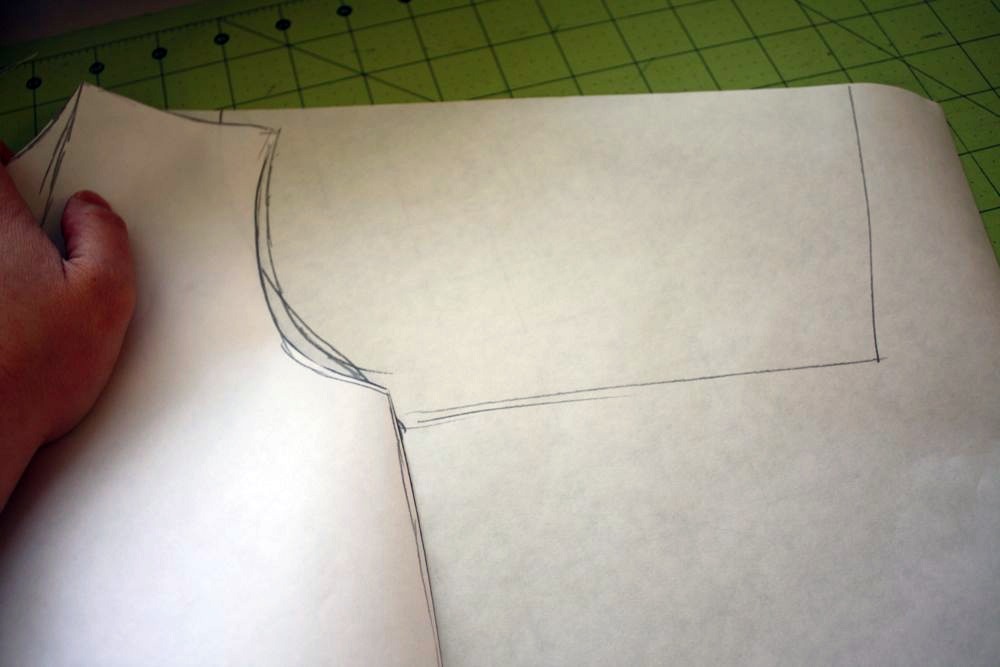
So first off, fold a tee that fits your kiddo in half, and trace around it, adding seam allowances. Cut it off where you’d like the bodice to end on the bottom. That is your back piece. Then I traced it to create a full front bodice. You could also lay the tee shirt out not folded, but this way it’s more even. Draw the front neckline as well.
Then I made a line where I wanted the asymmetrical button flap to be. (if you don’t like the off center front-by all means, make it centered! It’s as simple as moving the line to the middle. Everything else will work)
Then cut out that pattern, and cut 2 of the back piece on the fold, then 2 each of the two front patterns.
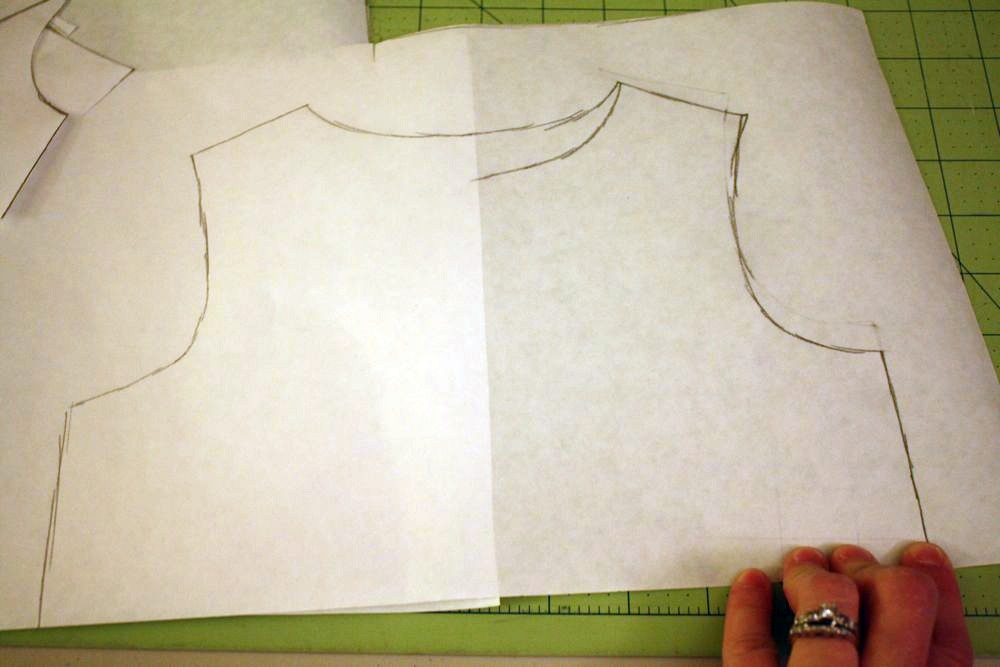
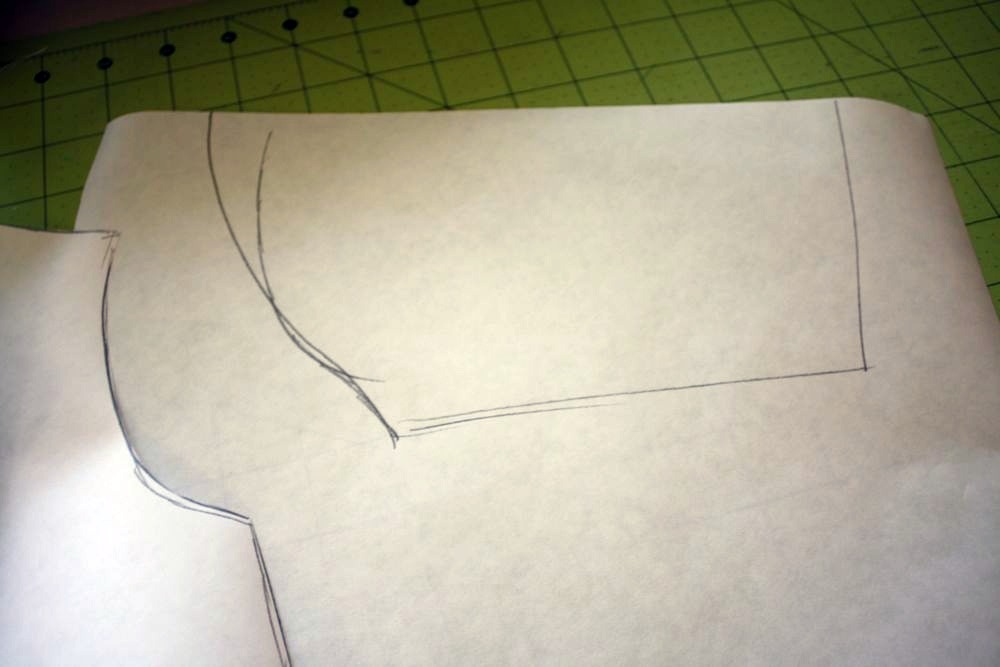
To make the collar pattern, lay out the pattern pieces, joined at the shoulder, and trace around the neckline.
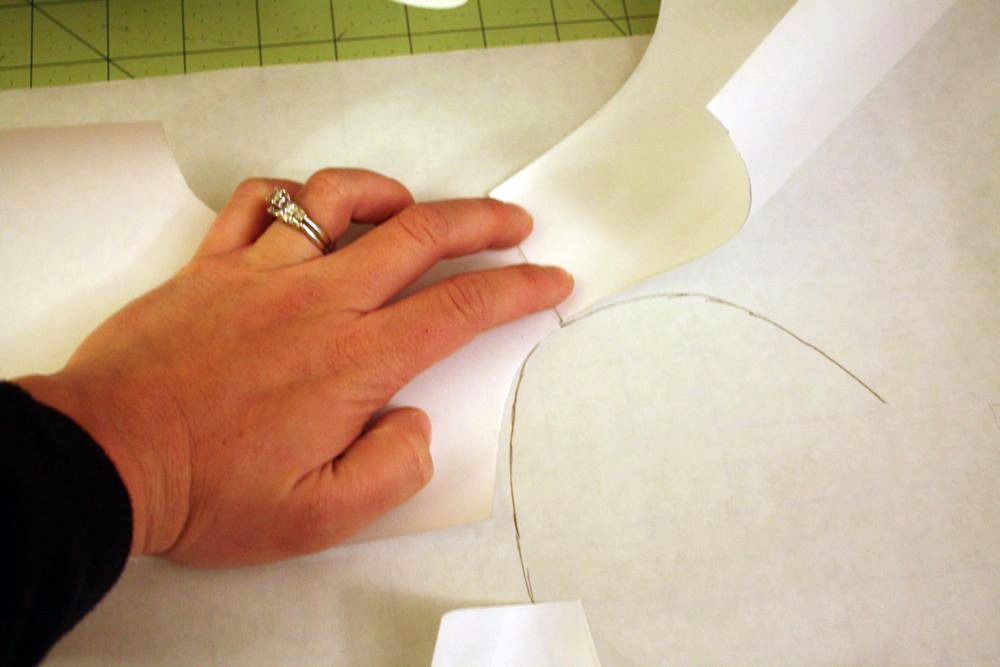
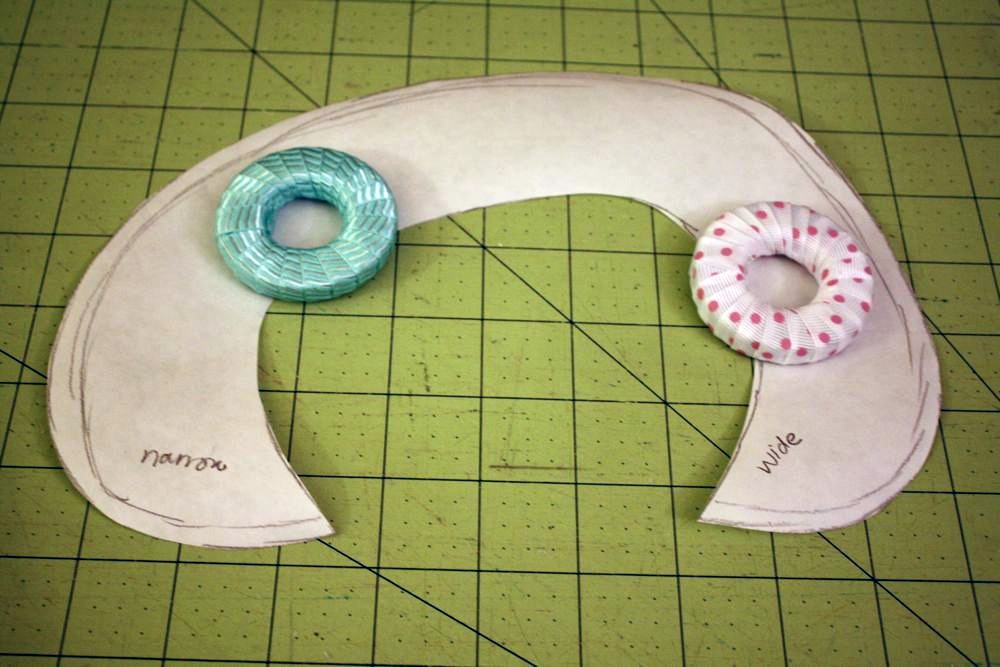
Make sure to note which side is which (narrow vs wide)
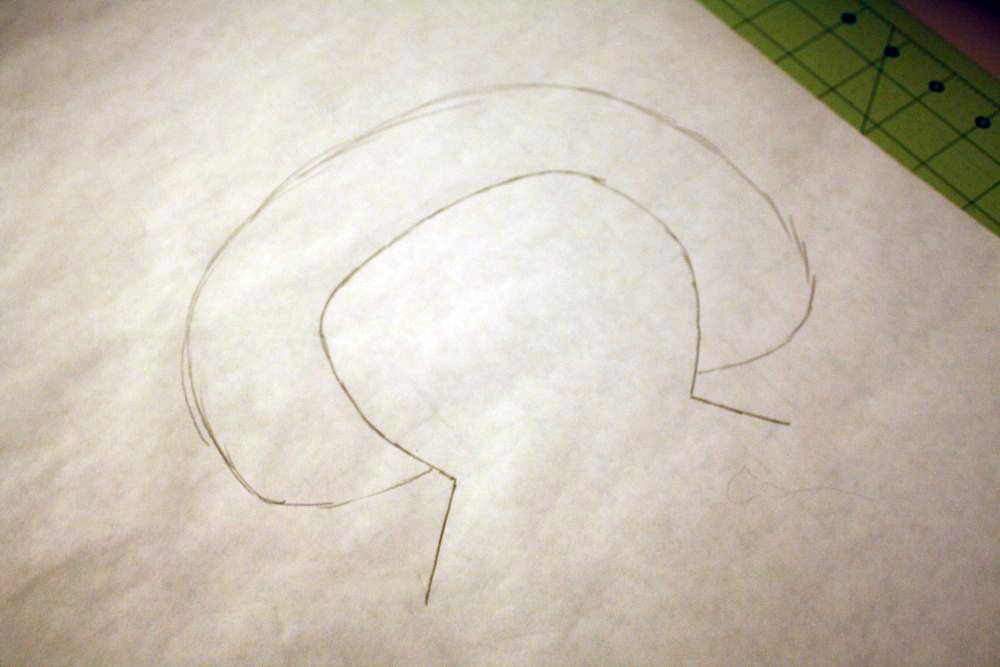
Then sketch out your Peter Pan collar pattern, like so. Doesn’t have to be perfect, but try to make the width as even as possible. I also started the collar about 1/2″ in from the front edge.
Add seam allowance around the outside, then cut out the pattern. (btw I labeled the collar wrong in this pic, lol. it’s backwards)
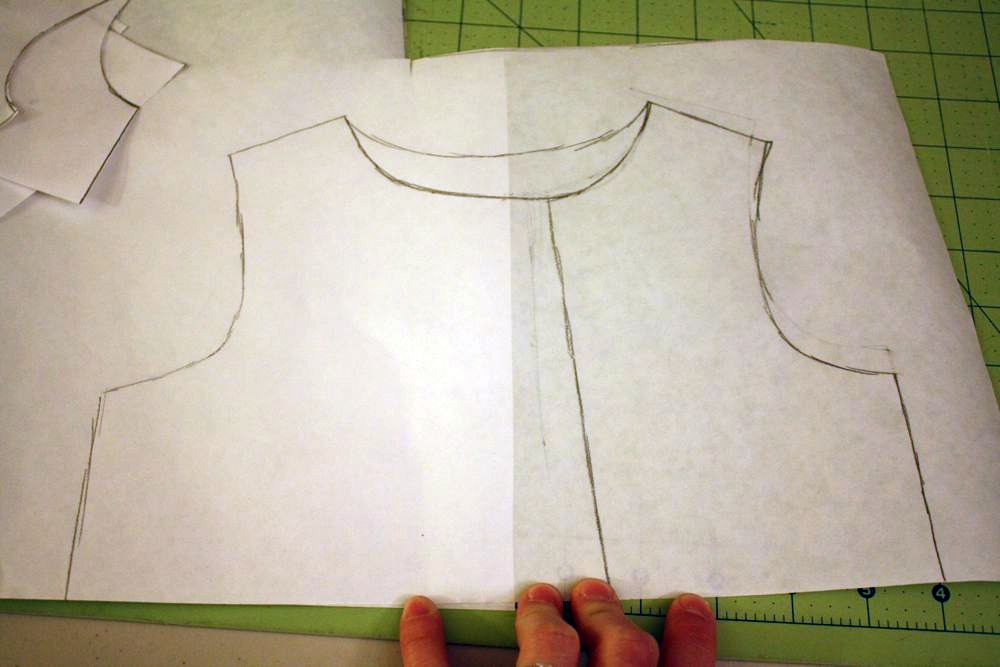
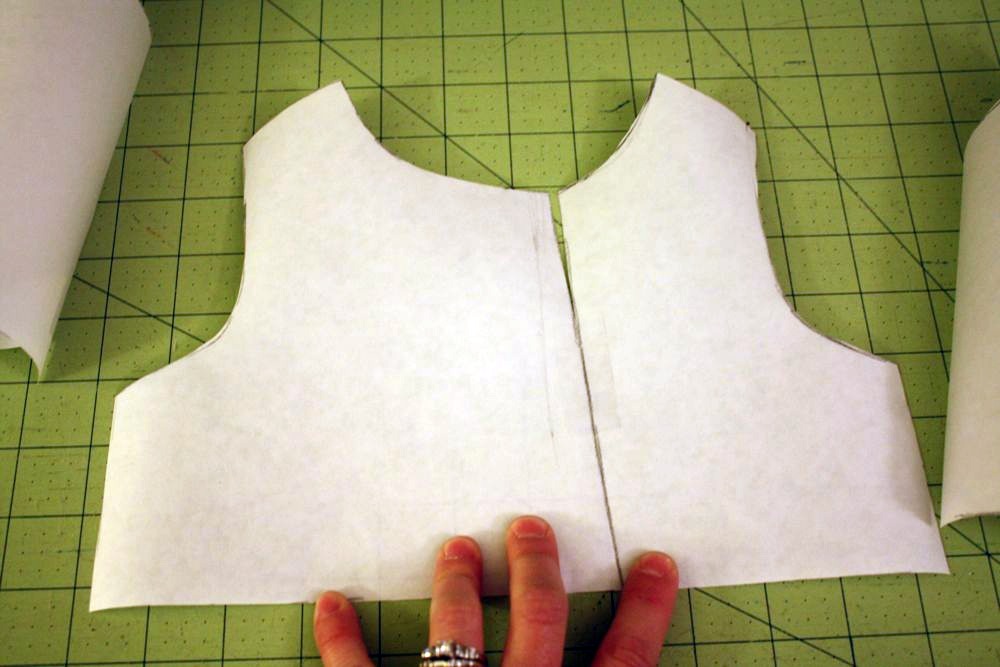
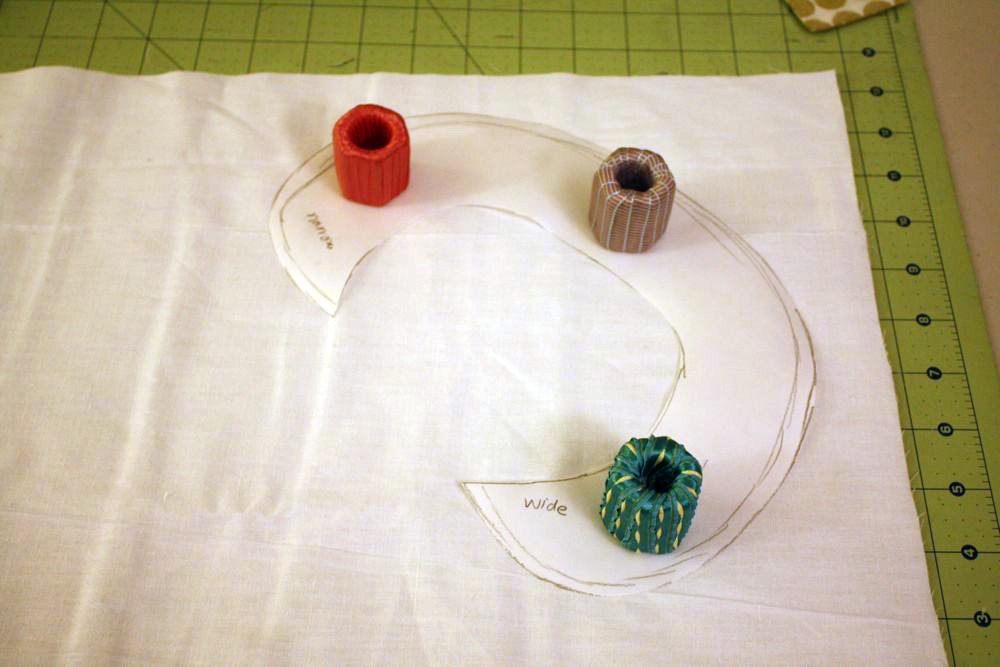
Then I used the armhole on the bodice to trace a sleeve pattern. (the top is the fold of course)
Even out the top a little, this sleeve will have a few pleats. Or gathers, if you prefer.
Next: Cut out your pieces.
Sleeves: 2 on the fold (plus one long strip of fabric 2″ wide to be the bands on the bottom of the sleeve.)
Collar: cut out two collar pieces, on the bias. This means, if your fabric is laid out like mine below, with the selvage to the side, angle your collar pattern so that it’s slanted. This will help your collar lay nicely!
Front bodice-wide and narrow: cut 2 of both pieces, I usually fold my fabric so that there is two layers (right sides together), lay my pattern on top, then pin (or weigh down with fabric weights) and cut it out like that. That way you have pieces that mirror each other, for the lining and outside of the bodice.
Back bodice: cut 2 on fold.
For the skirt, I simply cut a length selvage to selvage-my length for an 18 mo size is 10.5″. Keep in mind I added a band around the bottom, which added 1.5″. You can use a dress in their closet to find a good length, or measure to see what length you want!
Tomorrow we’ll start the collar and bodice! Let me know if you have any questions!
What a lovely dress! Nice to have a sewalong I´ve never tried before.
Anyway ow to make the pattern bigger for may 5 y old granddaughter? (from Sweden)
This is so sweet! Love the trim! My cutting table is covered with projects, but I still want to try this! I have one in 18-24M too….ahhh!!! 🙂
Hehe I’m doing a Peter pan collar for my project run and play outfit this week. Not asymetrical though 🙂
I do love this dress and hope to make one later this week!
Um… I think your pattern pieces are labeled wrong. I couldn’t figure out why the bodice pieces weren’t even in the front, then noticed the neckline on the back piece dipped more. I tried putting the back as the narrow front and that looks better. So… is your back really your front?
Oh, also, does it need to be self lined or can I use some other fabric for lining?
Do you have directions on how to cut the band on the bottom of the dress? Do I have to get enough fabric to cut that on the bias?
Thanks!
Yeah so I was just coming back to find out why the pattern pieces weren’t lined up. Now I know why. I was trying so hard to use fabric that I already had but now I can’t re cut it. Thanks for fixing it.
So sorry everyone about the pattern oops.
@Kristina-you can use another fabric for lining if you want, no big deal!
@Lilia-I will have instructions tomorrow for that, no need to cut it on the bias.
This is so much fun! I have never done a sew-along before but I hope to do more in the future. It’s so much fun to know that others are working on the same project. I just hope that my first self-made pattern works out…fingers crossed : )
Hi Jess,
because american lengths are quite different than the european ones, could you tell me approximately how much would mesure the skirt from selvage to selvage.
This is a nice little dress, I’m making one for my niece’s b-day !!!!
Thanks for sharing,
Hey Jess,
me again ! I I was geting ready to cut the bodice but it seems that the front bodice narrow side has the shoulder lower than the wide side…Is this correct or should I correct myself before cutting ?
I have a question about your printable pattern, on your front narrow piece it says fold on the one side. I am assuming it is not supposed to be cut on the fold?
Hi –
I’ve just printed out your pattern and am noticing the same thing about the front shoulder heights…they don’t seem to match, even accounting for the addition of the button placket…the split for the placket is definitely off center, but doesn’t seem to be slanted…the pattern line goes perpendicular to the bottom bodice. Should that be slanted somewhat to result in the raising of the narrow side shoulder to match? If I line up the armholes, that’s how my pattern pieces appear to line up, but not sure if that’s how you intended. Love the dress and have some adorable fabric to use, but don’t want to start cutting until I’m sure it’s right.
Thanks!
-Amy
Where is the bodice post? I’m not seeing it? Also I’m confused on cutting the front piece.
I may have missed it, was your fabric 36″ wide?
Thanks
I think it was normal quilting cotton width-44″