


First I cut out a pocket pattern-I adapted this pattern.
Then I used some more bias tape for the tops.

First I folded it over, right sides together, and sewed down, and then backstitched up. (same technique as the binding for the collar)
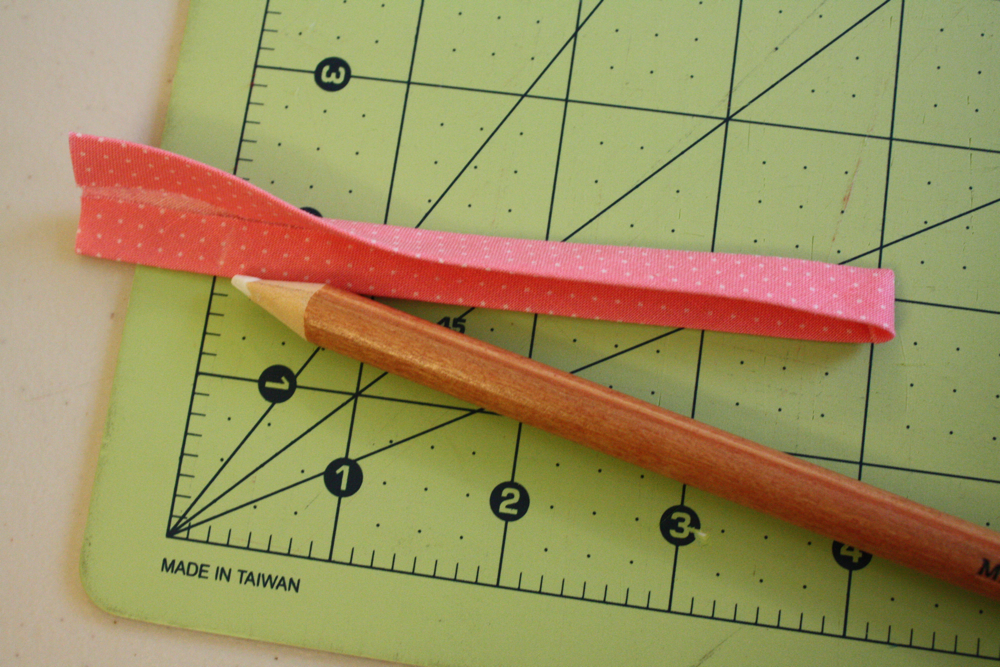
Then I measured 4 inches, marked that, and sewed that end the same way, on the mark.

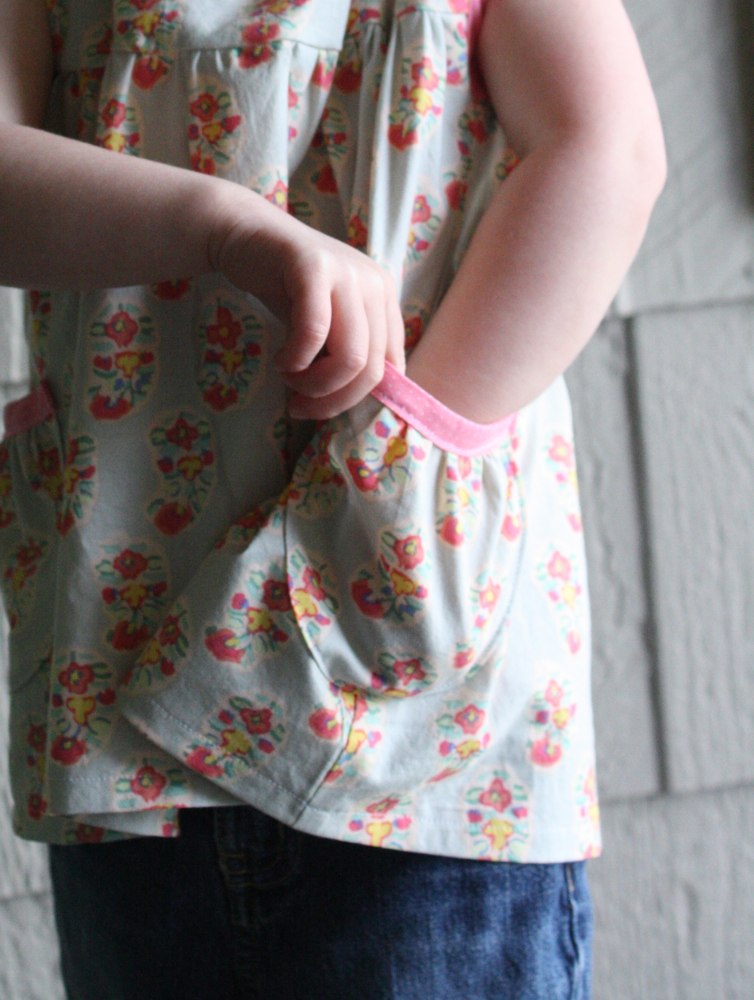
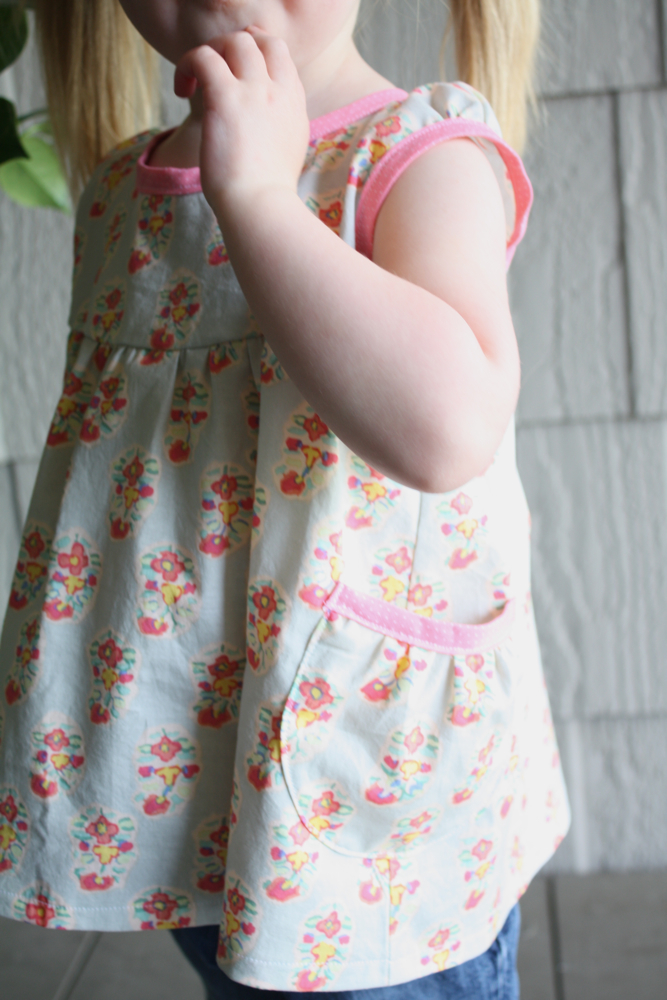
I serged around the curved part of the pockets, then pressed the edges in like this.

Then I gathered the tops of the pockets, and fit them in the bias tape. Pinned, and sewed the bias tape on.

Then I placed my pockets, using a ruler to make sure they were even.
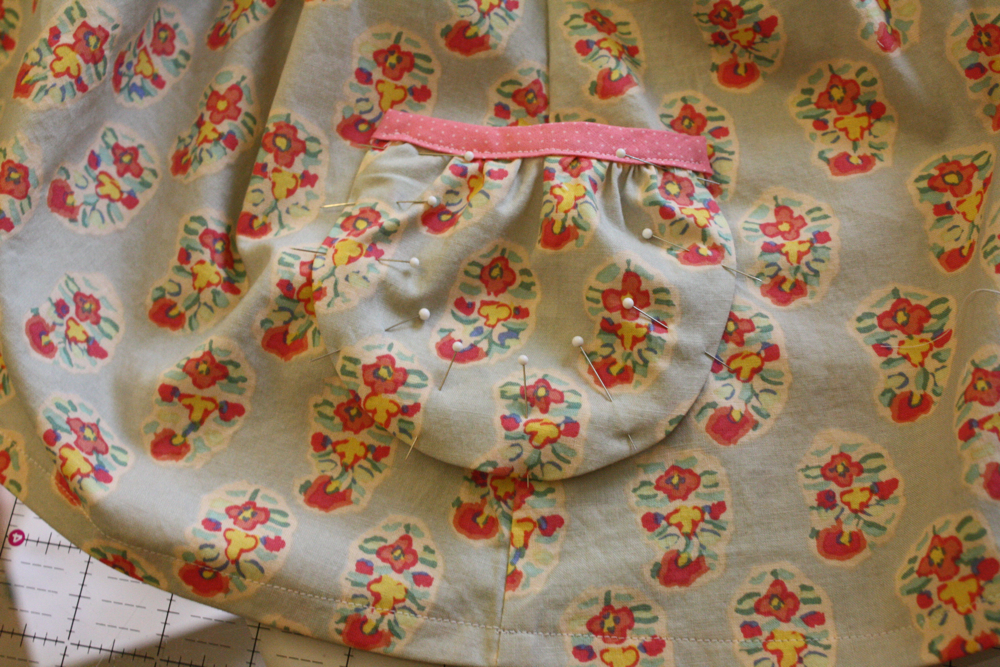
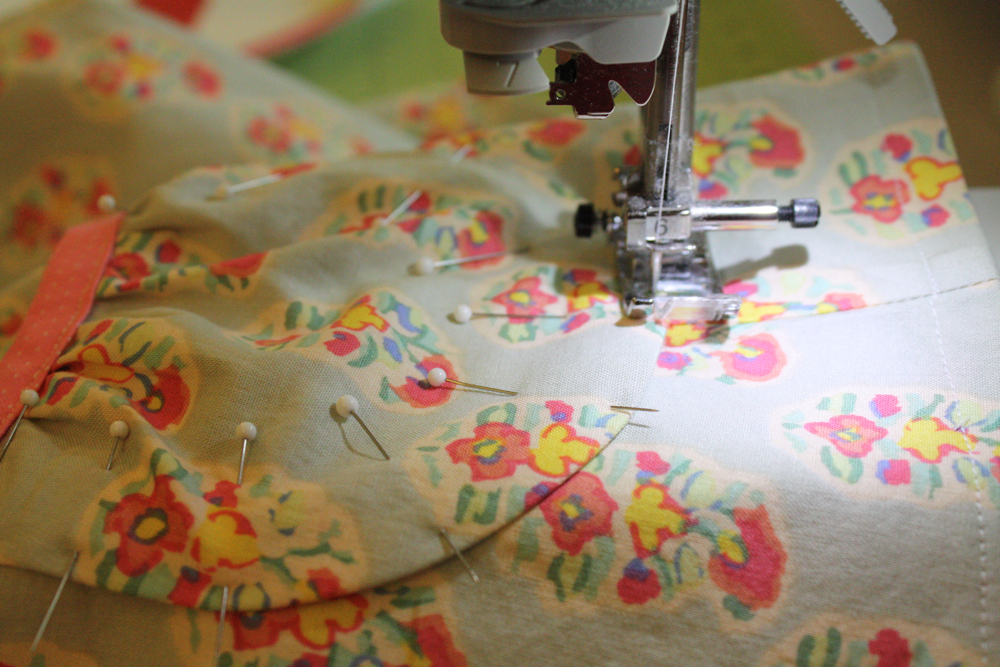
Pinned…
and sewed them on around the edge! I back stitched on the tops where the pockets will get the most wear and tear.
Lastly, hem the bottom…..

Sew on your button….

…and you’re done!
Try it on your cutie, and revel or bask in the glory of it all. 😉
Don’t forget to put up some pics in the flickr group for everyone to enjoy! Thanks for sewing along. 😀
Thanks for the sew along. I think I’m going to attempt one this weekend! I love the tutorial for the cap sleeves…so simple yet it helps so much to see everything step by step!
I followed your tutorial to make a top for my daughter today. Great instructions! Thanks for sharing!
http://crafts4lily.blogspot.com/
I love this little top!!! Those cap sleeves are precious! I linked to your tutorial on Craft Gossip Sewing:
http://sewing.craftgossip.com/tutorial-little-girls-leah-tunic-with-puff-cap-sleeves/2011/04/08/
–Anne
Wow! What a cute top! I hope to make one of these this weekend for my daughter. Thanks for the tutorial!
This is such a sweet shirt, Jess. I can’t wait to see everyone’s shirts so I can get some ideas for when I make one.
You did such a great job with your instructions. Very easy to follow. This is my first sew-along and I am so excited with how it turned out. Thank you!
http://greylustergirl.blogspot.com/2011/04/leah-top-pillowcase-dress.html
awesome! I made one! although I made my pattern to big and so I will now have to make another in the correct size. oh well – another shirt for the grow into pile!
http://thecraftingfiend.blogspot.com/2011/04/flower-or-no-flower.html
i did it!!! it’s super cute – come by and check it out
http://polliwogsinbloom.blogspot.com/2011/04/leah-tunic-finished.html
thanks jess great tute!!
Starting over with new fabric… maybe I will try and selvage the stuff I cut wrong later. BUT, I have to wait until my dryer is fixed so I can prewash and shrink the new stuff. I swear I am GOING to make this! UGH!
Thank you Jess for this great sew-along. I did ones and will make more Leah tunics. We love it much!
Thanks for this great tutorial!
Here you can see my result:
http://hanna-herz.blogspot.com/2011/04/leah-top-vollendet.html
sunny greetings from Spain,
Sylvia
YAY! I finally got it done!
http://pacountrycrafts.blogspot.com/2011/04/leah-tunic-sew-along.html
Thanks so much for the tutorial!
Love the pockets!!! I’ve pinned for future reference.
YOU ARE AN ANGEL !!!! So kind of you to show us step by step what to do. Looove your work.
Have a nice week-end.
Christine