


I’m sure you’ve seen these around, right? An easy, cheap way to make some cute fall decor. gotta love that! PLus, Sadie helped me with these. Well, she handed me strips of paper until she got bored and wanted to use the hole punch by herself.
“SADIE DO IT!”.
We here that a lot around here these days. That, and “me? mine?” Mostly when we go to the store. She thinks anything with Belle or Cinderella on it was made for her, and her only. Anyways, getting off the subject!
You’ll need:
2 sheets of matching scrapbook paper
ribbon
hole punch
paper cutter
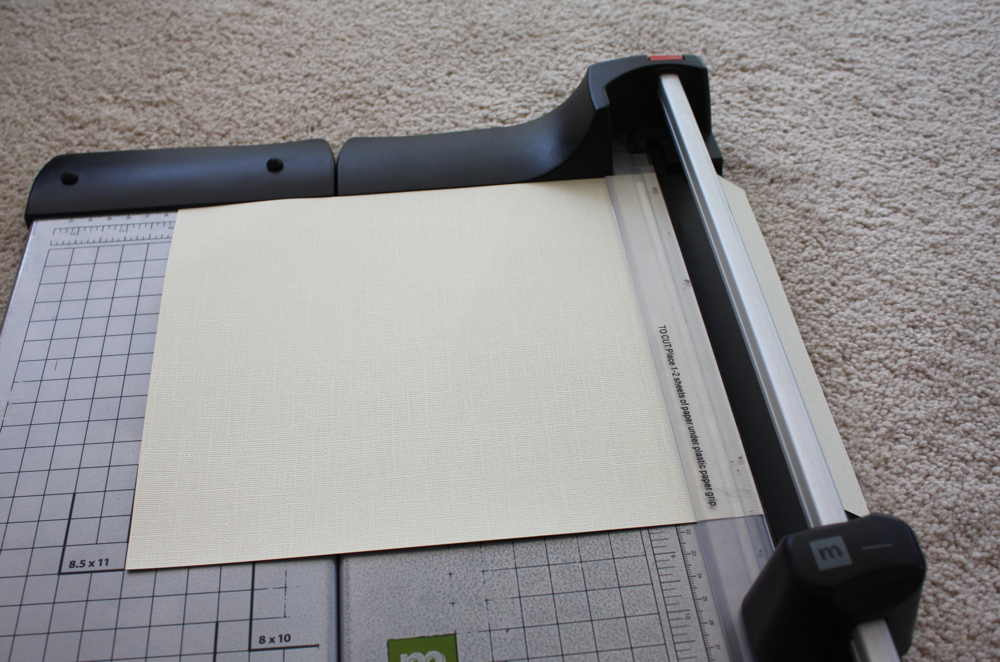
Cut 1″ strips of paper from your sheets. I cut mine different lengths too, so they’d be different sizes. The white strips are 8″ long, the brown are 10″, and the orange is 12″.
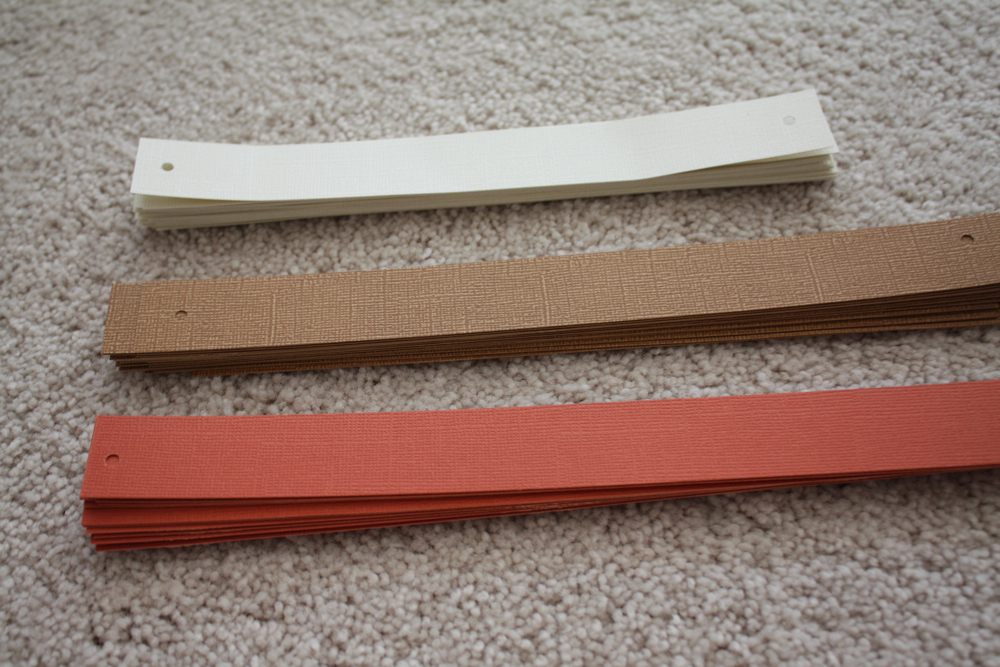
Punch a hole in the ends of each strip. Smaller hole punches work better if you have one, if you just have a normal sized one, I’d use wider ribbon.
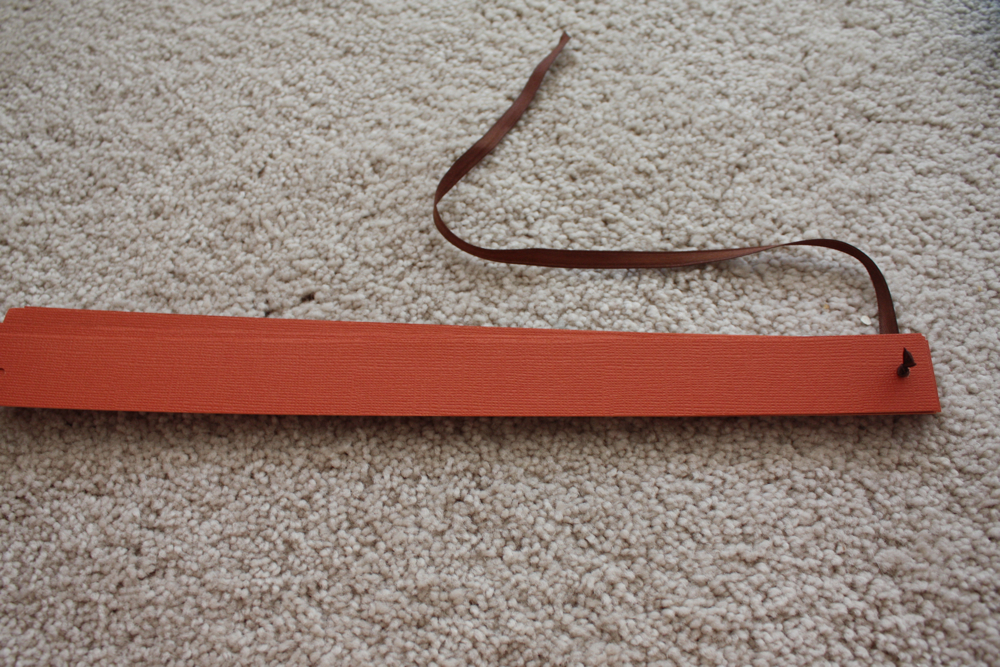
Tie a knot in one end of your ribbon (cut it about 10-12 inches, you’ll cut some off in the end though), and string it through all the holes on one end of your strips. It helps to cut the end at an angle and then use a lighter to seal the edge. That way you have a nice little pointy part to poke people with use.
If there is texture on your paper like there was mine, make sure it’s facing out.
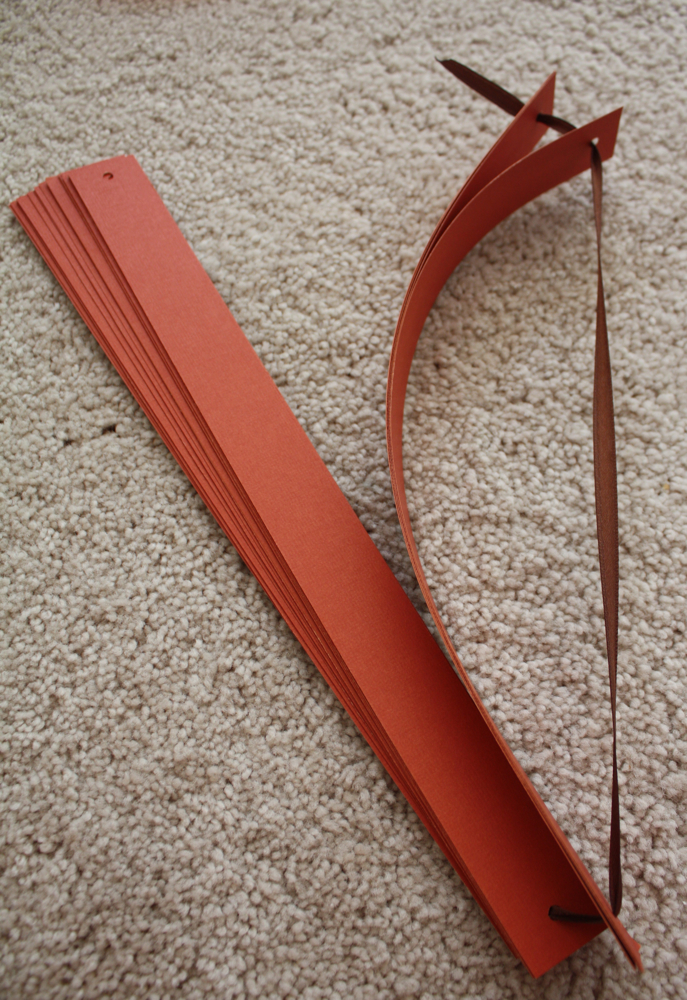
Then, put the ribbon through the other set of holes, like so.

Then, tie a knot. Ignore the green bow please. I ditched that. Then, fan out your little strips until they make a “pumpkin”, adjust your knot placement if needed, and tie on a ribbon bow/stem. I like the brown and orange one best, little squat pumpkins are too cute!

Arrange and enjoy your cute decor that you made, all for a couple bucks!
Place on top of hubby’s desk in hopes of a “hey, cute pumpkins!”
Nope, nuttin’. That’s ok. That’s why I have you guys!
And P.S. I had so much fun seeing the shirts you guys made for the sew along! I think I’ll do a post showcasing them on Friday-that’ll give some extra time for those still working on them or want to make one before then! I think I’ll have to do some more sew alongs soon 😀
I love these! And so much easier than the fabric one I slaved over last weekend that was kind of eh, but had the short and squat look to save it.
xo,
Bethany
Too cute!! Kadie would love to make these, I’ll have to give it a try.
And YES, you MUST wait for me to get my shirt done!!! Just kidding…you don’t have to wait for me. ;D
Super cute and easy!! Totally going to do this tonight!
Oh this is such a good idea! And to take it a step farther, you can place a flameless candle in the middle! I think I’m going to make these! Thanks Jess!
And I just pictured making smaller versions in green/red and using colored tealights in those for a festive Christmas theme….like paper ornaments =)
very cute pumpkins, they seem really fast and easy, love it!
I am glad we can appreciate them better than your husband!
I also like the idea from stayathomebecky, it could make nice ornament…
so cute jess, love how cute they are together. 🙂
i like em sooo cewute!
these look great! We don’t do halloween but I could see them being slightly smaller and in xmas colours.
Doesn’t have to be Halloween at all: there’s this whole season called autumn and pumpkins are perfect for the whole thing. 😉
That is absolutely adorable!
These are beautiful. I love the colors and the ribbon. Your husband sounds a lot like mine!
Love them! Made some today! So fun!
That is such an incredible idea! So easy, looks great, and it won’t rot! Thank you!
http://www.uvinyl.com
These are great, Jess! I’m definitely going to be making some. Thanks for linking up!
so so cute, I must give this a try. Thanks for the great tutorial 🙂
http://inmy-craftroom.blogspot.com/
I just saw your idea featured on two other blogs so I followed their links to you to say that you have some serious creativity in you girl. These are a great idea.
this is probably a stupid question but how many strips of paper did you use for each pumpkin??? thanks
I must say in wondering through Pintrest I came upon your blog looking for craft ideas, great place to share and have others find blogs. But the most important message for you is that I l-o-v-e your blog, I like you have it laid out to find the tutorials, and the ease of which you have written them. I have signed up to receive your updates. Thank you, keep crafting you do a fabulous job!!
Karren
These are adorable, easy on the wallet and look amazingly easy to make! So much so that I think I’ll make some tomorrow night. Do you mind if I blog about them and link up to this post?
New follower after finding you through Pinterest! <3 the site and can't wait to check out your other projects!
I love this idea. Making a Halloween decor mash up on my blog. Would love to feature these with a linkback of course! Getting all my Halloween ideas and inspiration ready!
domesticult.blogspot.com
hey ! they are really sweet ! so i have made some too. But the next day the center of each pumpkin had “flattened” down quite a lot… Did you have this problem too ? Maybe the paper strips were too long ??
I’m sure I could figure all of this out through trial and error, but I was hoping you could provide some of the answers.
How many strips of paper did you use for each pumpkin? I see that you say you need (2) pcs of paper, so I didn’t know if that meant 24 stips per pumpkin (I’m assuming 12×12 paper)?
What width is the ribbon used in the middle and what width is the ribbon used on the top?
What size is the smaller hole punch you suggested?
I’m not sure if you are still responding to comments on this post as I see it is from a couple of years ago and I don’t see answer to questons asked, but I’ll check back here for an answer or you can e-mail me at [email protected]
Hey! I did this for Halloween. It was really easy.
I suggest putting a rock in the middle if putting it outdoors…it was blown all over the place!
These are just what I was looking for to do craft time with my grand kids. Thank you so much.