


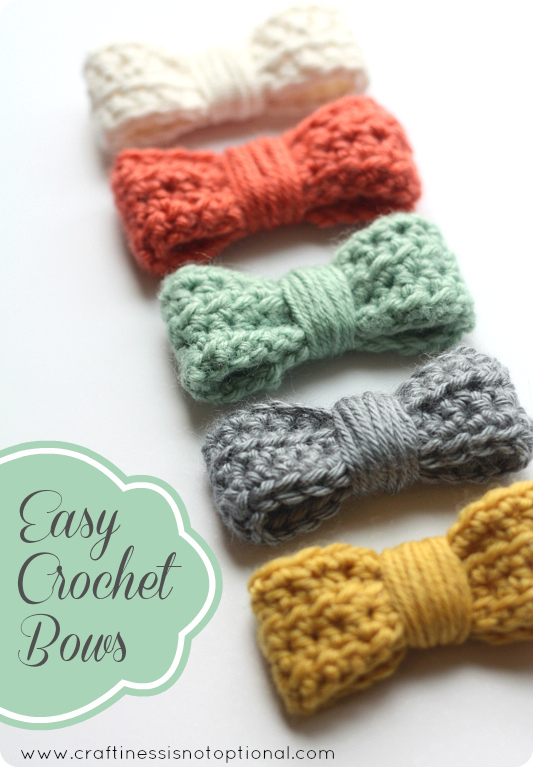
First things first…I am no crocheting expert. Far from it! I’m definitely a beginner, so if I can make these little bows, so can you. Basically, get ready for a meellion pictures about how to make these. Cause, dang, aren’t they cute? Glue a clip on them and attach it to the nearest kiddo and tada! Instant adorableness and cute-osity. They would make rad bow ties, too, for those of you who have boys.

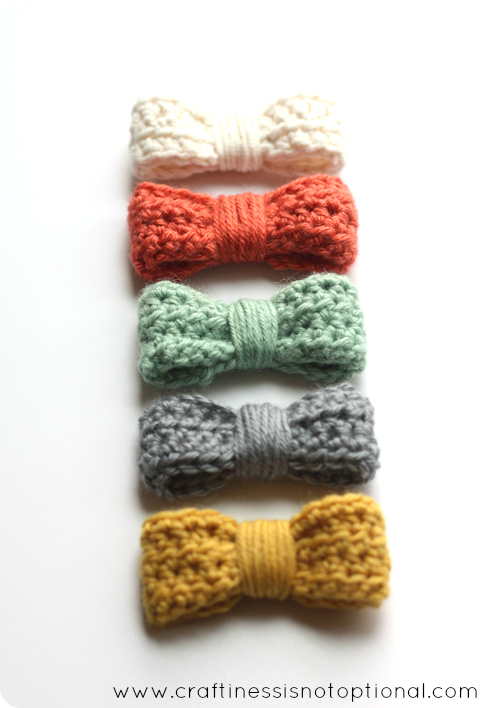
Anywho, you can tell I had fun taking pictures of my line up of bows…this is only a fraction of the pile I’ve made so far! Once you get going, they don’t take much time to make and not much yarn either, so they’re a great inexpensive homemade gift.
Alright, here goes! For those experienced at crochet patterns, see the pattern below (hope I did it right), and try not to laugh at me. For those of you who need the pictures (that would’ve been me!)….keep reading for in depth pictures and some basic techniques!
See below for the full tutorial!
Bow:
Chain 25, half double crochet in third chain from hook, and in each chain across.
For rows 2-4 Chain 2, half double crochet in closest stitch and in each all the way across, turn.
When you get to the last stitch, single crochet, then cut yarn, pull it through and tight, and weave in both ends. Fold over both short ends to the middle, glue together and squeeze in the center to form a bow, then wrap yarn around center and glue the end down.

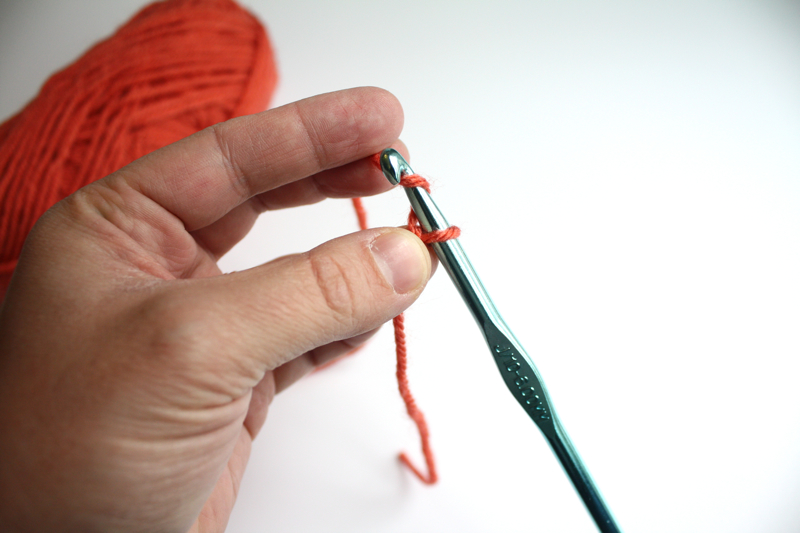
Start with some yarn…duh. and a crochet hook. Mine is a J/10-6.00mm, whatever that means. (told you…beginner!) My yarn is an acrylic-cotton blend (I had to have the color!), but all-cotton yarns are really nice to crochet with.

This is how you do a slipknot-which starts every crochet project. Left to right: Loop the yarn around in a circle like so. Then take the end of the yarn and pull it through the loop. Put your hook in the loop and pull it so it’s snug.
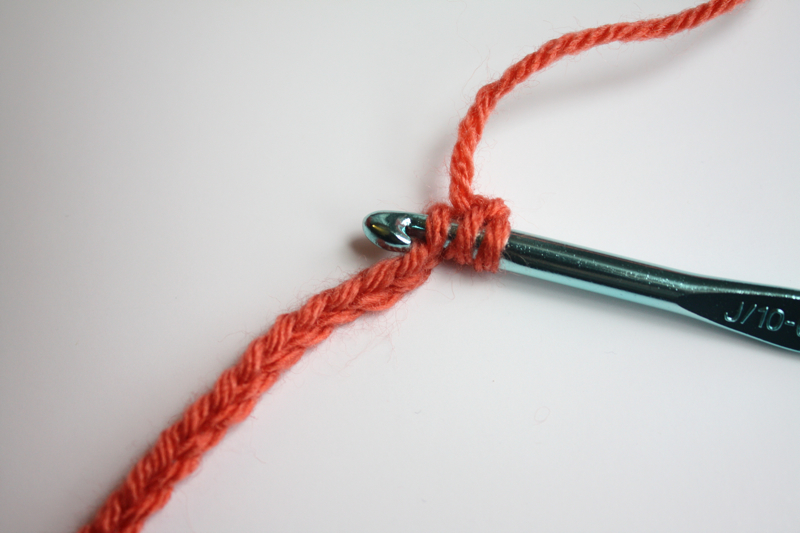
Now start your chain! You do this by grabbing some yarn around the hook (also called “yarn over” or YO) and pulling it through the loop you just made.
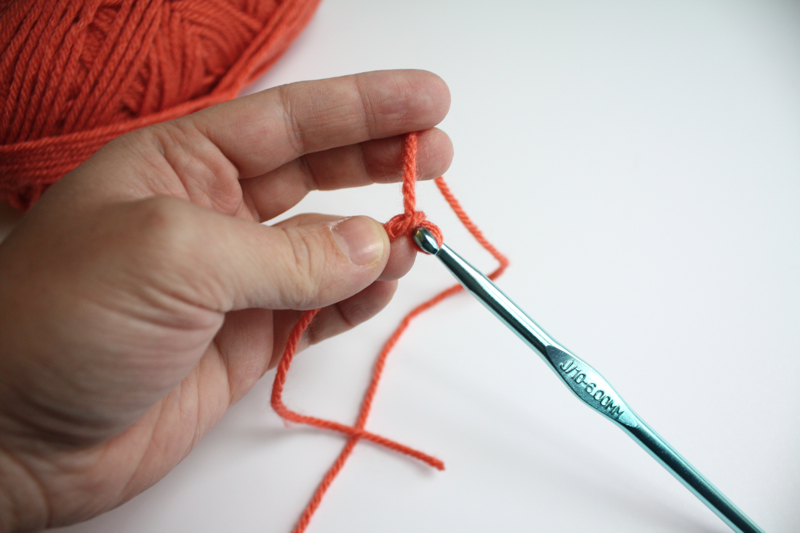
Like so! (also called a chain)
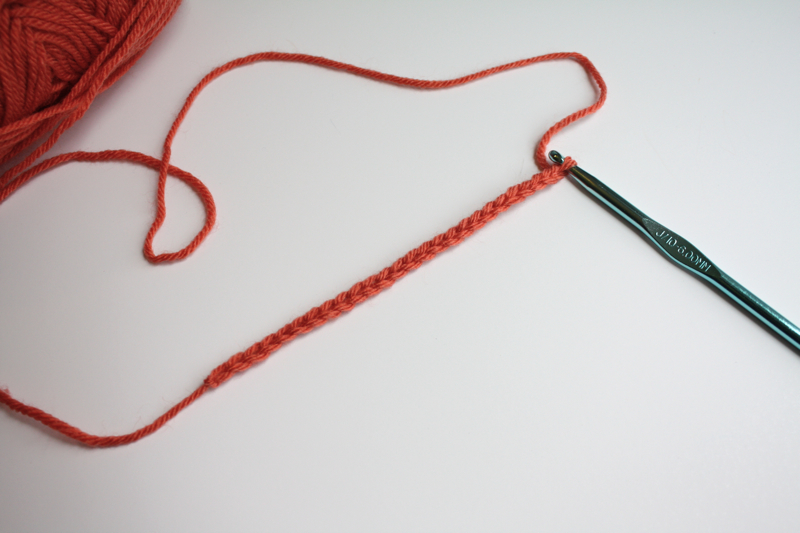
Continue making a chain-I did 25 for this size bow…you could easily make the bow larger or smaller by lengthening or shortening the chain.
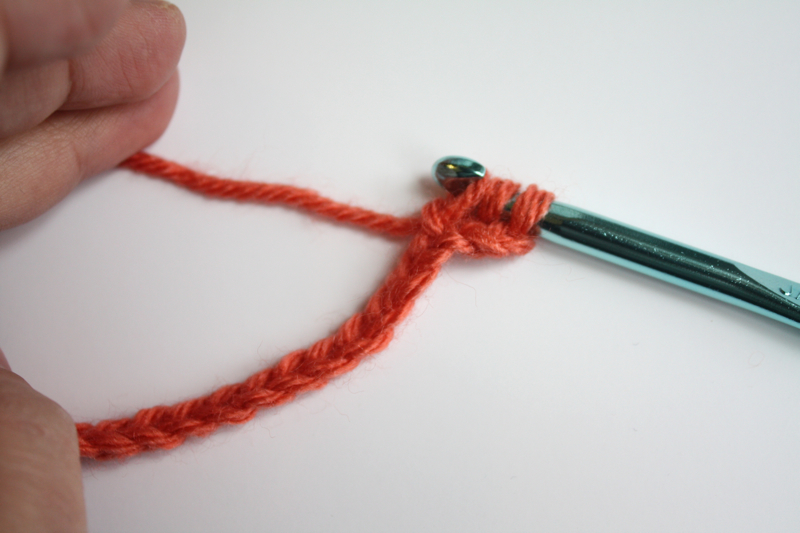
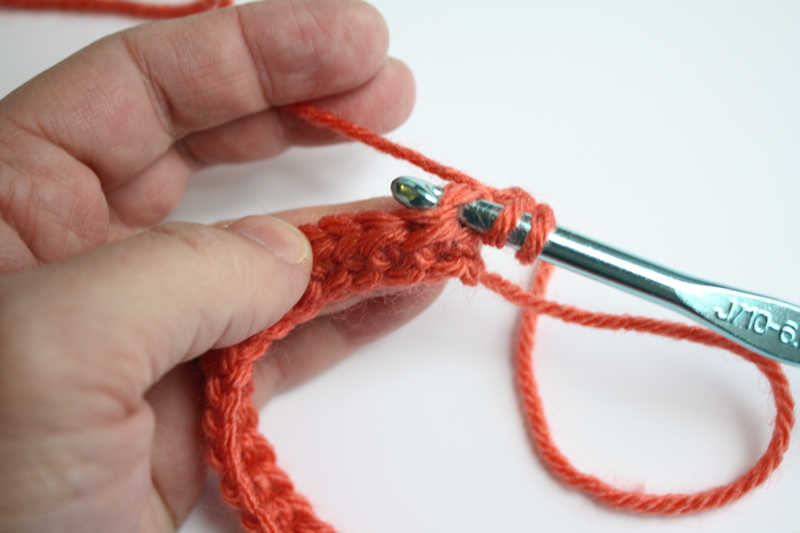
At the end of the chain, yarn over (YO) and then do a half double crochet in the third loop from the end. Have no idea what a half double crochet is? (HDC) I didn’t either. I’ll do my best to show ya!
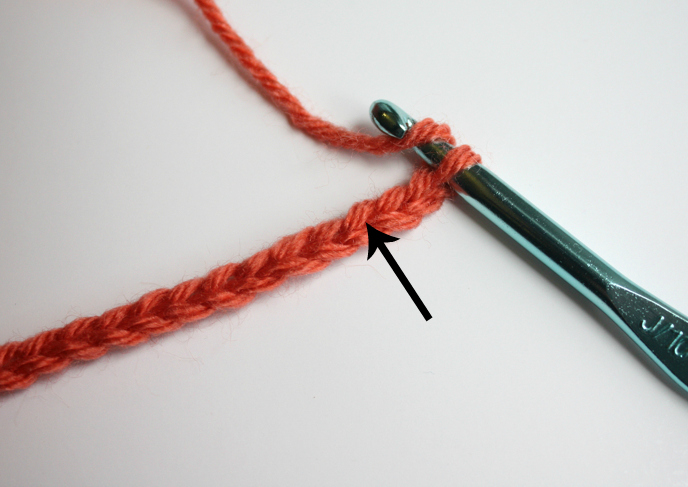

It will look like this! (pic above)

YO again and pull through all three loops! You did a HDC! (ok, so bear with me….I was really excited when I figured it out the first time.)
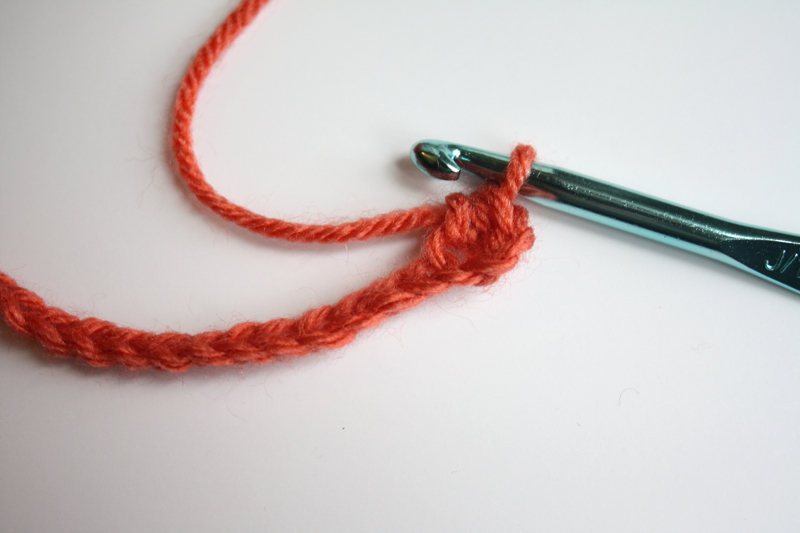
I pull the yarn snug after each stitch.
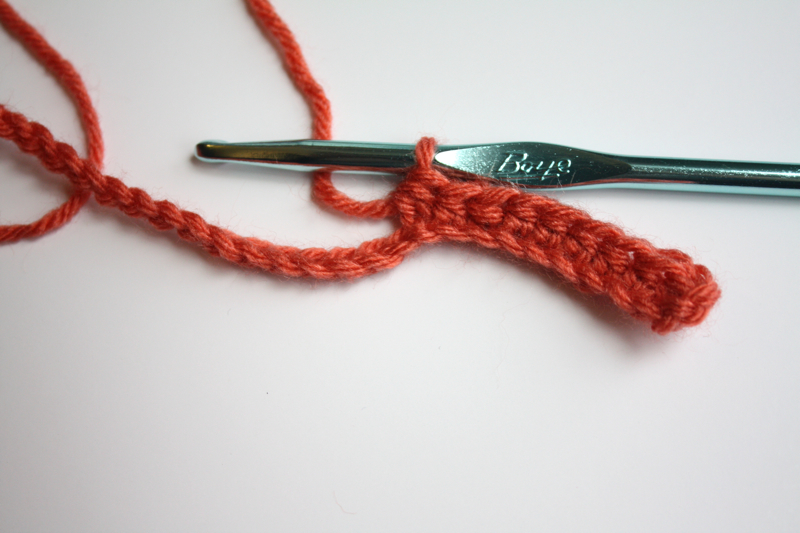
Then keep doing HDCs going down the chain you made!
After you do the last HDC, chain 2.
Then flip your row to the other side, and continue doing HDCs down the first row you did. Go into the first loop though, no skipping loops at the beginning of the row this time!
Make sure you catch both loops of yarn in the stitch!
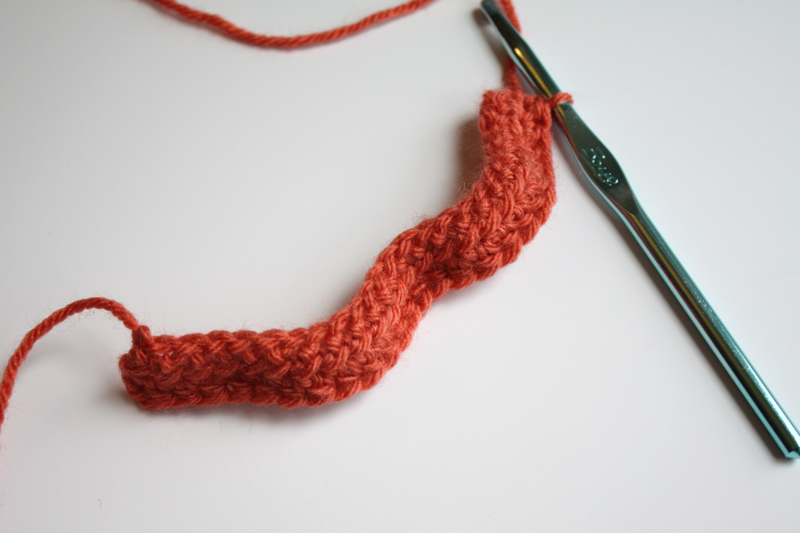
If your yarn gets wobbly and looks like bacon…go make a BLT. just kiddin’. Just gently pull the ends and it’ll straighten out.
THEN go make a BLT.
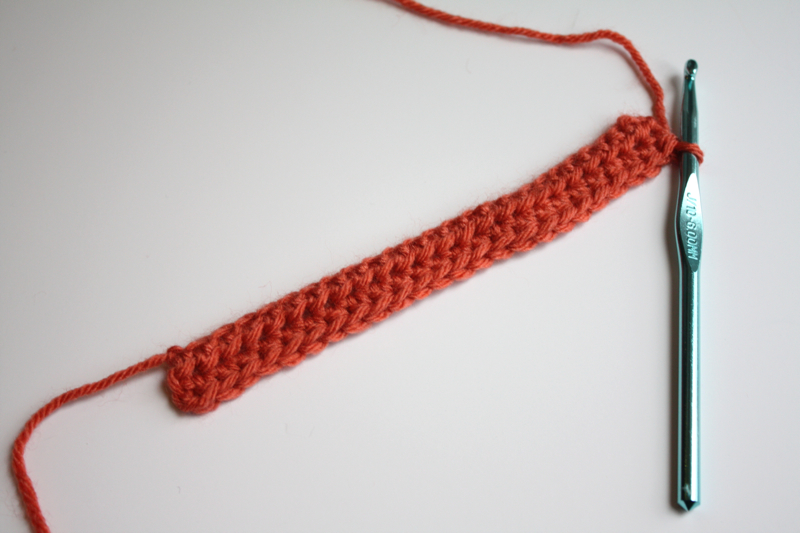
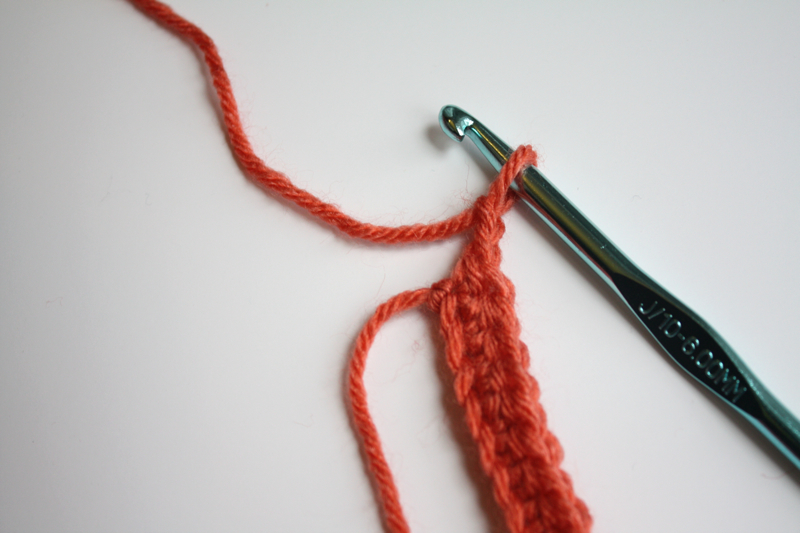
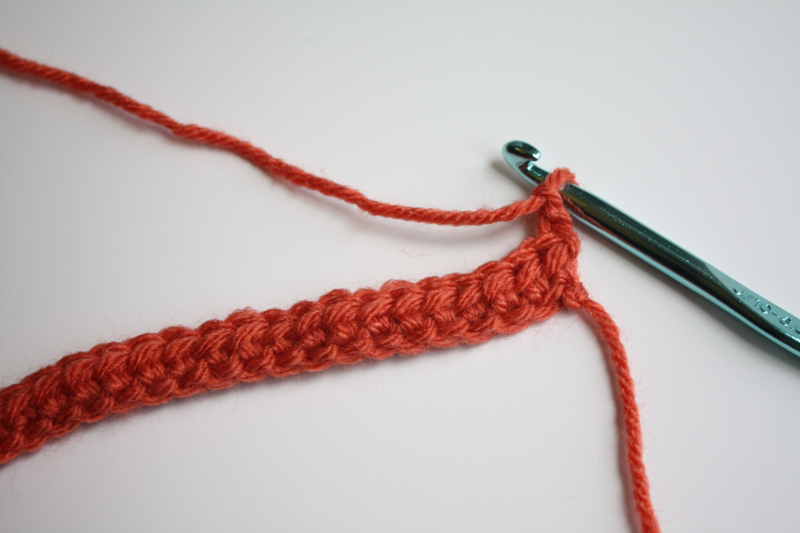
When you get to the end of the second row, chain 2 and do HDCs back down the other way. Like I said, you can make it larger or smaller depending on how many you chain in the beginning, and how many rows you do.
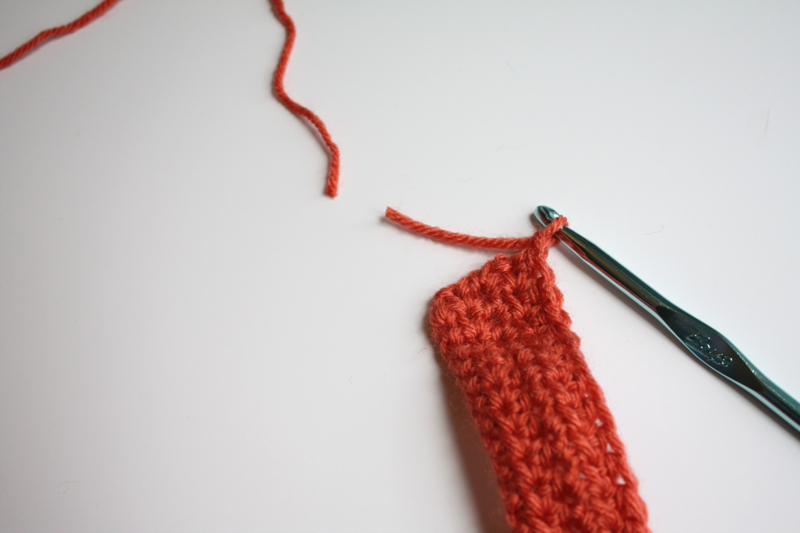
At the end of your last row, chain one, then cut the yarn.
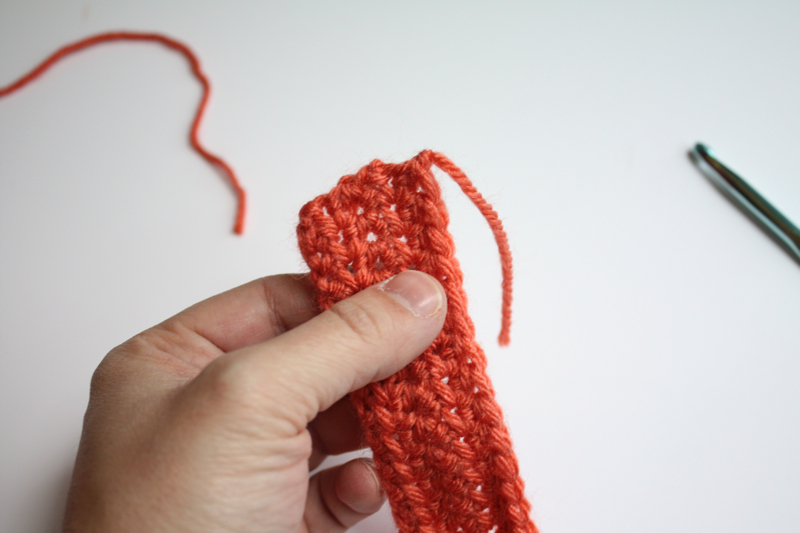
Pull the end through the loop and pull tightly to make a knot.

Weave in the ends and clip off any extra, or tie the ends together and then clip.
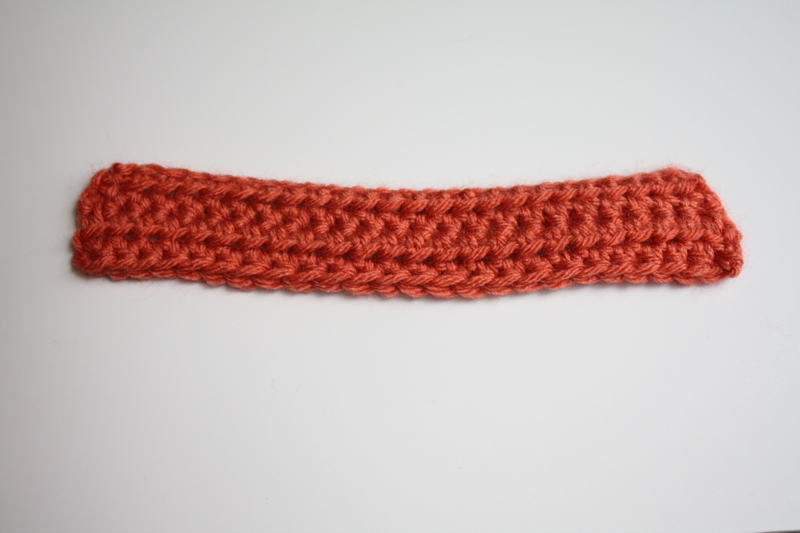
Tada! You have crocheted a piece of bacon.

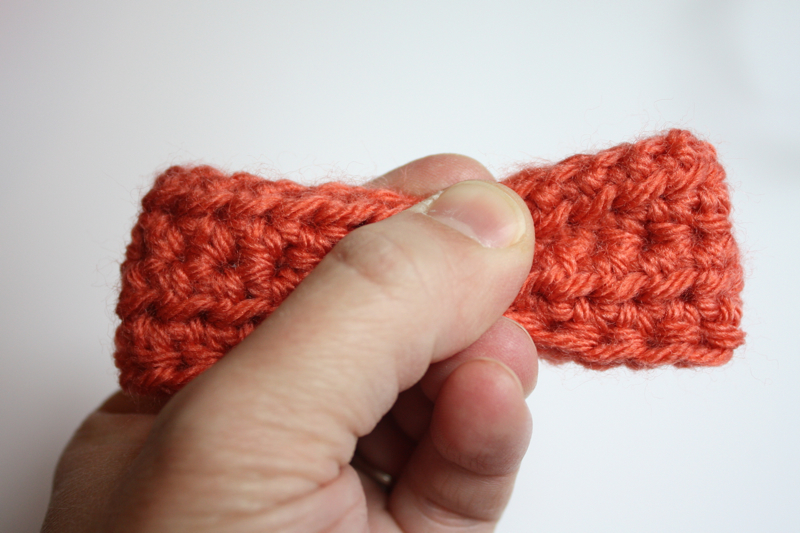
Find the center of your bacon bow piece, then fold in both sides to the center.

Hot glue the ends to the back of the bow, let cool a little bit, but while the glue is still warm and pliable, squeeze the middle to make it look bow-ish. (pic below)
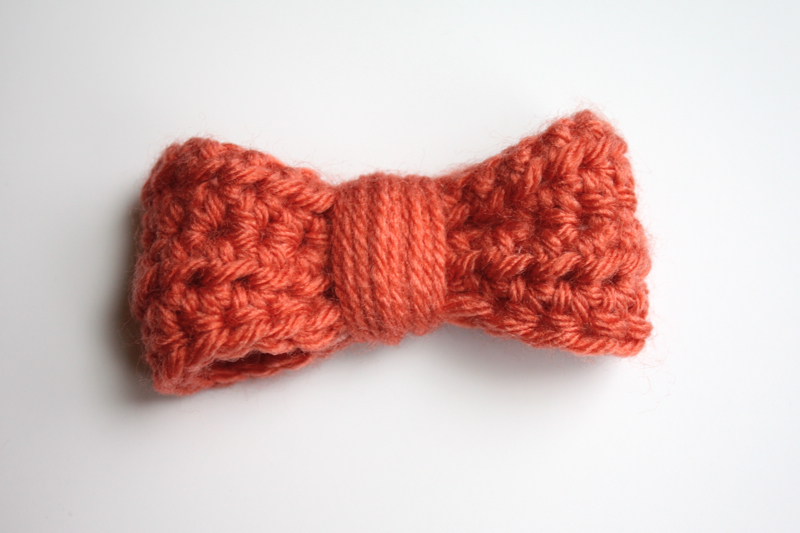
Dab a little glue on the back, stick the end of the yarn in the glue, then wrap around the center until you’re happy with the width. Cut the yarn then glue the end underneath another piece so it’s hidden.

Tada! Attach a clippie by sliding it underneath the yarn and gluing under the clip.
You did it! I hope you are super proud of yourself if you’ve never crocheted before. Even if you have, you still made a super duper cute bow, so that’s something.

For an even quicker bow, Chain 15 or so, then HDC the rows like the other bow until you have 4-6 rows. (you can even HDC every other stitch to make some cool hole patterns in the bow.) Wrap yarn around the middle and glue just like the other bow! Pretty easy and quick, though the edges can curl a bit.
Hope you enjoyed this, and could figure it out!
İts simple but very beatiful crochet. Thanks.
love this tutorial – very easy. must make some of these soon 🙂
I love these! And the directions were nice and easy to follow. I really appreciate that and they turned out well even on the first try. Cannot wait to make more. They are a bit addicting!
I totally agree!!
Thanks for sharing!
Aww, they are so cute! Thanks for the pattern, will definitely make some now 🙂
Learning to crochet is on my to-learn list! I tried about a year ago and couldn’t get the hang of it but I keep seeing cute projects like this one that make me want to give it another try.
So adorable, and so simple! I’ll be making a few of these this afternoon. Thanks for sharing!
Your bows are absolutely adorable!!! Thanks so much for the idea and the tutorial.
Love it! I am just learning to crochet myself, and can’t seem to get enough. Thanks for sharing.
Thank you so much for this tutorial. I look forward to this, as it will be my first crochet attempt. I love the fact that you explain in great detail with pictures…I’m a very visual learner. Again, thanks for this!!!
I don’t get crochet. I’ve tried to understand it several times with no luck. This is a great place to start, thank you for the detailed tutorial and the pictures!!
I’ve always wanted to crochet. I have a the hooks and a book, but have never learned. I’m going to try this out tonight after the kids go to bed and we’ll see how I do! Thanks for all the millions of pics!!
mmmm…bacon!
I mean, cute tutorial! 😉
Those are cute! And your instructions are very easy to understand. =)
Super cute. I’ve added a link to this on the crochetatplay.com directory.
I hope it brings your page lots of traffic.
Megan
Oooh thanks for this – it looks fairly straight forward – but that doesn’t mean that I’ll be able to do it!!!
These turned out so darling. I don’t know how to crochet but being the hoarder of craft crap that I am I’ve got yarn and a crochet hook so I might have to brave it!
Who know they could be so simple! Going to make 2 to add to the side of a pair of booties I just finished for my baby girl!
Great tutorial! I am definitely going to make some larger ones for myself! And possibly attach them to a headband instead of a clip.
VANNA WHITE YARN!
I have been wanting to teach myself to knit and crochet this year and your tutorial was the perfect opportunity to start! Your instructions are fab…and very easy to follow. I whipped up three in no time with the odds and ends yarn I found in my craft drawer. Next time I’ll use prettier colors (like yours) but this was a great start. I posted a link on my blog to yours where I got the instructions.
Cheers!
Jennifer
Totally plan on trying these! Bows for my little girl and bow ties for my little boy due in march! Trying to teach myself how to crochet a hat, but this will be a smaller easier project as I’ve ttaken my hat apart 3-4 times already. 🙂 thanks for the tutorial!
Made one just after finding your blog. Super easy, super cute, and so quick! I didn’t have a glue gun, so I stitched it together – that worked pretty well too, but I think the glue would make it a little sturdier. Thanks for the pattern!
This was great! I just made a camo bow tie. I think I am going to make it into a barette or maybe a headband. Great instructions! Thanks for sharing!
Third time I have attempted to leave a comment. This was cool. I just crated a camo one. Think I will turn it into a barette or maybe a headband. Great instructions. Thanks for sharing!
I love these, the colors are perfect. It reminds me of the time I was learning how to knit… I ended up with a random long strip, so I just turned it into a hair bow almost the exact same way you made yours!
http://flavorpink.com/2011/12/30/knitting-with-juniper/
Extreme cuteness! Thanks so much! 🙂
~Kim
This is cute! This’ll be great since I’m recently into hair 😀
Such a well done tutorial! The pictures are super clear and helpful! Thanks!!
These are so cute! Great tutorial!
Super cute! And a perfect beginner project. Hope you won’t mind me linking up tomorrow at Tangled Happy. Thanks for sharing this wonderful photo tutorial! 🙂
vey lovely!
These are so darling!! I love how simple they are! You used such cute colors too – makes me want to make up a bunch for spring!
This is coming from somebody who has never successfully used a crochet tutorial or pattern: this tutorial was fantastic. Thank you thank you thank you. Teach me everything.
Here’s the what my bow project turned into (and many more to come):
http://instagram.com/p/WXmZuOkiNl/
Thanks so much for this tutorial! I just made one and added a little headband. It’s so stinkin’ cute!
I’m also a newbie crocheter and have been searching for easy-peasy things to try out. I’m so glad I found this tutorial! I just made my daughter a bow for her hair and I’m way too excited about it. Totally making these for Christmas gifts this year. (Too early?) 😉
I’ll probably be blogging about it a wee bit later, and will be sure to link to your original post. Thanks, lady!
How cute! Oh and, I don’t know whether you’ve figured it out yet, but 6mm/10/J is all the same size. In Europe, we use 6 mm, and somehow that is converted to US size 10. In America, they also use the alphabet to determine size (hence the J), but that’s just for crochet hooks, not knitting needles. Okay, I’ll stop being a know-it-all now 😛 happy crafting! xx
Loved your tutorial!!! so much fun, my bacon-bow is super cute thanks to you!
Thanks for the great tutorial! I just made one change when I did mine – as I didn’t have glue. I folded the ends and then used the loose thread to sew them together and to the middle. Then I used the thread around the middle like you. Worked great!
So cute and super easy!!! Thanks for the tutorial…..
I just wanted to check if this pattern uses US or UK crochet terms BEFORE I start so I don’t have the embarrassment of having to undo it all having used the wrong one! love these though, can’t wait to make them 🙂
I am so glad you included the pictures. I love it! I am a novice crochet-er, they helped immensely. Plus I’m a visual learner. Awesome, I will definitely be back for more tutorials and patterns!
I made a bow using your tutorial and it turned out great! I did the double layer and just tied my yarn around the middle instead of using hot glue. It was the perfect embellishment for my zipper pouch.
http://sarahdudik.wordpress.com/2013/06/17/weekend-crochet/
‘Fold your bacon’ HAHAHA!
It takes talent to come up with a pattern, so beginner or no, you’re good! I love this and it’s PERFECT! Exactly what I’ve been searching for! Thanks for sharing (:
Whoa, you are a tight crocheter! I noticed your chain is really tight in the pictures, and then I made one with a J hook and my bow is HUGE! Too big for a bow tie (for my boys) but it will be cute for my hair on a headband. I made the 2nd bow with an I hook and it was closer to the right size for a bow tie, but still kinda big, so I went down to H. Just an FYI for anyone else reading who might not be as tight a crocheter as you, like me (:
Love this tutorial I plan on making clips out of these! But I was wondering what brand of yarn that is and where you got it? I just LOVE the colors!!
Very cute design. A suggestion from an advanced crocheter I would suggest sewing it together versus gluing. It will hold together better and won’t have the hardness of glue.
ok – these are totally adorable.
Very easy tutorial! Thanks!
Fantastic tutorial !! thank you for sharing this x
Hey. Love your bows!!! I am going to be making a few for christmas presents for sure. Anyway……I watched another tutorial on youtube that made bows kinda like yours and instead of hot glueing they just stitched the two ends together and used the stitched part as the middle. Just thought I would pass that along becuase I think that is easier than hot glueing!
great idea!
Thank you for the tutorial AND for making me giggle. Now I am craving bacon. 🙂
THANK YOU for making some beautiful granddaughters happy…and their Nana, too! LOVE your work!!
Cute little bow!
I’m making a hair bow tie out of it, by attaching it to a hair elastic.
Instead of using hot glue, before you tie off and weave in your yarn, you can single-crochet the two shorter ends of the rectangle together, and wrap yarn around that part. It makes it a bit faster to make, and there is no need for glue.
This is lovely!! I’m going to make some for my 2 year old niece!! Thank you very much!!
Love this pattern. I started making these and can’t stop now. I make some bigger some small and with all types of yarn. Thank you.
I can’t wait to try these – so simple but will be really cute on some booties and mittens for my grandson
OH MY GOSH!!!!!!!!!!!
i HAVE MADE 5 SINCE LAST NIGHT.
AND I’M WILLING TO MAKE A LOT MORE FOR FRIENDS AND ME….
THE FIRST 2 THAT I MADE,DIDN’T LOOK LIKE BOWS,SO I MADE 5 ROWS INSTEAD OF 3.
5 ROWS LOOKS A LOT BETTER….
BUT IT ALSO DEPENDS ON WHAT WOOL YOU USE
DANAE~
Wow. Easy and love the kind of yarn and colors that you chosed.
Ale
I like your sense of humor. Thanks for the bow tutorial.
Totally making these RIGHT NOW! I love it! Thank you for sharing!
I love love love these!! And you are a lifesaver! I was just needing some cute bows as well as a simple crochet pattern! 🙂
nicely and correctly done
Thank you so much for this!! I work so much better with photos! I just started learning the past week or so and this is the easiest bow instructions I’ve found! Looking forward to making some tomorrow!!
Hello, Jess! Thank you so much for sharing this pattern! I have made numerous bows so far and love all of them! I have a question for you: would you be all right with me selling things that include bows that I make from using this pattern? All credit would go to you, of course, with a link-back. Thank you! 🙂
Sure! There is a license to sell on my blog you can purchase and that tutorial is fine with me to do so with. 🙂
Thank you for the detailed tutorial!! LOVE THESE SO MUCH!! Such a cute and different alternative to the ribbon bows. I love sewing but definitely don’t know the first thing about crocheting so this helped tremendously!! Can’t wait to try with some leftover yarn I have!
I love this step by step guide and the humor keep it up x
Thank you sooooooooooooooo(ect.) much!! I finally completed a crochet project, and humor helped 😀 (especially since I <3 <3 <3 bacon!) Now onto cat sweaters!
I have never crocheted before but, now i am. You explained very well and your project was outstanding. Way to go!
I am definitely making these for my friends and family! I wish I would have found this before Christmas, it would have helped a lot! Thank you for sharing 🙂
This is adorable and I am so excited to do this. Thank you so much and your descriptions as super cute too! Made me laugh.
hehe thanks!!
Super cute and easy. Thank you for sharing…
? I love these! Thank you for sharing.
I love this! This was so easy to do, and I actually left my tails long, and used them to weave it together in the middle instead of using glue (I didn’t have any glue, so I had to improvise). It worked great!
awesome! glad it worked so well!
Thank you for this amazing tutorial! It is only my fourth day since learning to crochet, and it turned out perfectly! The pictures were very helpful.😊❤👧
they are so adorable!!