


drumroll please………

Finally the Vintage feedsack dress tutorial! I know you were all on pins and needles this entire time waiting for it huh?
chirp chirp…
no?
That’s ok, I won’t hold it against you. I know some of you are new around here.
(hello there! Welcome! settle in! Grab some chocolate!)
Anyways, it’s only taken about 4 months for me to get this posted, but whatevs….Here it is! Hope it doesn’t disappoint. Let’s get going!
Click below for the full tutorial!
You’ll need:
fabric (I used one yard and had just enough for my 2 yr old) feedsack print is optional, but adorable! 😉
single fold bias tape (one package was just enough for me)
buttons
lightweight iron on interfacing
muslin for lining
thread, sewing stuff
I have the pattern I used available here to download. For free, of course! It’s only available in a size 2/3T.
(I’ll show ya some tips on making the pattern yourself) I don’t have pattern grading/making capabilities right now, so that’s all I have to offer. It’s also very homemade, so excuse the hand drawn patterns. 🙂
To get started, make a simple bodice pattern by tracing an existing shirt, or printing off my pattern. You’ll want the neckline to dip down in the front a bit more than the back.
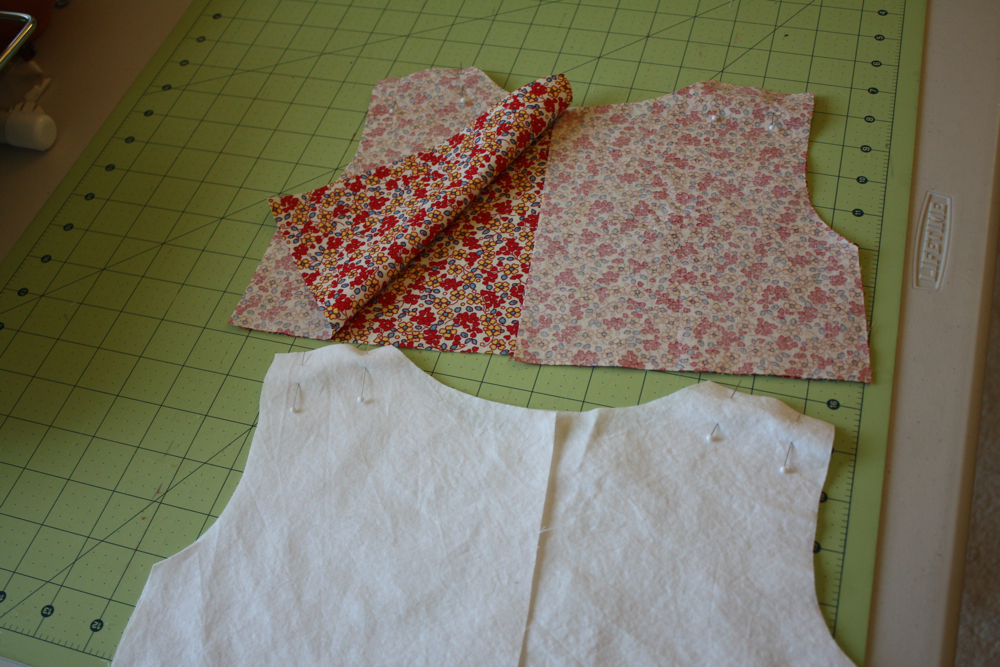
Then, cut out your pieces-cut 2 of your front bodice on the fold, one of main fabric, one of your muslin (or other fabric) lining.

Cut four of the back bodice, two of MF, two of lining.
Then, right sides together, pin and sew the shoulder seams together. Press seams open-do not finish them!
Now to make the Peter Pan collar-(or use the pattern) lay out your bodice piece like so, and trace around the inside. Note that I moved the fabric away from the line for the picture, it should follow the edge.
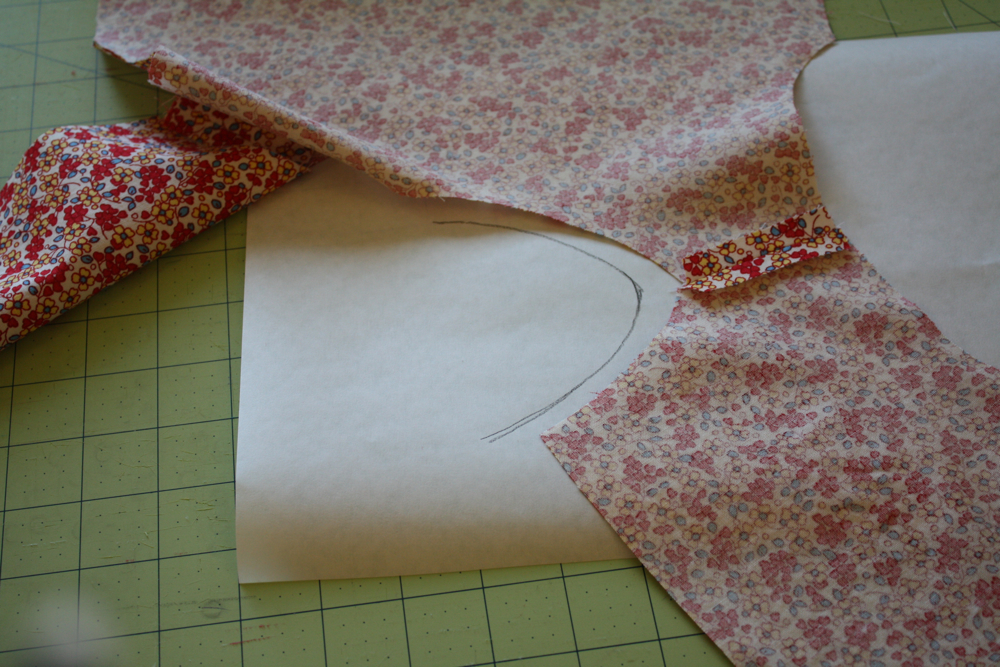
Didn’t get a pic of this, but then draw a PP collar shape around that tracing. With this style, you don’t have to add any seam allowance, since it will be trimmed with bias tape. Then cut out 4 pieces of muslin from this pattern.
It should look something like the picture below.
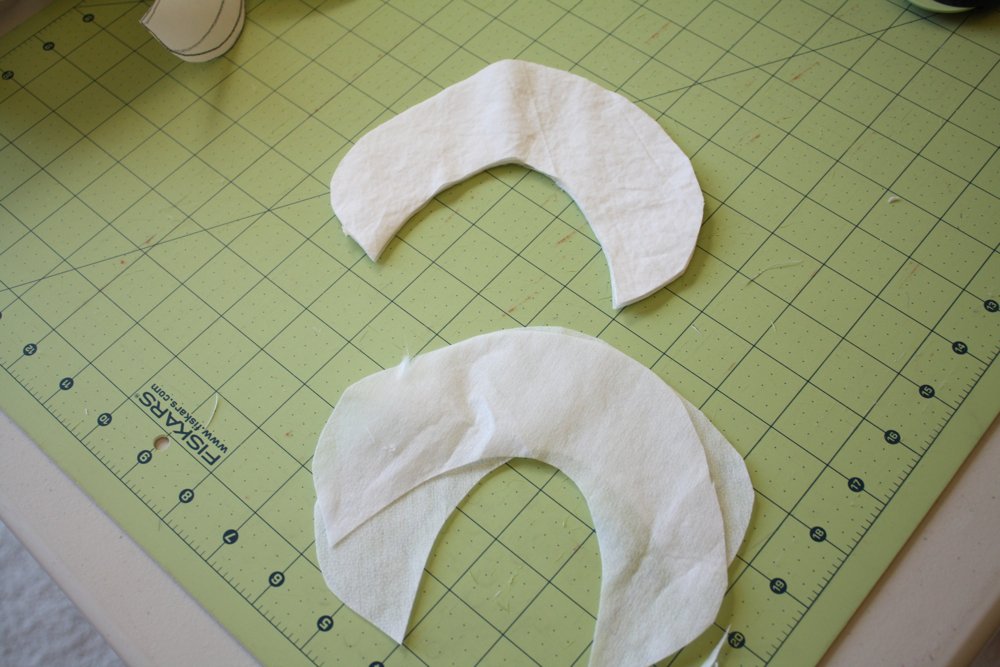
Also cut out two pieces of interfacing (I used medium weight), and iron them onto the backs of two of the pieces. Make sure the pieces are facing the right way so they won’t be “off”. (ie, slightly different ends of collar on different sides) I’m so bad at explaining these things.
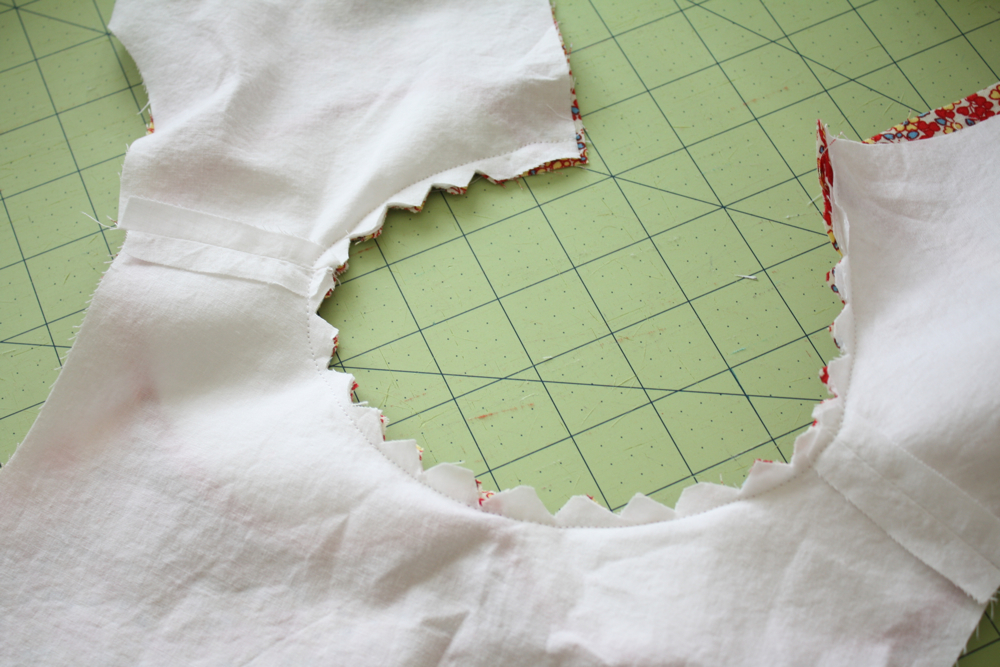
Then, make sure you have the collar pieces facing the right way. then:
1. Baste together on the outside, wrong sides together.
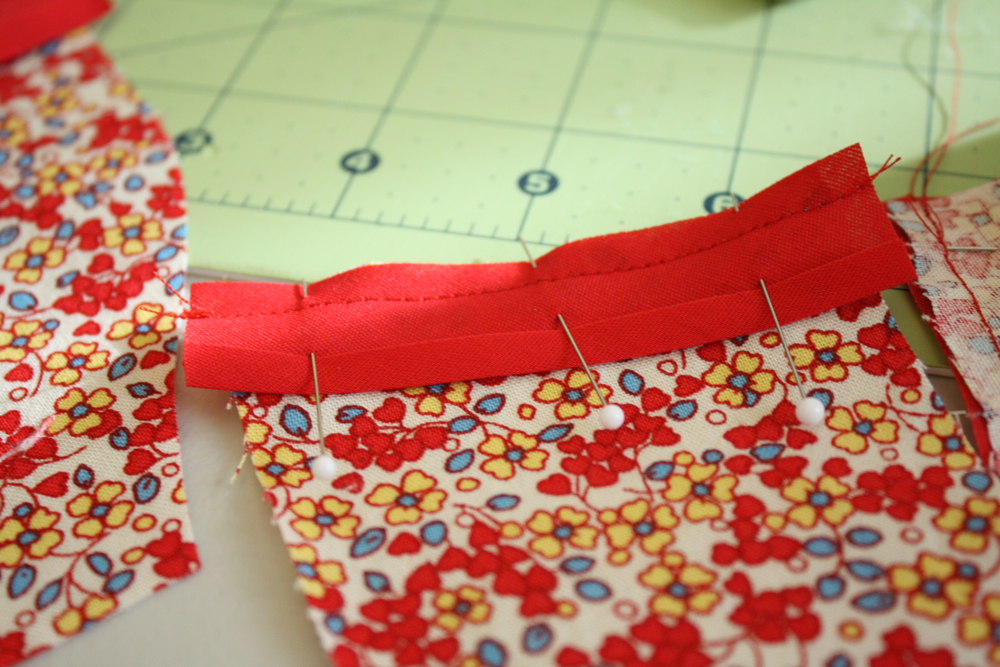
2. open up your bias tape, and pin it to the round part of your collar.
3. sew it to your collar, making sure your stitches follow the crease.
4. flip the bias tape around the edge, pin, and top stitch close to the edge.

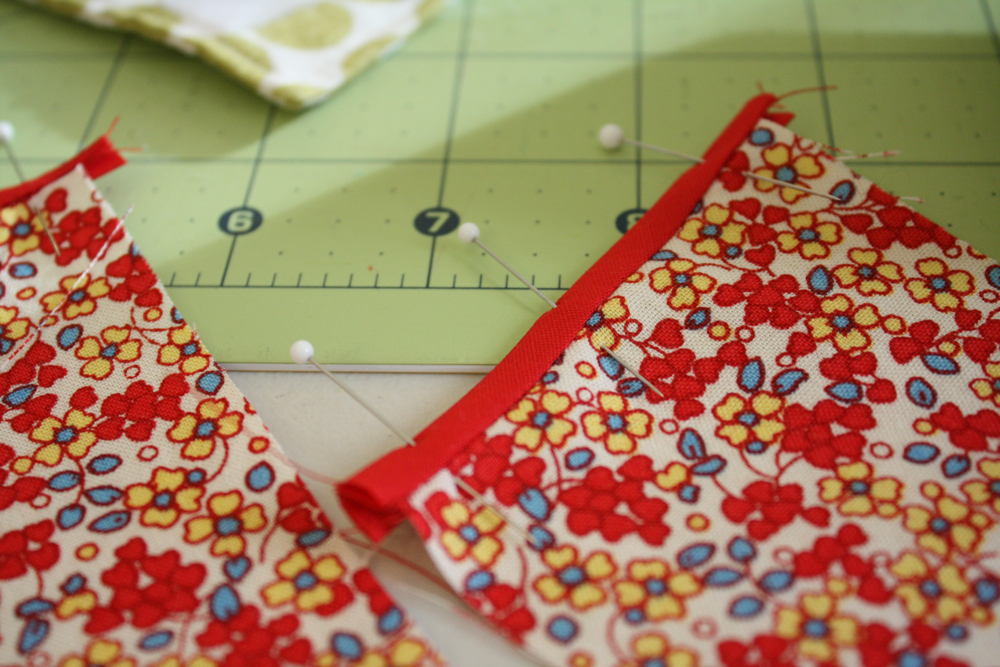
Now place your collar pieces like so…I ended up trimming a little bit off of the front bodice piece to make it fit. I overlapped the front a little bit so that when I sewed my seam allowance the pieces would just barely touch. On the back, I left 1/2″ of room for my zipper.

Then I laid my lining piece right side down on top of that, and pinned around the neck.

Then I sewed around the neckline only, clipped the curves like so, turned right side out and pressed well.
Then I made and cut out my sleeve piece, pretty basic. I cut an angled piece out of them in the middle (this is already done in the pattern piece I uploaded)
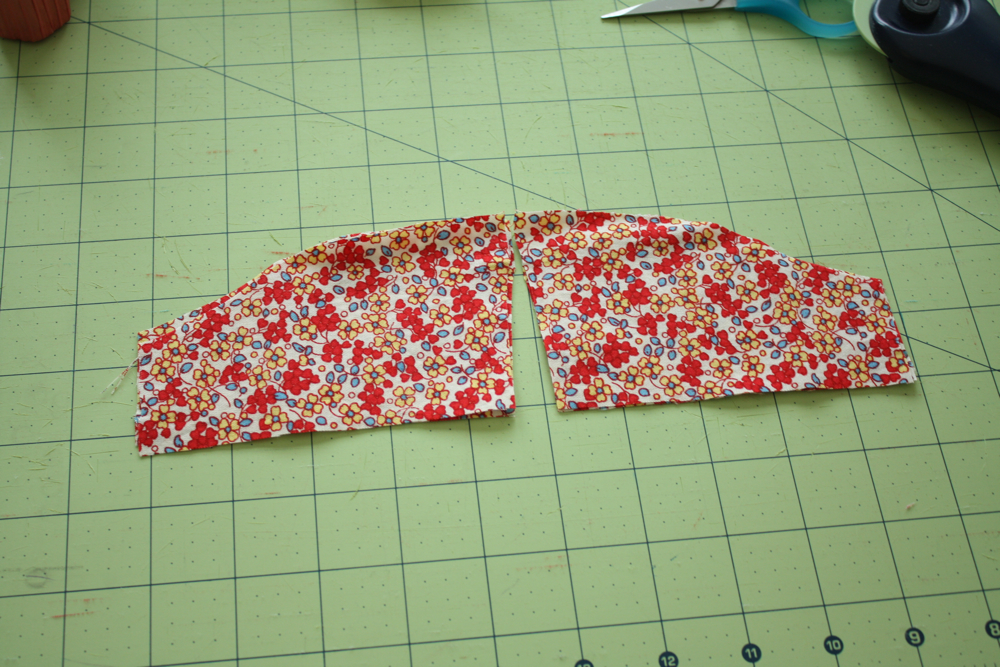
Then I cut some bias tape to fit the sleeve edges, sewed them like so…
Then flipped them around and sewed them just like the collar.
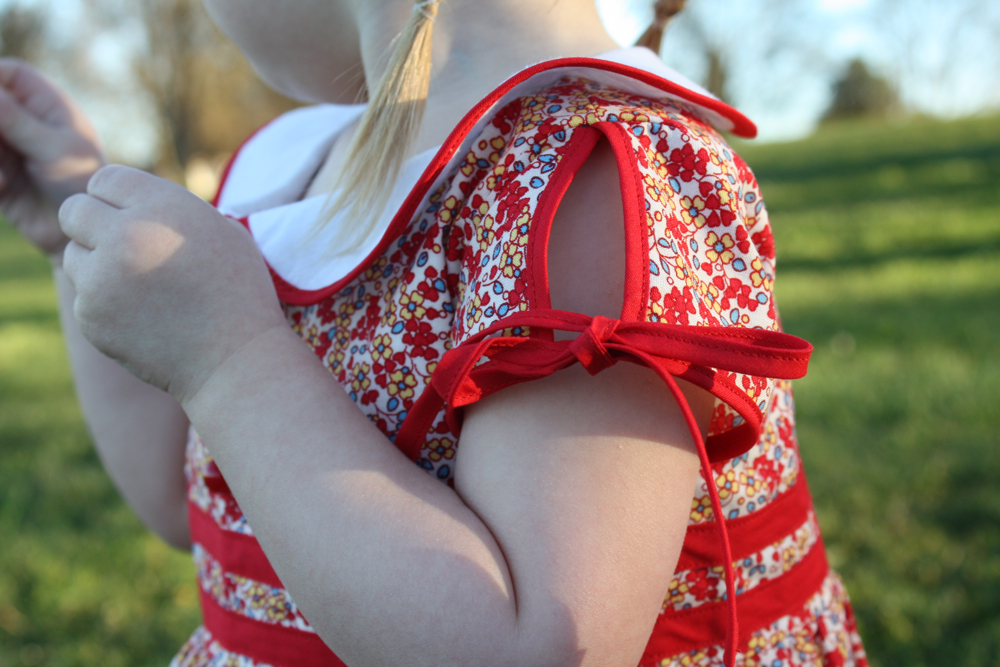
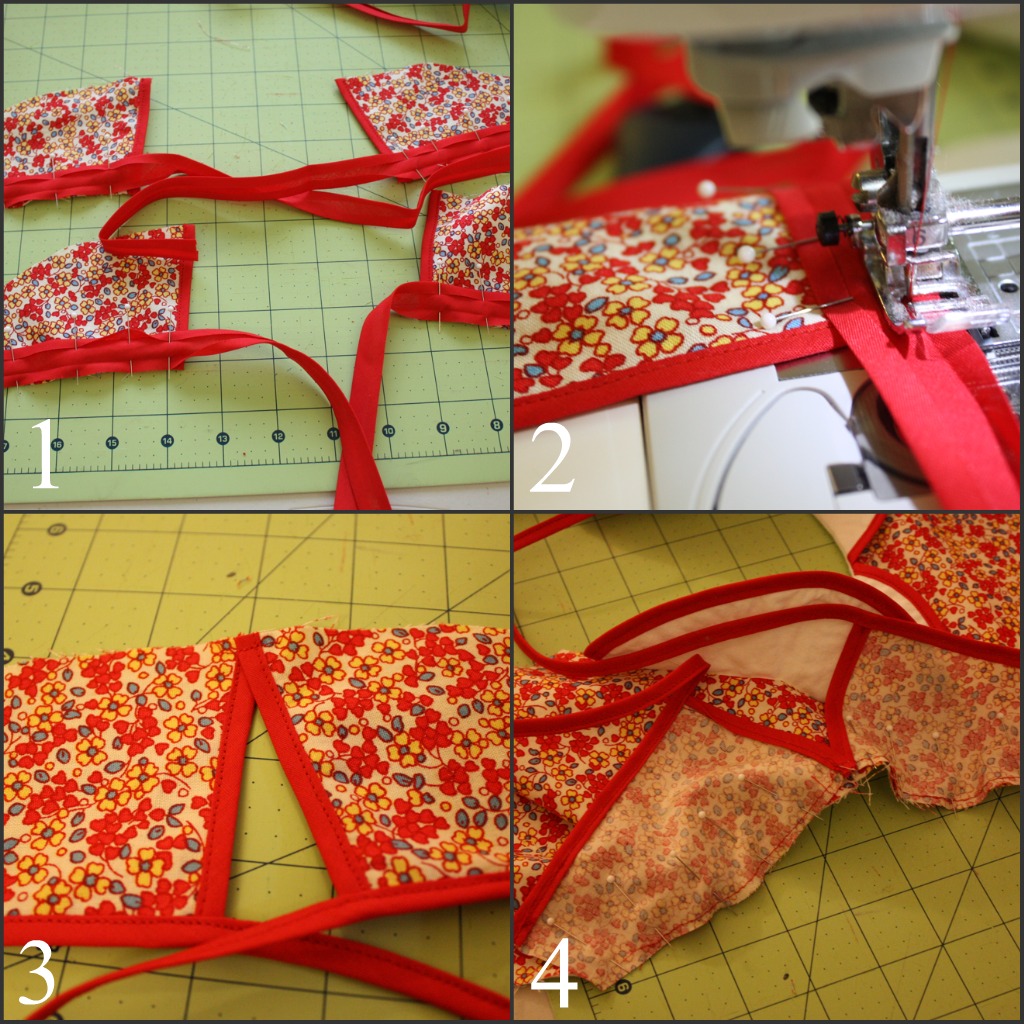
Now for the ties:
1. Pin the bias tape open around the bottom of each sleeve piece.
2. Sew to the edge of the sleeve, then back stitch a little at the end. Flip the bias tape around, and sew down the tie-all the way down the tie, folding the edge under 1/2″ before sewing it shut.
3. Then lay the sleeve pieces at a slight angle, and baste them together at the top.
4. Gather if needed, then pin to your arm holes and sew together. Finish the seams.
Pin and sew the sleeves and sides, right sides together. Finish your seams.
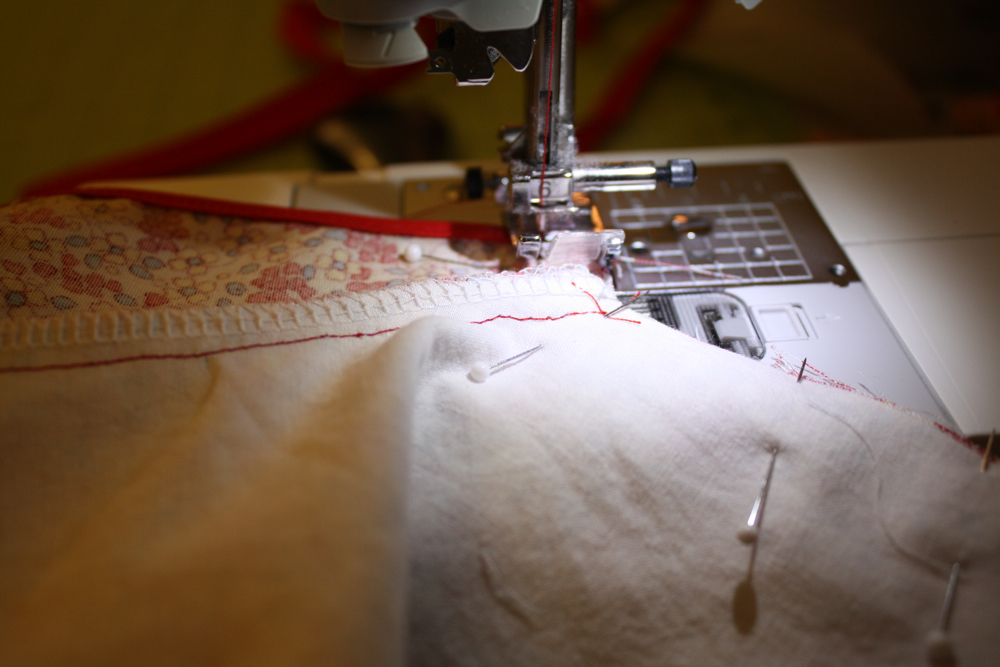
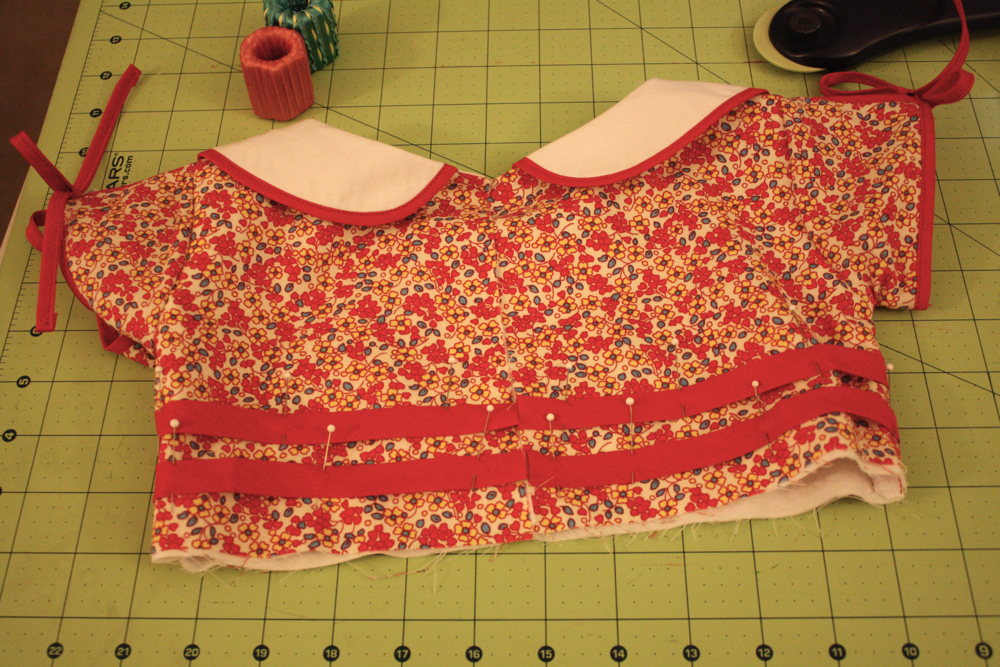
Then I laid my bias tape down til I liked the spacing and pinned it to my dress, folded side to the shirt.

I made sure it lined up in the back, then sewed it onto the bodice.
I didn’t take pictures after this point, but it was basically cutting a rectangle (selvage to selvage) of fabric to the length I wanted, sewing it into a tube, hemming one side, then gathering the other and sewing it to the bottom of the bodice. Then I put my zipper in, sewed on the buttons, and was done. 😀

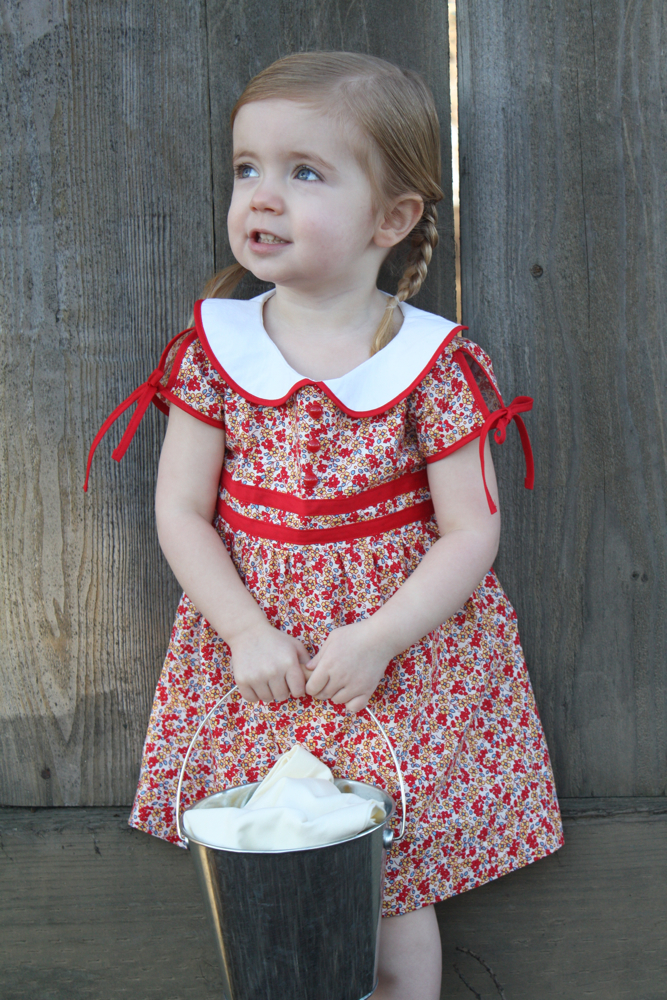
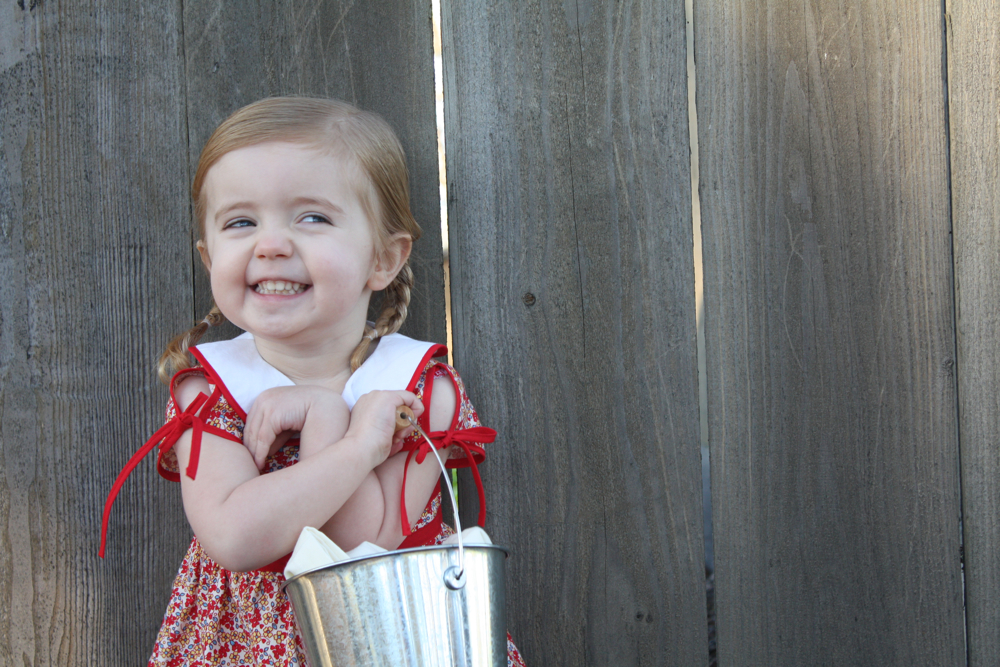
What a cutie patootie. I mean, I know I’m biased…hehe.
holy smokes!! this is so adorable!! now i just need a little girl to make it for! 🙂
I love your beautiful little dresses, they are so lovely. Your daughters are very lucky ladies!
Jx
BEYOND cute! I totally had to pin this to my pinterest board. Great job. =)
Oooh Jessica!! I love you!
You know I have been stalking you for this! LOL
Thank you! Now I know what my weekend project will be!
And thank you for the 2T download pattern..I am so glad that my baby is turning 2 soon!
Owhh.. she’s so cute
Kisses and hugs for Sadie
and her mom too, for inspiring me and keeping my sewing machine on at the weekend
A cute patootie indeed. She looks adorable in her lovely dress!
seriously an amazing dress!! All the detail in it is fabulous! No wonder it took you so long, this is truly great work!
I so love the sleeves on this. It doesn’t get much cuter, Jess 🙂
Love this dress! Too bad all my girlies are older now.
Hahaha Jess, I am new around here and I love it. You make me chuckle. Thanks for the fun and the great tutorials. And she is a cutie!
Oh my goodness! Adorable! (The dress and your daughter! 🙂 )
your little girl could not be any cuter. That fabric is amazing. Your tutorials always make everything look so easy. 🙂 Bookmarking this for later when I improve my sewing skills just a bit. 🙂
I love the little peek-a-boo sleeves, a beautiful detail.
Andrea
http://dressmakerelves.blogspot.com/
I love love LOVE this dress!! Kit is my daughter’s favorite doll, and mine too b/c of all of her gorgeous clothes. Every time I see this dress in the catalog I find myself wishing I could get it in a girl’s size for my little girl.
I linked to your tutorial on Craft Gossip Sewing:
http://sewing.craftgossip.com/tutorial-vintage-feedsack-dress-for-little-girls/2011/06/24/
(link will go live later tonight)
–Anne
This is just precious!!! LOVE IT! 🙂
Yay! I’ve been waiting for this one!
Those sleeves are adorable!
LOVE! Another score for you…your little lady has to be the best-dressed girl in town! I have to tell you that I have pinned pretty much your entire blog. My girls will soon be replicas of yours! (Okay, not quite, because I can never find or afford such fabulous fabric!) Thanks so much for sharing all your lovely creations!
I have been wondering about the peter pan collar forever, thanks so much for your tutorial, one big sewing mystery solved 🙂
Yay! I’ve been waiting for this tutorial. This is my favorite dress you have ever made! I can’t wait to make it! Thank you!
GORGEOUS! Thanks so much for the tute! I’m gonna attempt it for the baby…we’ll see how it works out…
Darling Jess! And the tutorial is so clear. Awesome job. And the girly? Cute. As. Ever!
Wow! Thank you for this… it’s adorable! I’m going to have to try to make this for my little cutie!
You are so clever Jess! I will have to make this for one of my little girls for next summer in New Zealand! Much too cold here for that dress at the moment!
Jess, you rock! I adore this dress. I’m going to make one as soon as I finish the 300 other projects I have started. Sadie looks so sweet with her little braids and bucket. Great photoshoot!
Ahhhh! Seriously I don’t know how you do it, just when I think your ideas and your kids can’t get any cuter!! THANKS for the pattern. I better get to this since my daughter can wear a size 2T now
I LOVE IT!
I linked to it in today’s Friday Favorites at http://www.onthelaundryline.com, today’s roundup was all people who volunteered for Summertime and the Living is Thrifty but lets not kid ourselves here, this would have made the cut regardless. I LOVE THE DETAILS ON THIS DRESS. And I’m sorry I said you were an android from the future. What? Nothing!
Thank you thank you! I can’t wait to start sewing this one!!!
Diana
Hooray! This is the cutest!!!
So adorable and she is just a peach! Thanks for the tut 🙂
So adorable and she is just a peach! Thanks for the tut 🙂
so super cute jess. and sadie is just a complete doll!
YAY! Yes I HAVE been waiting on pins and needles!…well, since I didn’t know you were making a tutorial for this dress not actually. But truly I have adored this dress since you first shared it. Love love love it! Thanks so much. my girls are much too big for a 2T, but I would still love to give it a try. For a gift maybe.
So little house on the prairie!! 😀 Super adorable!! 🙂 I’d love to make one for my little girl.
wow, for once in my life I feel like I’m ahead of the trend 🙂 Thanks again for giving me the super secret deets early. I’m visiting with family and that dress is a big hit with the grandmas 🙂
Hi Jessica!
Thanks thanks again for the tutorial and you can see my version here!
http://sertyan.blogspot.com/2011/07/vintage-blue-dress.html
So inspiring! I love the bias tape borders and the peter pan collar. Too sweet!
Jenny
Just stumbled across your blog (from I am Momma Hear Me Roar, I think) and I am in love! I have spent the better part of an hour checking out your posts and have bookmarked several things to try, but this dress takes the cake! I literally gasped when I saw it, as we are American Girl doll fans in this household, and my Kit doll (yes, *my* doll… I am a dork) has this dress. (It’s the only non-homemade dress she has, because I usually sew the doll clothes myself to save moolah. Couldn’t resist the real one of these, though.) Now I can make one for my girls! Yea!
BTW, *high five* for Gilroy! My mom lives there, and I used to as well. Went to church there for a little while until I changed to the singles ward in Morgan Hill and met my husband (10 years ago!) Ok, that’s all for now. Don’t want to come across as too stalkerish. Lol! Thanks for the tutorial!
Your pdf for the vintage feedsack dress is not working. Can you send it to me?
Terri Carter
OOPs forgot to leave me email address:
[email protected]
I would love it if you could send your pdf for the vintage feedsack dress. It is not working when I try to download it.
Thank you!
Terri Carter
I am so sorry! I know you emailed me the pdf for the feedsack dress, I saw it on my phone while on the stationary bike, but somewhere between the gym and home. It disappeared 🙁 could you please send it again? thanks you again and again!
Terri
[email protected]
Would you happen to remember the name of that particular fabric that you used? I cant find it anywhere and i really like it.
Thanks for the tutorial!
I live in the UK and came across your blog earlier this year and loved some your ideas. I would love to make the Vintage Feedsack dress for my little great niece but the Download of the pattern didn’t work. I see that some others had problems so wonder if you would be kind enough to send me the PDF. My e-mail is [email protected]. Please keep on with the good work, it’s sonice to see such original ideas.Many thanks, Pam
So adorable, thank you so much for the tutorial, DH will be 2 this coming summer… perfect!
muito lindo!Parabéns
I love your site…I have no little granddaughters and are just in awe of your daughters…they are so cute!!!!
your site should be named cuteness is not optional….you are truly blessed…keep making those gorgeous clothes!!
A dor a BLE!!! Will you please email the wonderful free pattern? I tried 2 different browsers and still no luck.
Thanks!
Rubberduckywon at gmail
Thanks bunches
Thnk you so much, kindly email me the free pattern, want to try one.
it’s available to download in the tutorial post 🙂
Is there a seam allowance included on the pattern download , and if so, how much?
I think so, but it was awhile ago. probably 1/4″ but I’m not sure.
wonderful tutorial.
I love the Vintage Feedbck Dress. Your tutorial is so detailed and with all the pictures, you can’t go wrong . So here we are in 2023. I’m not sure your pattern is available. I get a message that says I need to ask for access. I am a grandma who likes to sew dresses such as this one. They look simple in a sense but with a couple of changes. If it’s possible, can you tell me how to obtain access to this pattern. There were 2 or three others that you had that I was not able to access, but I will just go with this one for now. Thank you so much for your assistance. P.S. Wish I could see a picture of how your little girl looks now. She is the cutest model I have seen on Pinterest.