


While on my latest felt flower making kick, I also made these easy rolled flowers.
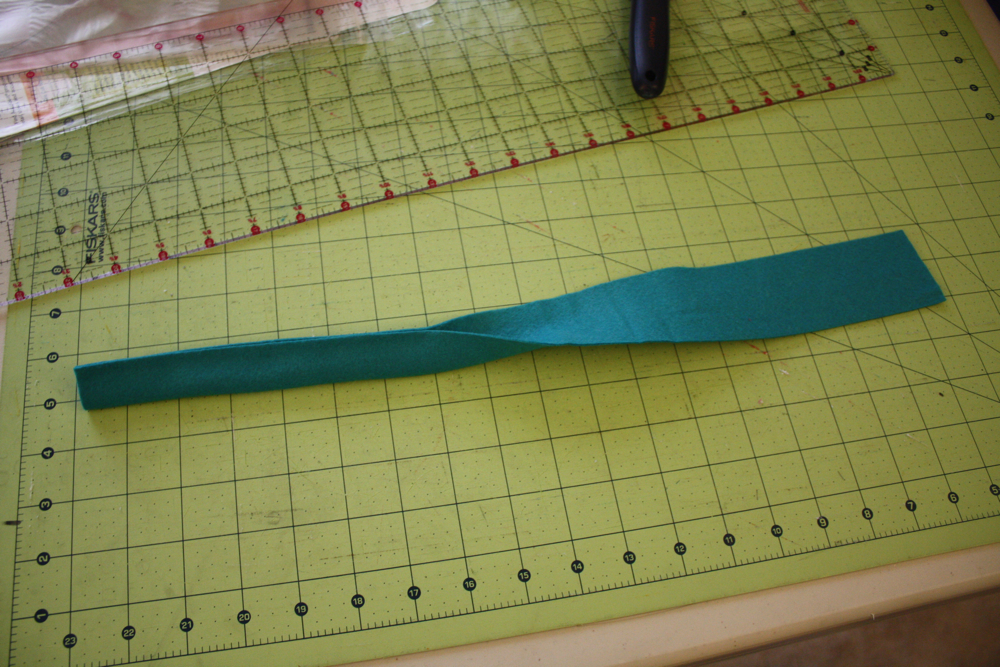
Cut a long strip of felt, I prefer wool felt (my strips were about 18″ long and 2″ wide) then fold over and glue lengthwise…just along the edge.
Then cut little slits however wide you like, and end them about 3/8″ from the bottom. (notice my awesome new scissors? The nice folks at Olfa sent them to me…and they are fantastic for this kind of project!)
Also, cutting closer to the bottom helps the flower lay flatter.
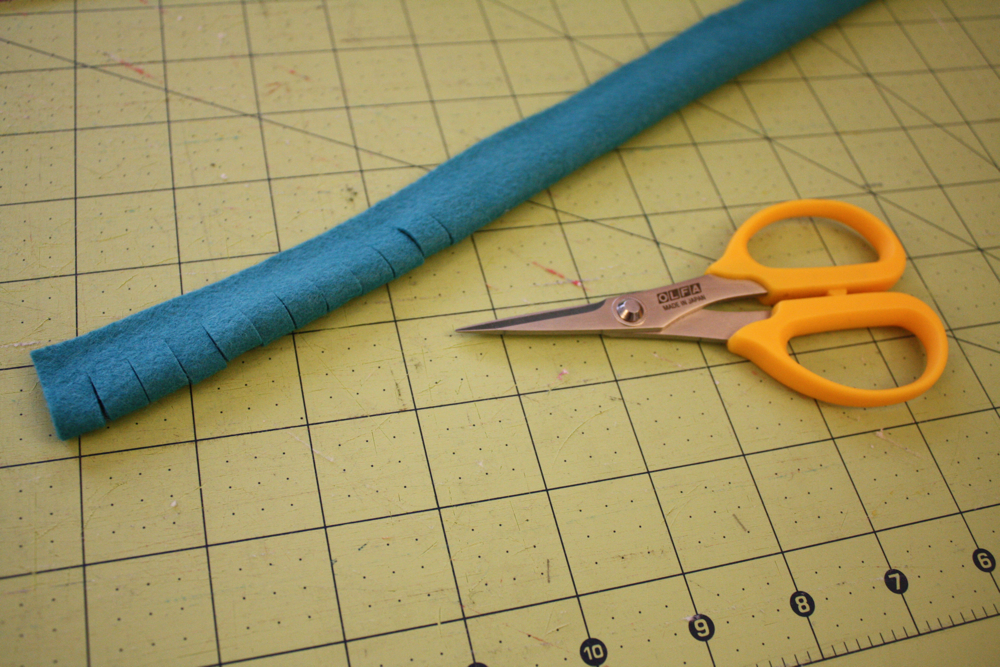
Then start rolling and gluing along the bottom edge.

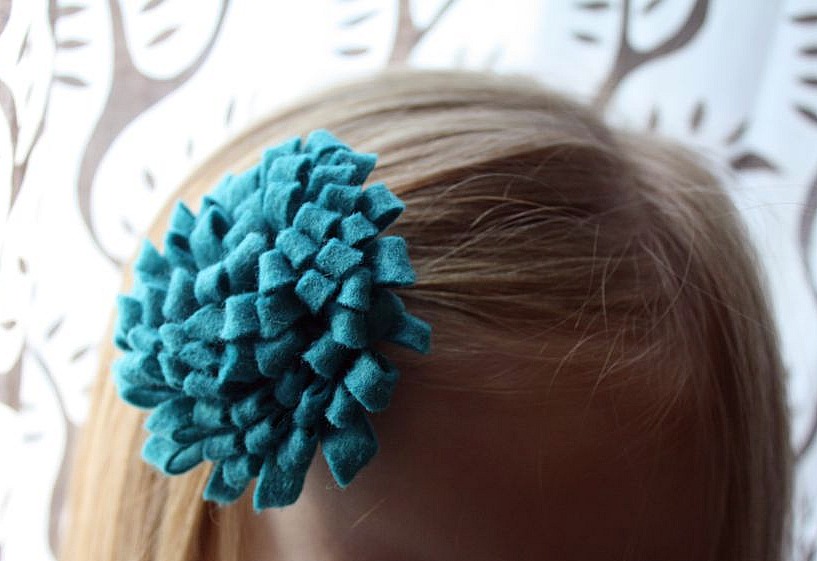
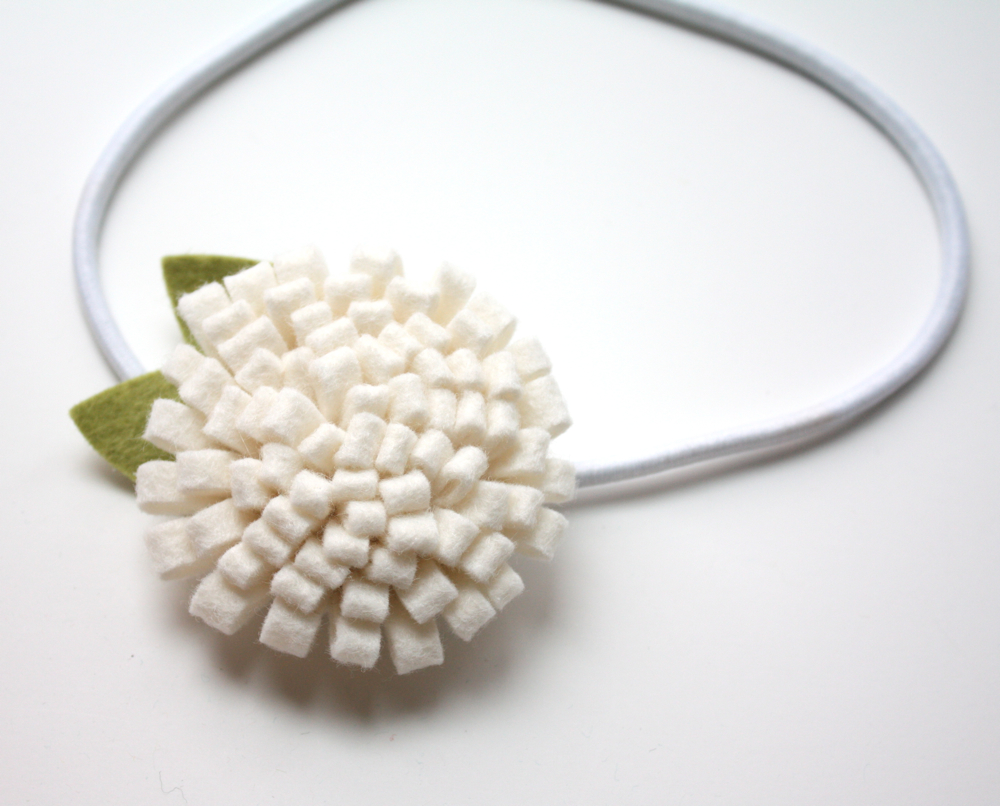
Add a couple of felt leaves and you’ve got a cute flower for a headband, clip, or brooch!
Tip: try cutting the slits at an angle for a different look!
You truly are a wonder jess. I just received some wool felt in the mail yesterday and spent the night making some flowers so what an awesome time for you to post this tutorial. Can’t wait to try all your ideas too. Thanks for being such an inspiration
Thank you for sharing. I have twin granddaughters who would love to have headbands with such pretty felt flowers.
I can’t believe they’re that easy! It looks like you spent hours gluing every little petal individually 😉 Thanks so much for clearing that up for me
So cute… definitely Pinning this!
I’m so excited to make some of these for my daughter! Thanks for sharing! Oh, what type of glue did you use?
Oh, I LOVE this! What a great idea!
that’s so awesome and sooo easy!
where do you find those headbands?? thanks:)
Cute! I’ve done them before, but haven’t tried cutting them at an angle – good thinking!
I was wondering how those were made. Apparently I’m not clever enough to figure it out! 😀
I’ll be making this. My daughter will love it. Thanks Jess!
Definitely pinning this!
Fantastic! I need to get me some felt!
Thanks for the inspiration.
Katie x
Thanks so much for sharing. I cannot wait to try this flower. Arlene from theroseyposey(dot)com
Whoa! That is WAY easier than it looks!! Love it!!
I am with Sara, way easier than it looks. So cute!
WOW! i totally didn’t expect this flower to be so easy! have to make one now.. i think i’ll be making all of them 🙂
Super adorable, Jess. I love how simple this is! And it looks great.
Cool! this is the one I commented about yesterday! My favorite!
This was so simple, and I was in such a bad mood yesterday, that I went home and gave it a try. I can never make fabric flowers and this turned out pretty! Thanks for the great tutorial. I’m loving all the flowers.
Holey moley, Jess! You are so creative! I can’t wait to have a little girl to put these on (head bands never stay put on my head)!
Thanks for the great idea . I tried this and the back of my flower is pretty big how did you attach the flower to the head band ? Any ideas ?? I love this idea and ur site !
These are too cute and way easy! Thanks for the tute! I had to make some for the girls’ Christmas stockings! Good thing at 20 months I can use them to model stuff that will be going in their stockings, LOL. I’m posting a pic to the flickr group in a minute!
How did you attach the flower to the headband? IT seems like it would be bulky on the bottom. Do you have to flatten it in any way? It is very cute, and I love the dahlia flower you posted yesterday.
Just made a couple of these. So cute and super easy! Thanks so much for sharing. My nieces will be so excited!
@ Weaves Way & Georgine-cutting close to the glued edge helps it lay flatter, and I glued a circle of felt to the back of the flower, sandwiching the elastic headband in between. Hope this helps!
It’s done! Thank You for ideas:)
Greetings from Poland!
thanks for the tutorial. I finally got a chance to try it and made it mini for a hair clip.
thanks for sharing
http://latenightstamper.blogspot.com/2012/02/mini-mum-felt-clips.html
wow thats so easy and so effective. looks great
What kind of glue would you recommend?