


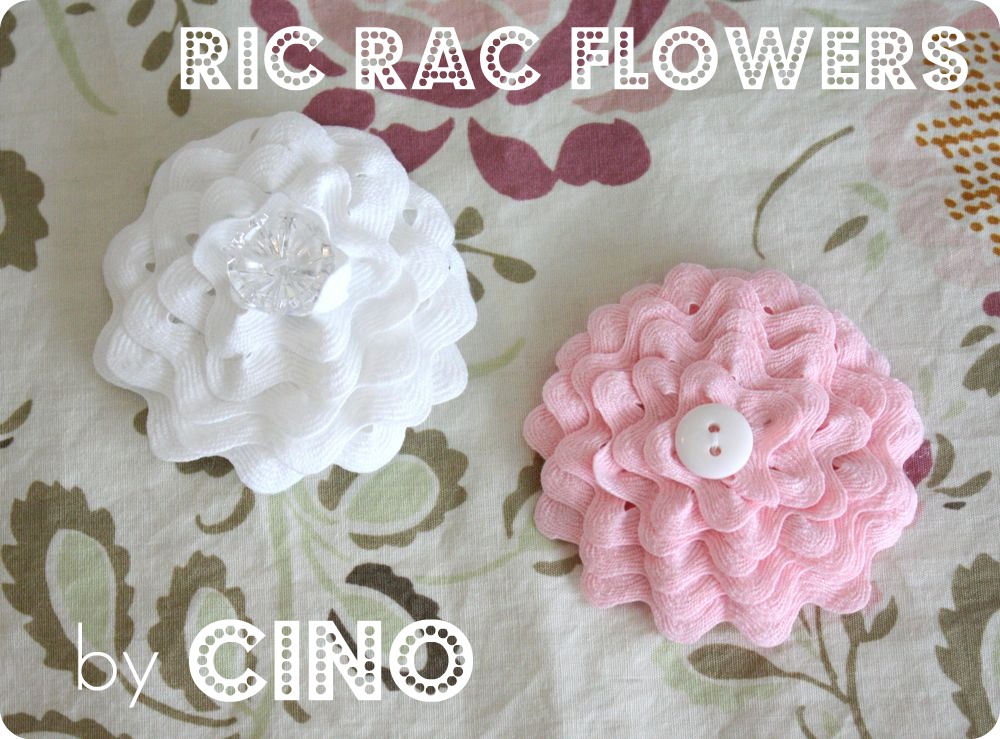
Aren’t these little ric rac flowers gorgeous? I did not quite understand the full cuteness power of ric rac until recently, but I count myself enamored. My crafty cousin Jenni first showed me a flower like this last year at my sister’s wedding, and I promptly (and sadly) forgot about them! Until I needed a quick add on to a skirt and had ric rac within reach and…..the rest is history.

They are scandalously simple.

All you need is:
a yard of ric rac (3/4″ worked best for me and I get mine from Ribbon Retreat. They have TONS of colors!)
matching thread (or not…I used white on the pink one cause I was too lazy to go get my pink thread.)
hand sewing needle
hand sewing needle
buttons for center
felt scraps
clippy if you want to make this clippafiable. (Ohh yeah that’s a word. I just patented it. You owe me $1 if you use that word. You say you’ll never use it? oh, fine.)

First off, cut out two circles the same size. They don’t have to be perfectly circular, as you can see. I cut out a 2.5″ square folded it in half, and then half again, and the rounded the corners.
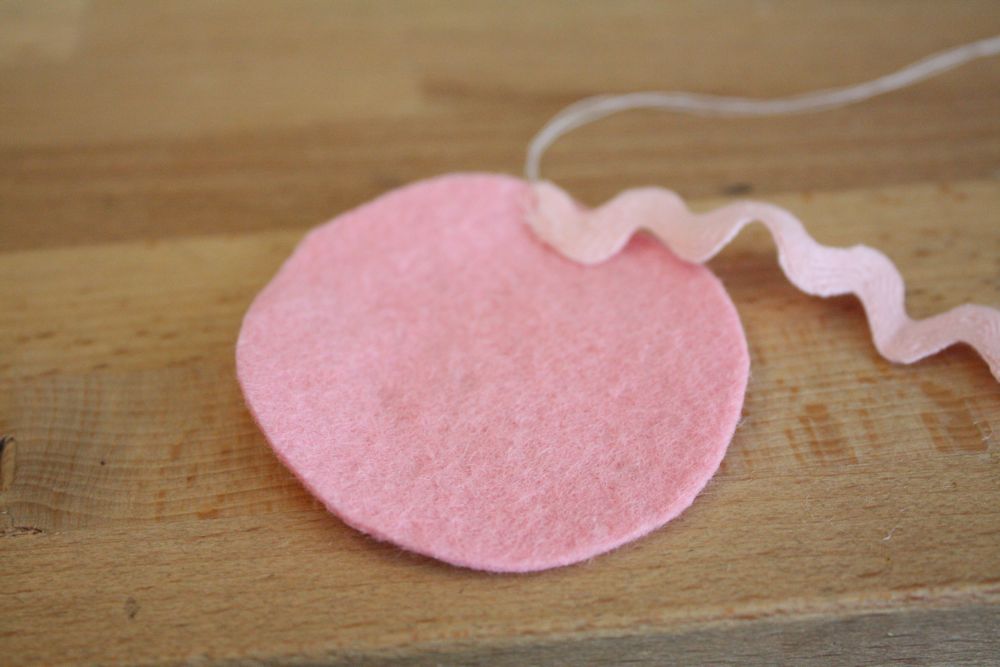
Then thread up your needle, knot the ends together and tack down the end of your ric rac to the edge of the felt.

Continue tacking (taking a small stitch) down each point around the edge of the felt.

When you come back to where you started, continue with the same piece of ric rac, moving inward towards the center.

Keep on going, layering and tacking the points down. When it gets smaller, you’ll need to start pinching the rics and racs (ha!) so that it will fit better.

Then when you get close enough to the middle, trim off the end, leaving a little bit extra.
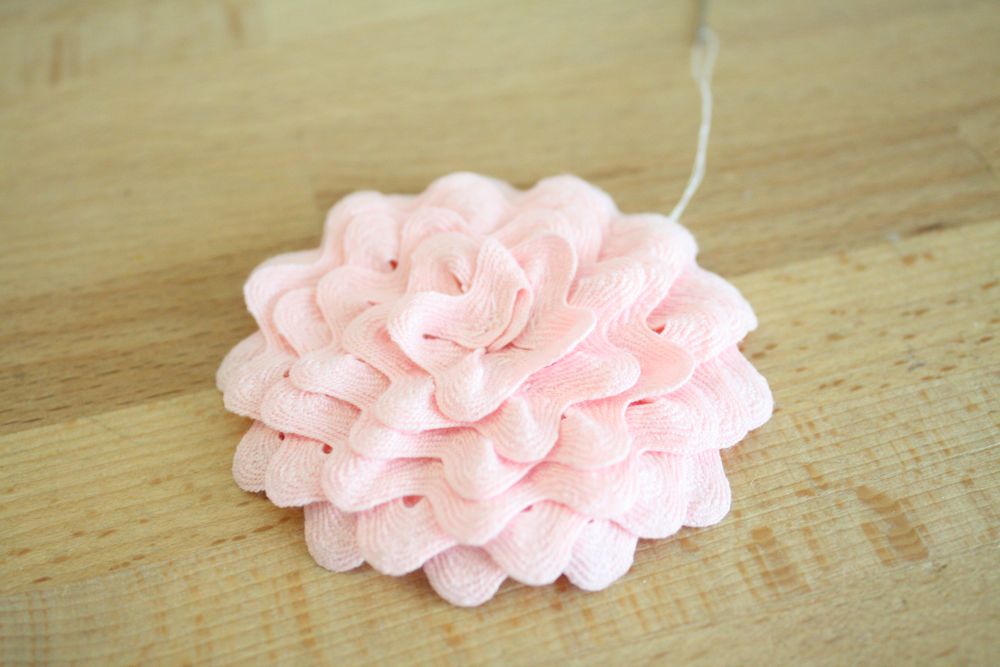
Then tuck that under and tack it down as well.

Add a button if you like, or leave it plain.

These are adorable on clothing or as pins.
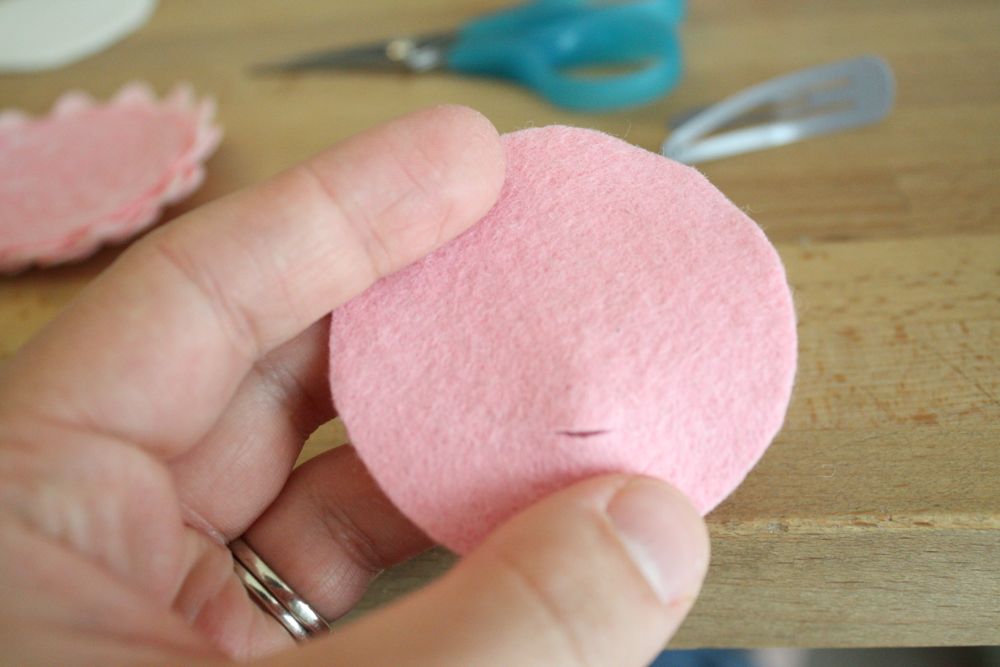
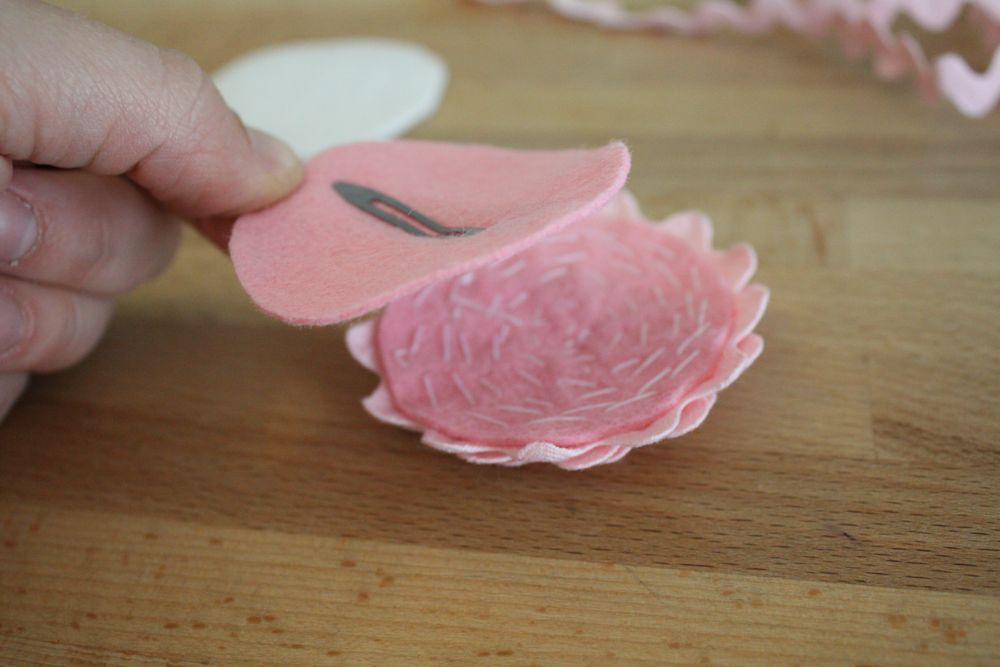
Then, if this ric rac flower is destined to become a clippy, cut a small slit in one end of your other piece of felt, making sure your clip will fit the size of the felt.

Insert the bottom of the clip through the slit.
Then hot glue the pieces together! (imagine glue in this pic)

Then you’re done! easy as pie and cute to boot.
Oh my goodness, you are killing me with the cuteness! Seriously, so adorable, and perfect for adorning skirts, and hair.
Oh this is so cute..and easy! I love easy! Thanks for sharing it!
Too cute and perfectly simple enough for me to tackle
so definitely on my to do list for this week – thanks muchly:)
very cute and easy little button to make! Thinking of smaller versions for barrettes with left over ric rac 🙂
Very sweet! And super easy to follow tutorial, thanks for sharing!
Good blog, nice writing Beautiful photos, I like very much
Congratulations for selecting as blog of notes
Best wishes, Keep it up
Biz and Legis, Online legal service providers
so adorable and perfect
this is so cute
Very cute! I really like them.
absolutely adorable!!!
super cute. they look a little like dahlias!
You have another hit on your hands! These are adorable…I agree with Erin they look like dahlias.
So cute! I may have to use that for my little baby head! 😀
OMG this is so great! I’m gonna make them NOW ‘coz I have all the materials in my drawers 🙂
How easy are these?!? So cute, Jess!
Those are so cute! Thanks for putting together the tutorial!
These are gorgeous! I’ve been meaning to make some ribbon flower clip things for my hair recently but these are so much prettier and more original! Now, where is my ric rac…?
Jess-
You rock. Good thing I was already headed to Jo-Ann’s today. ^-^
I have to have some of these!!!! i remember when Jenni showed us these and I almost died from how cute they are but like you, I never made any!! But now that I know how, I WILL make some!!! I love them!!!! They are SO cute and simple! I want some for me and my baby!!! 🙂 Can’t wait to see you in a few days!!!
You amaze me, woman! These are great, but everything you post is!!!
By the way, how is the license to sell thing going? I get people asking me all the time to sell things they make using my tutorials and I’ve been thinking about doing that.
I don’t mean to sound redundant, but those are so cute! And so simple! I love it! 🙂
I haven’t seen them done like this… I love it! SO cute!
Really Your Post is very good and helpful. i am very happy to read your post. Keep update I will return soon. My webstie World Cup Cricket
Recent news
The Daily News
money exchange
World Cup Cricket
Unlimited Backlink Free
Unipay 2 u
Earn Money
Thanks
ADORABLE as always!! Thanks so much for sharing!
so cute and simple. Thanks so much for sharing!
This is seriously too cute! I love this…I always look at rik rak and think “meh”. OK, so not anymore!
Oh sorry it’s ric rac…whoopsie daisy!
They are very cute. Definitely I’m gonna make one of those for my daughter. Thanx for sharing this easy and cute handcrafts with us.
So, so, so, CUTE!!
Gosh, it’s lovely! I’m sure I’m going to use it! Actually, it’s the first thing in your blog that I dare to try to make…
I totally love ric rac and I cannot wait to try this!
I love it simple and adorable.
I’m thinking the jumbo jumbo ric rac that you pay for by the yard at fabric stores and big buttons as decor in a little girl’s room! Super cute!
Following up from my earlier comment, I made one last night and it looks really pretty! I used some velvety ric rac I’ve had for years, and the texture gives it an extra dimension – there’s an eye-catching tip for you! Thanks for posting this brilliant idea 🙂
Simply cute and so many variations could be made using this idea! Thanks for sharing.
Thanks for idea!!!
Absolutely adorable! Thank you for sharing.
So adorable! I love these!
I found your blog on the “notable blogs” list today… I LOVE this idea. I’m totally making these this weekend!
Sooo pretty!! I linked to your tutorial on Craft Gossip Sewing:
http://sewing.craftgossip.com/tutorial-ric-rac-flowers/2011/06/16/
–Anne
Darling! I will try that for a brooch.
I love this, Just one more hair piece to go along with the many others in my top dresser drawer. Only one thing. ONLY HAVE ONE HEAD OF HAIR
I love this idea. They are so cute and I will try that in a quilt
Very cute!
Cute and easy!!! Thanks for sharing.
I´ll feature on my blog. Hope you don´t mind
hugs from Brazil
HI TFS they look great i love the idea of the clip but i had a thought of hot gluing the top half to a head band then turn the head band over and use more hot glue to attach the bottom circle. cant wait to hit the shopes for the bric a brac. this is my first time on your site but i will be back cheers susan from australia
I love this! It’s absolutely adorable. Thanks. You made my evening.
This is so cute and so creative! I need to find the motivation to go out and try this!
Such a cute idea. Thanks for sharing your creativity.
Thanx for the awesome idea! I made 1 today and turned it into a hair clip. It was so simple and easy, something I can make for all my girlfriends. Such a great idea
Thank you for taking the time to share this, it sure is cute. One question however, I used a narrower rick rack because I had some leftover and it didn’t turn out as ‘fluffy’ as your photo appears. Could that be why you say you use 3/4 inch? Hope I can find some that wide here in Austria!
Not giving up yet!
These are so cute! I can’t wait to go to Hobby Lobby tomorrow & get the stuff to make a few. Thanks so much for sharing!
very nice! thanks so much for sharing this great tutorial. I’d love it if you’d drop by Craft Schooling Sunday!
Aww. This is too cute. It looks machine made
waw, this is lovely, I opened your site fro my office, can’t wait to reach home and do it with my 6 and 3 years old daughters.
waw thanks a lot, this is really lovely, I checked your site from my office and can’t wait to reach home and make one flower clip with my 6 and 3 years old daughters, thank a lot
These are SO pretty and crazy simple! Thank you so much for sharing! 🙂
I made one today using a polkadot ric rac, very quick to make, thank you for sharing! Paula
So cute, love it.
Oh my! Pure cuteness!!!! I have been looking for something a little different to do for my daughter (age 2) a hair clip & matching pins for me & her. I’m looking forward to making some :0))
This is easily the cutest flower!
Awwwh! This is beautiful! Sooooo beautiful! Thanks for sharing it.
very well!!!Thanks for sharing it.
Can i post in my blog?
smauny.blogspot.it
Not only are these adorable but I love it when I find someone else who possesses the type of WIT that I have. Keep crafting and smiling!!!
entirely TOOOOO Cute, can’t wait to try some. I think my little granddaughers would look adorble in these. P.S. I have lots of neat ric rac from my grandmother’s stash making it even more neat to be able to share that with them. Thanks!
What a wonderful idea and so easy!!! I’m thinking if straight strips of fabric or textured strips can give flower effects too?
I have so many little girls and granddaughters to make these for. They look cute and easy.
it is very nice and very easy to make . thanks for sharing.
J’ai trouvée ce blog par mégarde puis je ne le regrette pas du tout !
These are adorable. Think I need to dig out the ric rac I saw the the bottom of my sewing basket. Thanks for sharing.
Simple, sweet & easy,
I’m horrible @ following instructions & patterns! You made this so easy & clear! Thank you for sharing!
I sew Owls (never w/pattern) so it’s easy to say no 2 are ever alike!
I’ve been looking for the “perfect” spring time owl ideas, I can’t wait to apply your flowers as their eyes!
Thank you!
Marcie Darcie
Champlin, MN.
ITS A VERY GOOD IDEA FOR THE USING OF RIC RAC LACE. I AM SURPRISE ABOUT THE USE OF RIC RAC.
This is pure fun! I would never have thought of this and will have a ball making them. Thank you for sharing this great idea.
Absolutely adorable! Hope to make some for an orphanage.
Thank you for sharing.
How can I save this pattern!!! My Aunt Lois LOVED ric rack…..I would like to make these for my cousins. They would love it!!
wow a BRILLIANT idea.. Sad that I don’t have any little girls to make them for but an excuse to put some on cards. Congratulations
those little bee or butterfly buttons in the center would be adorable
I love these going to make some for my Grand-daughters hair.