


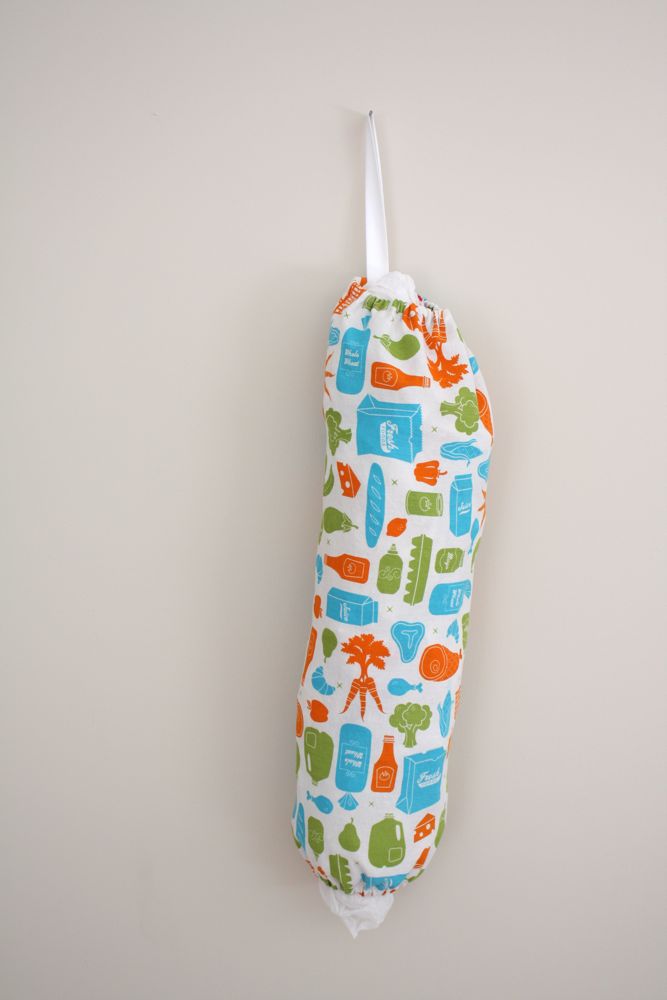
I’ve needed a new one of these grocery bag holders for awhile now, and have been hanging on to the perfect fabric for one, so finally I just forced myself to sew it up. It was a quick sew (even with taking pics) so I put together a little tutorial for ya! There’s french seams involved! Très chic. As chic as a grocery bag holder can be I guess.
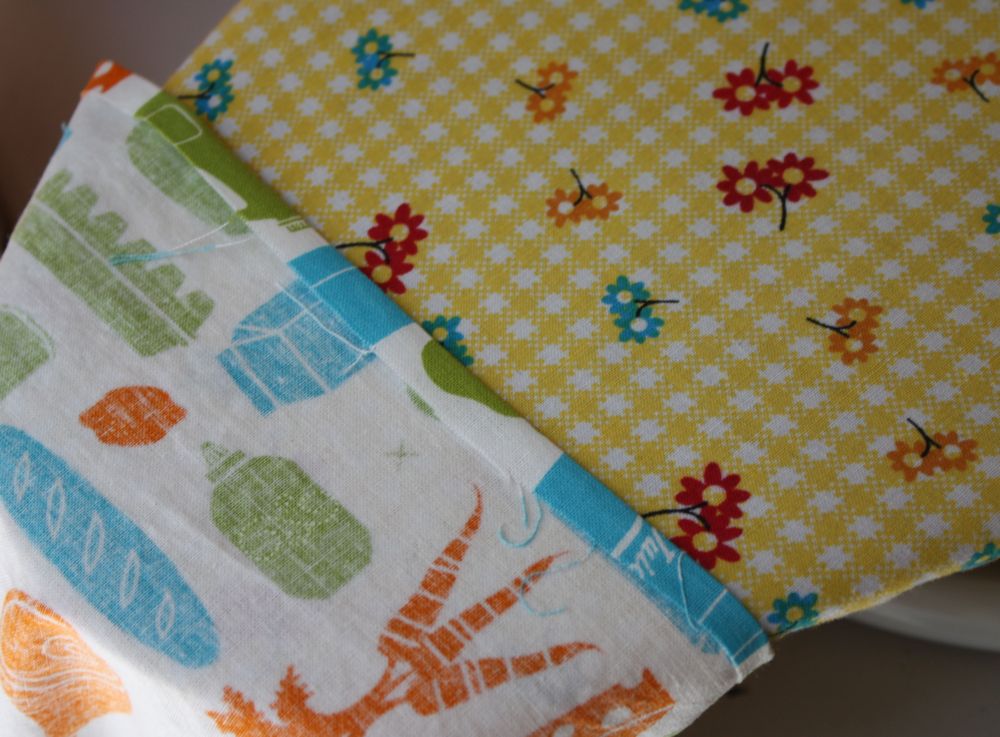
I made it with some fabric by Robert Kaufman-the Suburbia line. The holder only needs a fat quarter of fabric, so it’s perfect for those fat quarters you keep buying with no plan for. Come on, I’m not the only one that does that!
You’ll need:
one fat quarter of fabric (quilting cotton) They usually measure 18″x22″ if you’re cutting from yardage.
12″ of twill tape or ribbon
1/4″ elastic
thread, sewing stuff
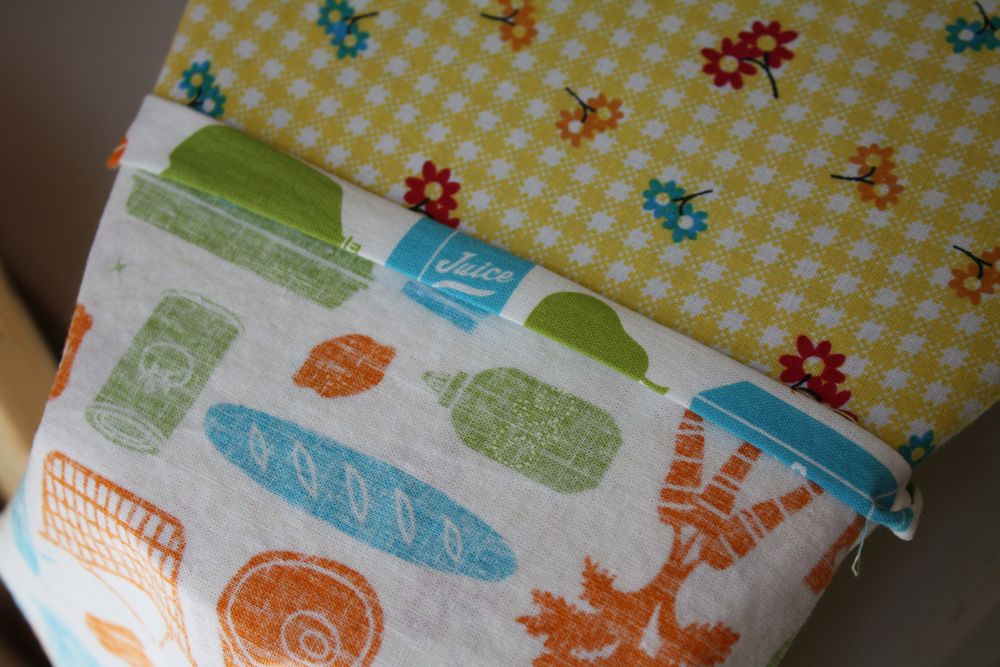
First off, make sure your edges are straight on your fat quarter, and that it is cut as evenly as possible.
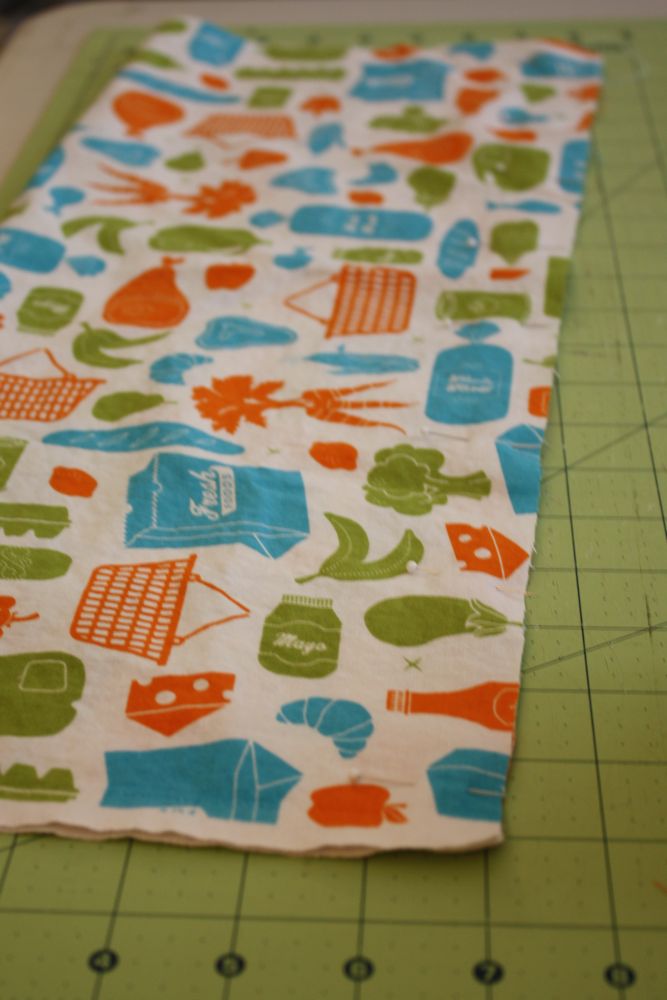
Then fold it over, wrong sides together, on the side that measures 22″, and pin that side.

Sew down that side with a 3/8″ seam allowance.

Then turn wrong side out and press that seam.

While it’s still wrong side out, sew down that seam again, this time with a 5/8″ seam. Tada! you just made a french seam. Now all the raw edges are enclosed and so pretty.
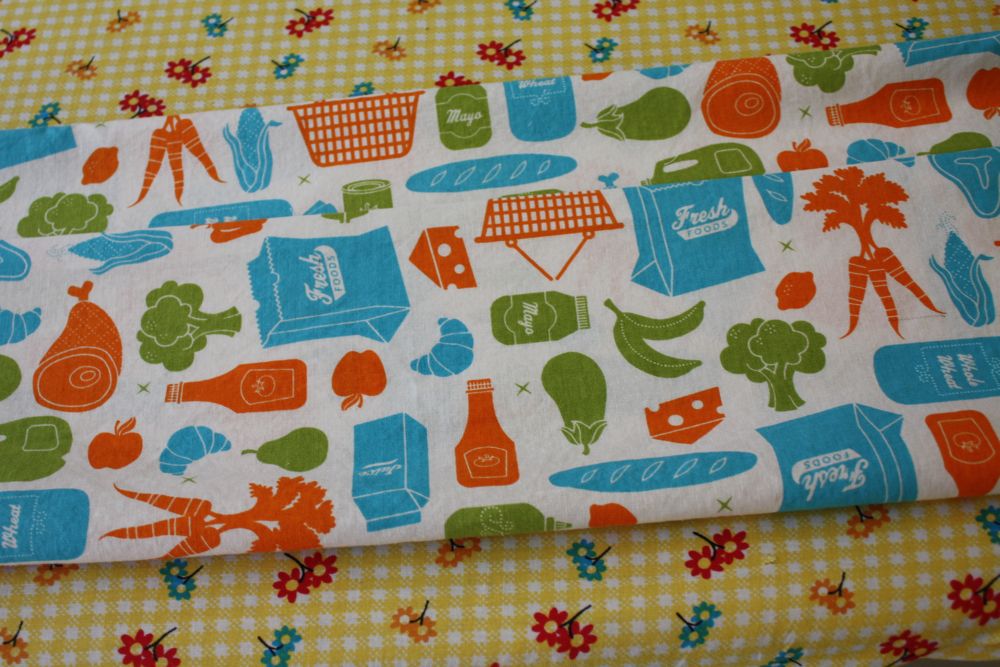
Turn right side out and press the seam. Take care not to press the edges of the bag so that you don’t have creases down your holder.
Then on one end, fold and iron in your raw edge about 1/4″.
Then fold and press another 1/2″ down.
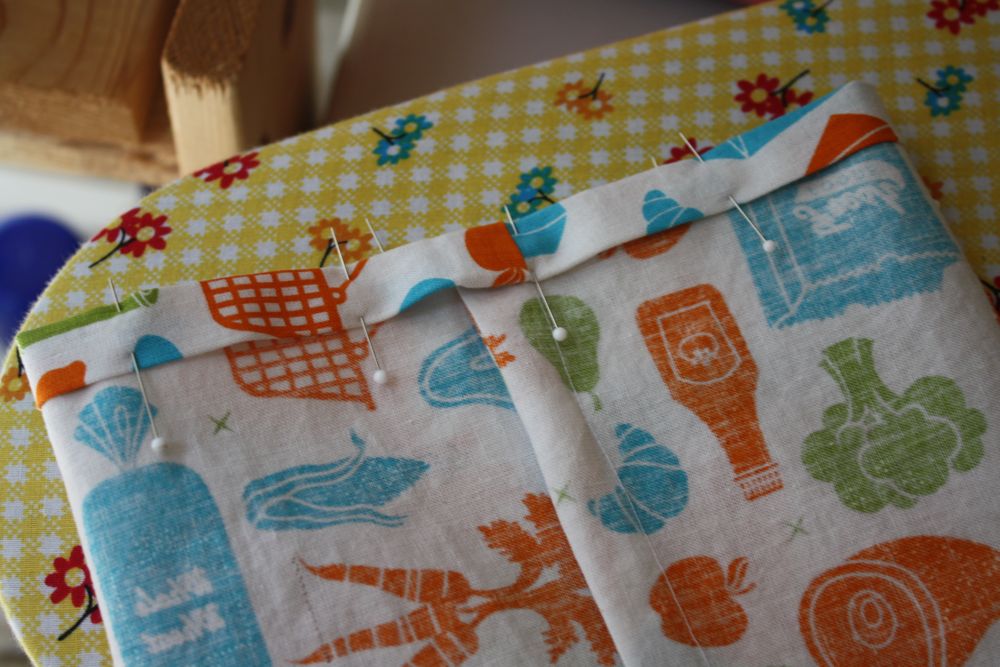
Pin around the end.
Repeat with the other side, and on one end, take your 12″ piece of twill tape or ribbon, fold it in half, and insert into the casing like so. This is your handle.
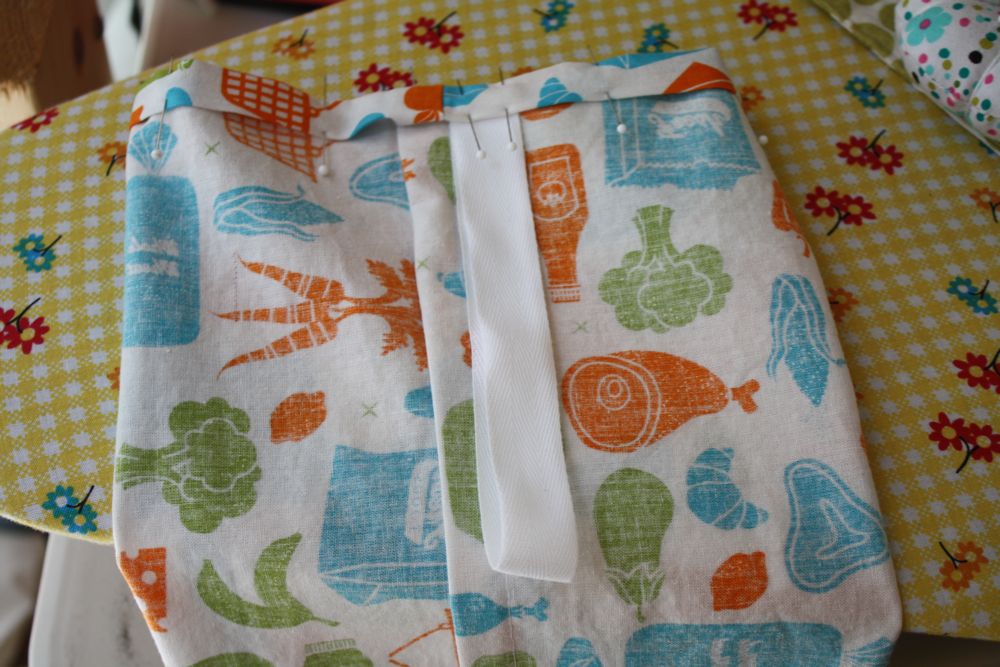
(no picture, sorry!) Then sew around each casing, leaving an inch open for the elastic.

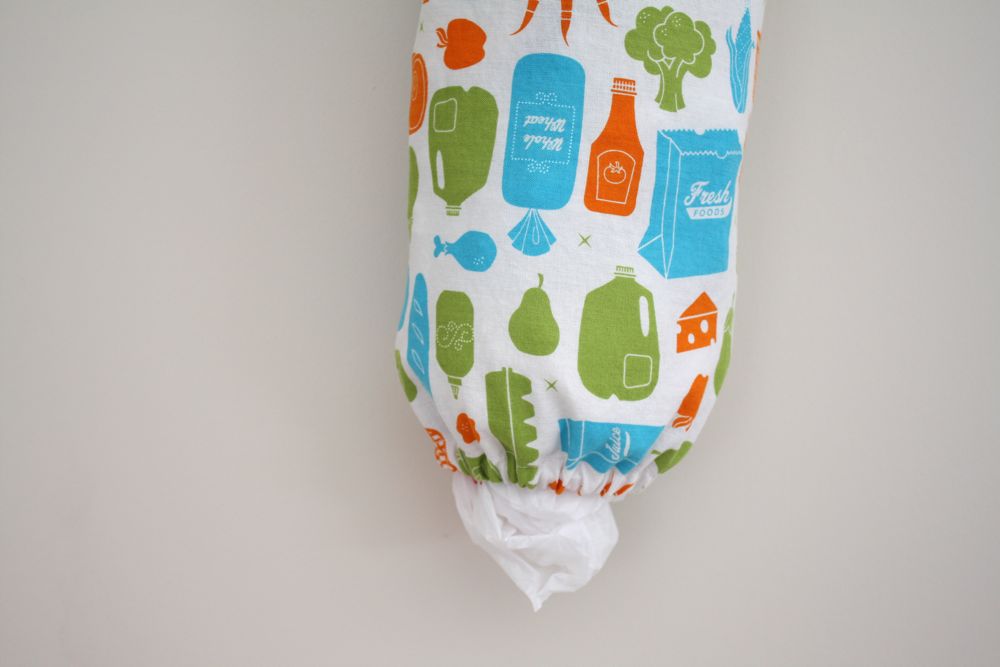
Cut two pieces of your 1/4″ elastic 9 inches long, clip a safety pin to one end, and insert into your casing.
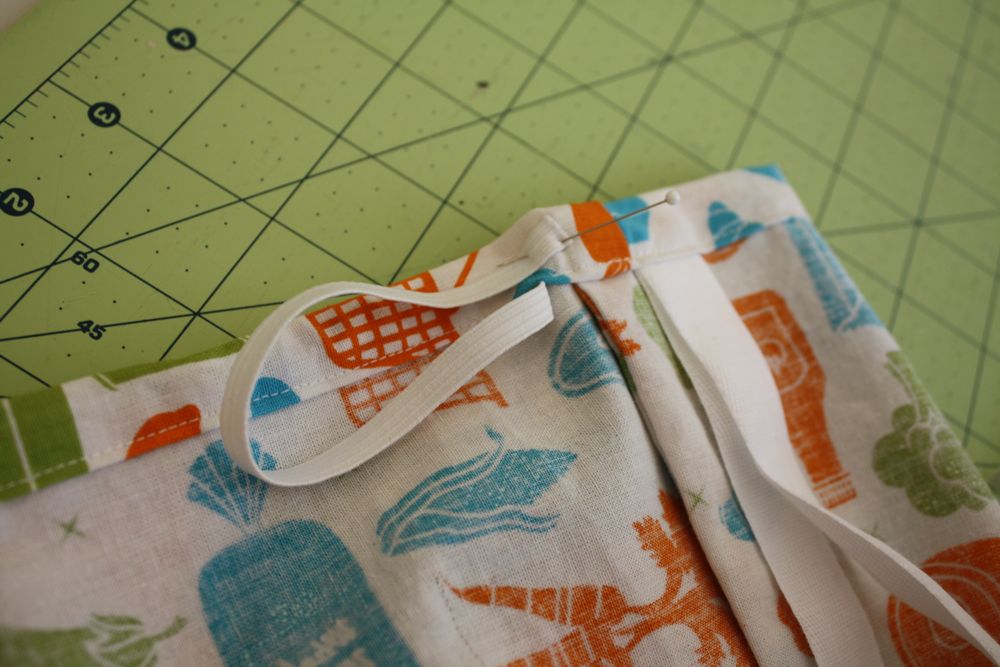
I pin the end of the elastic next to the opening so I don’t lose it inside the casing.

Once you pull both ends through, sew them together…

and then sew your opening shut.
All done with your cute and easy grocery bag holder. I would have shown it hanging in my pantry where it really goes, but that is a dark place no one but me should have to look at. At least I have this cheery fabric to look at now!
Love that fabric! Martha Stewart had a tutorial for one of those a while back using a dishrag which can also be pretty fun, because then it matches the rest of your kitchen automatically!
http://cartwheelingdowntheaisle.blogspot.com/2010/07/project-that-doesn-cost-anything-and.html
My grandma used to make these 🙂 A great way to clear all those bags out from under my kitchen sink!
Oh my goodness thank you for this easy tutorial! I have a ton of plastic grocery bags all over the right side of my pantry. I am going to have to whip one of these up during naptime someday and clean up that pantry!
Yes! I have been wanting to make one of these for so long because the one I have has wine bottles on it, and I don’t even like wine! I can’t believe this only takes a fat quarter. That fabric is awesome. Thanks for the how-to, Jess!
It’s so funny, I just bought some of this fabric this past week with no idea of what I would do with it. What a great idea, thanks for the inspiration!
I saw a tutorial of this on youtube one time. I should make one aswell.
LOVE your fabric!! This is so cute – but I use reusable totes at the grocery. I think this is the first tutorial of yours that I’ve come across and not said “I’ve got to make that!” Still adorable though!!
I love the fabric too. And I was *just* thinking yesterday, when I got home from the grocery store, that I need to make one of these. Thanks!
And no, you are not the only one who buys fabric just because. You’re good for only buying fat quarters. I go by the yard. 🙂
that fabric is so cheery and bright! it is true, sometimes you have to craft for yourself.. a grocerybag dispenser in a place no one else will see still can be bright and cheerful..good idea.
the lazy crafter in me made the dispenser from a cut-off pant leg..just ran a thread of elastic through the top and bottom. i thought, it hangs behind the kitchen door, no one’s gonna see it..
but now i think maybe i should cut up some pretty fabric and make a new one- just for me to smile when i see it.
great tutorial. thanks!
I love the jeans idea; what a great recycling idea!
OK, you talked me into it. I need to make a couple of these… maybe three. I use reusable totes most of the time, but I still need a small stash of these for cleaning the litter box and when I walk the dogs. I’ll hang a small one with my dog leashes so they’ll be handy when we head out the door.
Thanks so much!
Jan
Nice tutorial thanks! I drug my feet too long and my husband bought an ugly navy blue one. 🙁 thanks KRisty form http://www.apronsandapples.blogspot.com
This is great. I’ve thought about making one, but hadn’t taken the time to sit down and plan measurements, etc. Thanks for doing the dirty work.
Love the fabric you used.
Your tutorial came right on time! This bag is the first on my list of things-to-sew. Thank you for the tips! I had a pretty good idea how to make it- kind of like a cloth clothespin bag that I’ve made countless times, but yours is great, too! Thanks again.
Found this on Pinterest. I am constantly buying fat quarters (when they are on sale) so I can make a ton of these:)
This tutorial was so easy to follow and is a nice quick project! they turn out beautiful and make a nice housewarming gift inside a basket. thank you for such a great project!!
Hey Jess- I know this post was a year ago, but I used it today to make one for my husband’s grandma. Thanks 🙂
Thanks! I made mine tonight and it took 30 minutes… as I’d never used elastic before LOL. Very easy, thanks so much.
What a great tutorial! It was fun and very descriptive! Can’t wait to use all those fat quarters I always buy with no project in mind!
wonderful! Thank you for the clear tutorial! I am headed off to my sewing room…. 🙂
Thank you so much for posting this! I just sat down and made one for my mom. I’ve been looking for a simple and cute way to do it, and it worked out great. Thanks again!
I just whipped this up today and it turned out great! I did struggle getting the elastic in, but that’s how it typically goes when working with elastic. Nothing a chopstick & safety pin rigging couldn’t fix 🙂
That fabric is so cute! I’m going to make a couple of these for my new house to keep in the bathrooms so I’ve always got a grocery bag handy when I’m emptying the bin. I always use grocery bags because otherwise they build up and I end up with a sea of them spilling out of a press or drawer! 🙂 Thanks for the tut! 🙂
Thank you so much for the tutorial! I made this yesterday and found it really easy, even with my limited sewing skills 🙂
This comment has been removed by the author.
Made this today! Thank you for the wonderfully easy tutorial!
Just made this for my friend for Christmas. It’s so easy. Thank you for posting this tutorial. She will love it!
Wow! This looks great! I am so impressed!
My mom made one for me from a dish towel several years ago. I’ve had to replace the elastic in the bottom once, but the rest is still like new. Think I’ll make this as Christmas gifts next year. ~Ruth
Love it! I love the French seam instructions – I didn’t know how to do that before. I made one (in this exact fabric) for my mom & will be making more for my grandma & friends. Thanks for the tutorial!
hi i made this today and it came out so cute. I blogged about on my brand new blog and linked back to this tutorial hope that is okay 😀 here is the link if your interested http://misscaracrafts.wordpress.com/2013/03/24/bag-bag/
Thank you! I just make two. One for myself and one as a gift!
Just made one, it came out so nice with the finished seams.
I love your fabric, made this one for my daughter, Thanks 🙂
My Sunday morning project. I had a pillow sham that I don’t use any more and decided to use it. Thanks so much for this fun and easy tutorial.
Just made this is less then 20min. Thanks for the fabulous easy to follow tutorial!
I’ve just completed this project & it’s SUCH an easy to follow tutorial ….It looks GREAT.
Thanks you so much.
Hi! I belong to a Facebook page that likes to do a simple project every week. We’d like to use your grocery bag next Saturday. I just didn’t want to post your tutorial with out your blessings. Please let me know if it’s alright with you? Thank you. Cindy.
sure!
Thanks for the tutorial. I had never used a sewing machine before so it was very helpful. even though it’s not the best work, it does the job!
I have made over a dozen of these bags and my daughter-in-law is giving some of them as gifts at her Bunco Club.I use all kinds of cute fabric quarters such as puppies, kittens, patriotic fabric, etc. I even made some with wine bottles for my wine loving friends. I also make them with drawstrings. I have mine hanging on the cabinet pull in my kitchen.
Thank you, I made my gorgeous carrier bag holder last night, and mine is going outside the cupboard, it’s too nice to go inside!
I made the grocery bag holder from your tutorial today, and it turned out great! Thanks for posting these directions.
Today I made my third grocery bag holder from your tutorial, one for myself, and two for gifts. I just want to say “Thank You Jess!” for posting these great directions. Please know the effort you took to post this five years ago is still helping people today! Also, I appreciate the direction you gave for making the French seam. I’ve started using that in my other projects.
I didn’t have the right kind of ribbon on hand, so I made a handle from the fabric used for the body of the bag. I like that it matches, so that worked out.
Hi Jess
I love the simplicity of this pattern and made one today – wow – it really did just take 20 minutes! I hope it’s OK if I post a link (full attribution) to your tutorial on my site?
Thanks for the tutorial – I have just made a new bag for bags out of the curtain material I used for the kitchen so it all matches. Really nice to do some sewing again.
Have just made 2 of these – great tutorial. Thanks
Looks great and easy! Thank you, I will try it today 😀
Thanks for the pattern. I am going to make one for my granddaughter. She is starting her 2nd year of college, and will be sharing an apartment with several other girls.
I found your instructions easy to follow. I wasn’t sure about using a 9″ elastic for one of the top/bottom only so I just cut it in half… I guess that is what you meant hehehehehehe… thanks for sharing your wonderful designs! I looooooooove them all!