


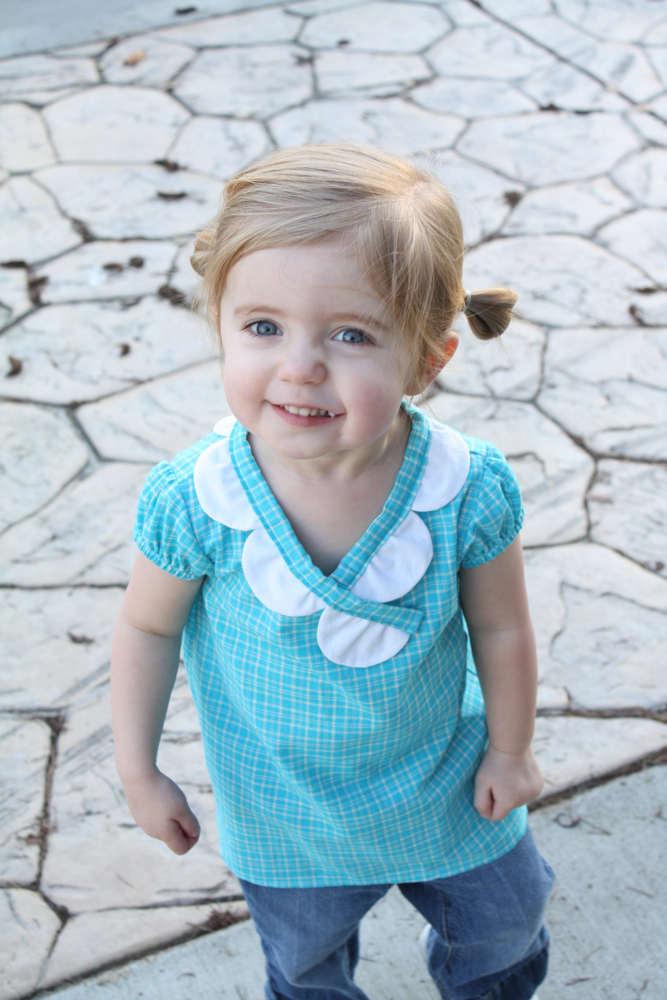


Hey guys-head over to Project Run and Play to see the tutorial for what I call the Scallop Shirt. (my thought process on this name was very short, lol)
Anyways, it’s simple and sweet, just my style. (luckily Sadie’s too, for now at least!)
Can’t wait to see the designers stuff this week! Should be awesome!
Click below for more details!
You’ll need:
main fabric (amount needed depends on your child’s size-I used probably 3/4 yard for my 2 yr old)
scallop fabric (a fat quarter would be plenty!)
thread
1/8″ elastic or ribbon for closure
button
1/4″ elastic for sleeves
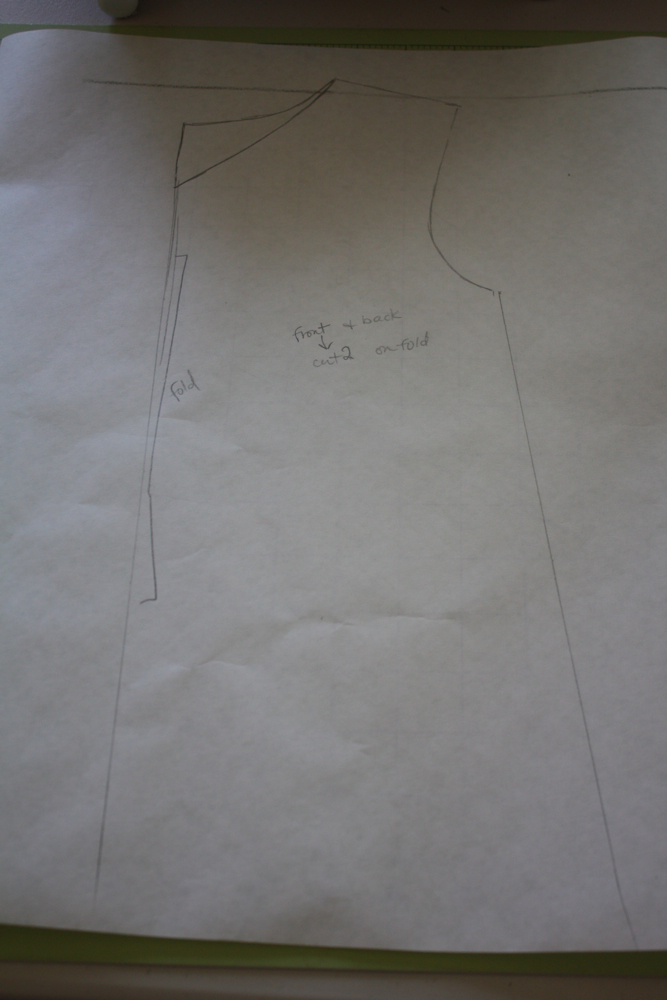
First off you’ll need to make a pattern-trace an existing shirt (folded in half) making sure to mark the back neckline, then trace a v-neck on the same pattern. I also made mine flare out a little on the sides for an a-line shape. For sleeves, you can use this post to help you make a pattern.
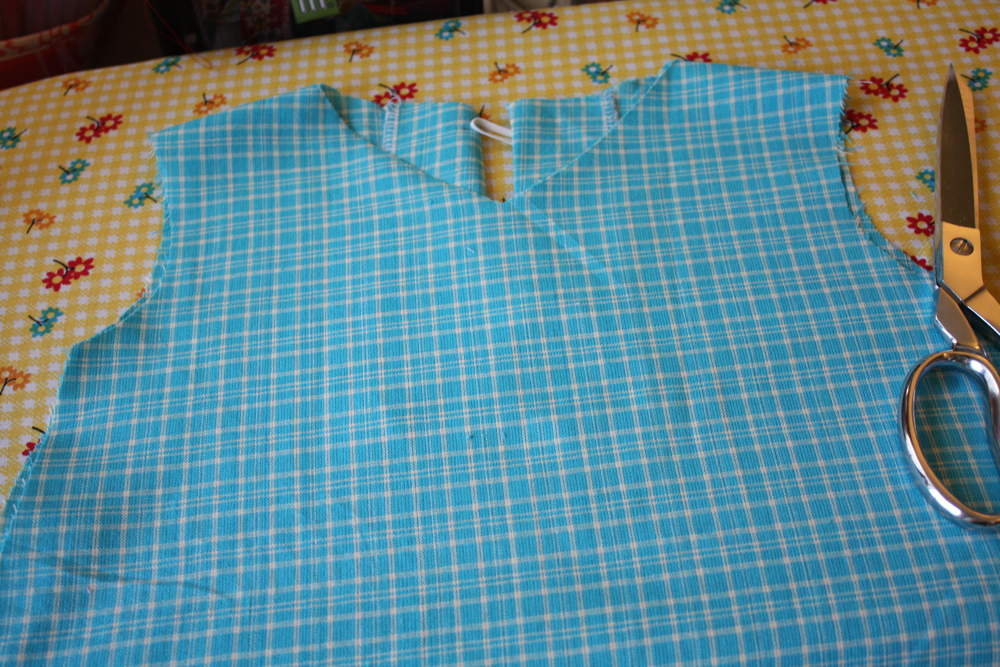
Then, cut out two pieces on the fold, and then cut the v-neck shape on one piece. Sew together at shoulder seams, right sides together, serge or zig zag stitch. Follow these instructions for a button closure on your back piece.
Next: your scallops!
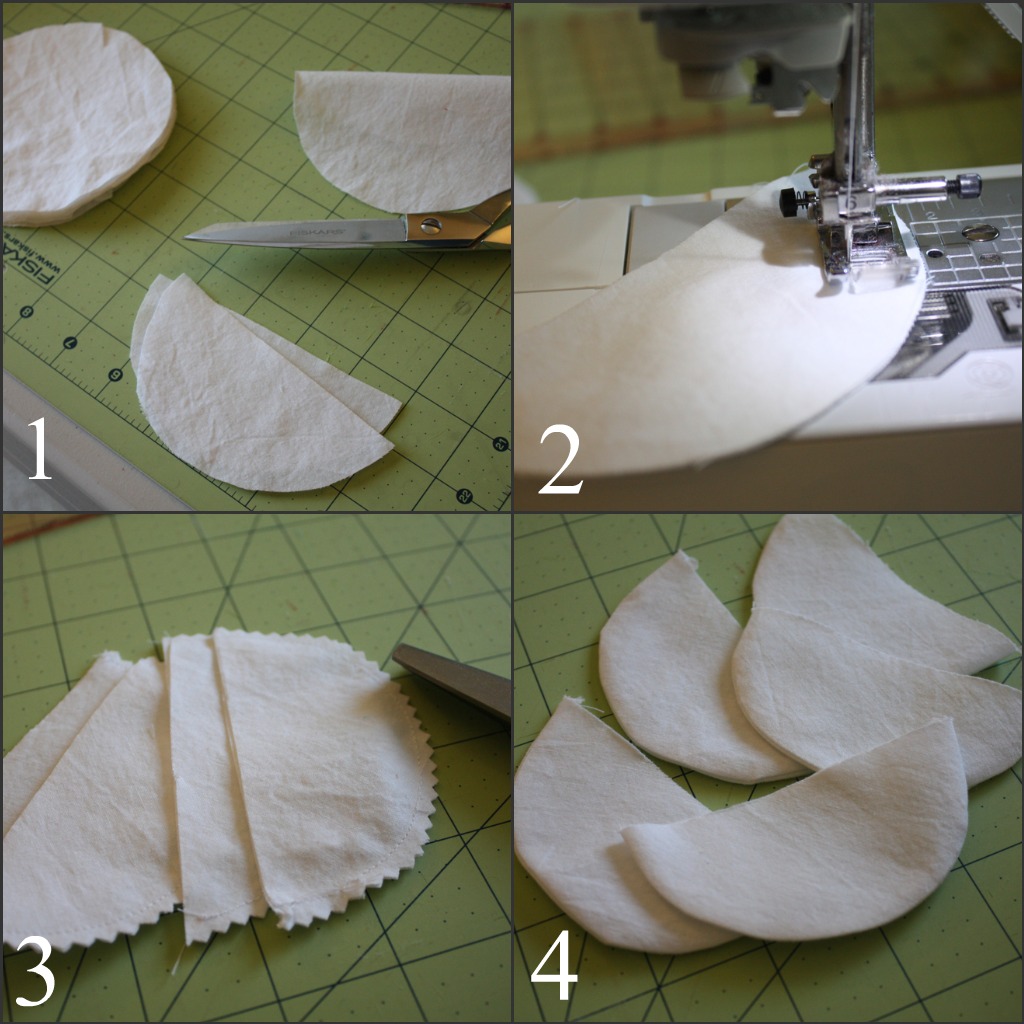
I used some bleached muslin for mine. I used a CD for a template and cut out 7 pieces. I then:
1. Cut them in half
2. Sewed around the round edge with 5/8″ seam
3. Trimmed away extra with my pinking shears
4. Turned right side out and pressed with my iron.
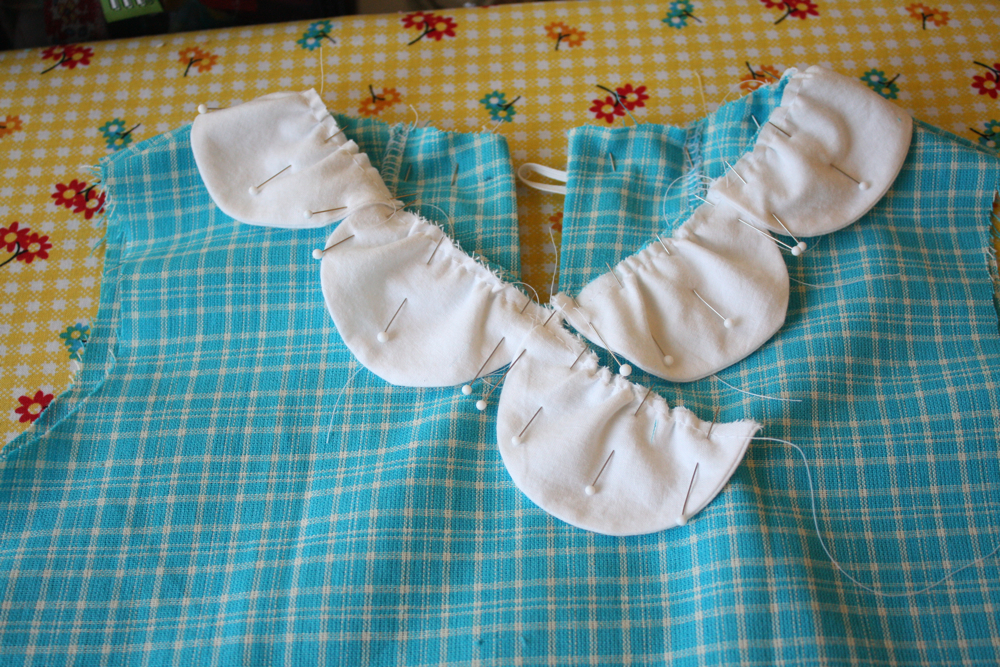
I then sewed a gathering stitch along the tops of the scallops, and gathered them a little bit. I laid them out like so on my shirt piece, and pinned them down, gathering more, or less, to make them fit around the neckline…one side as you can see extends a little bit, to add some interest!
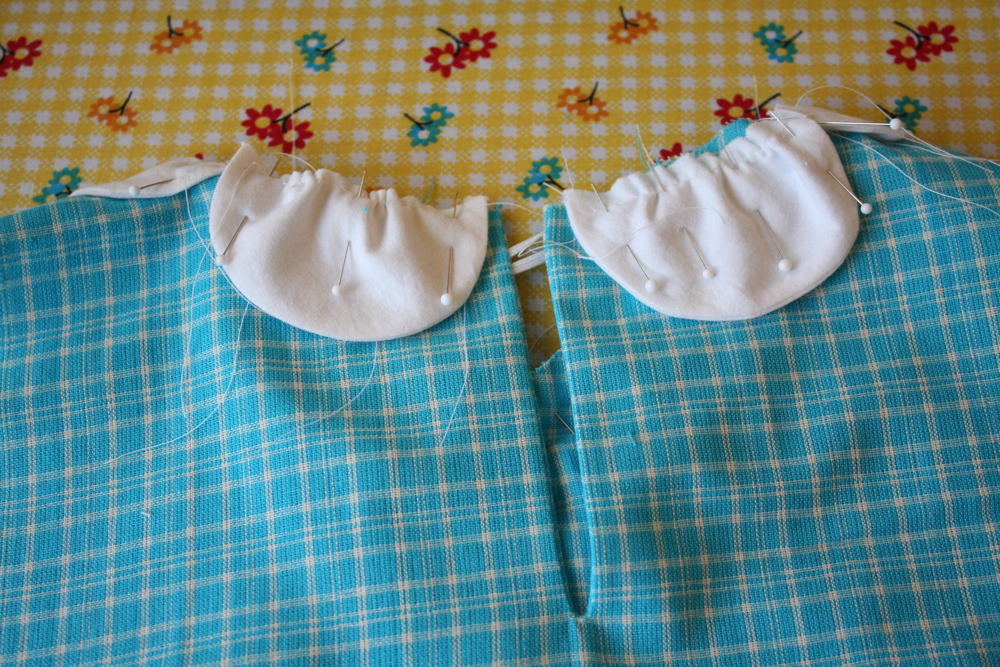
On the back, place the scallops about 1/4-1/2″ from the edge of your button closure. Baste into place along your gathering stitch and remove pins.
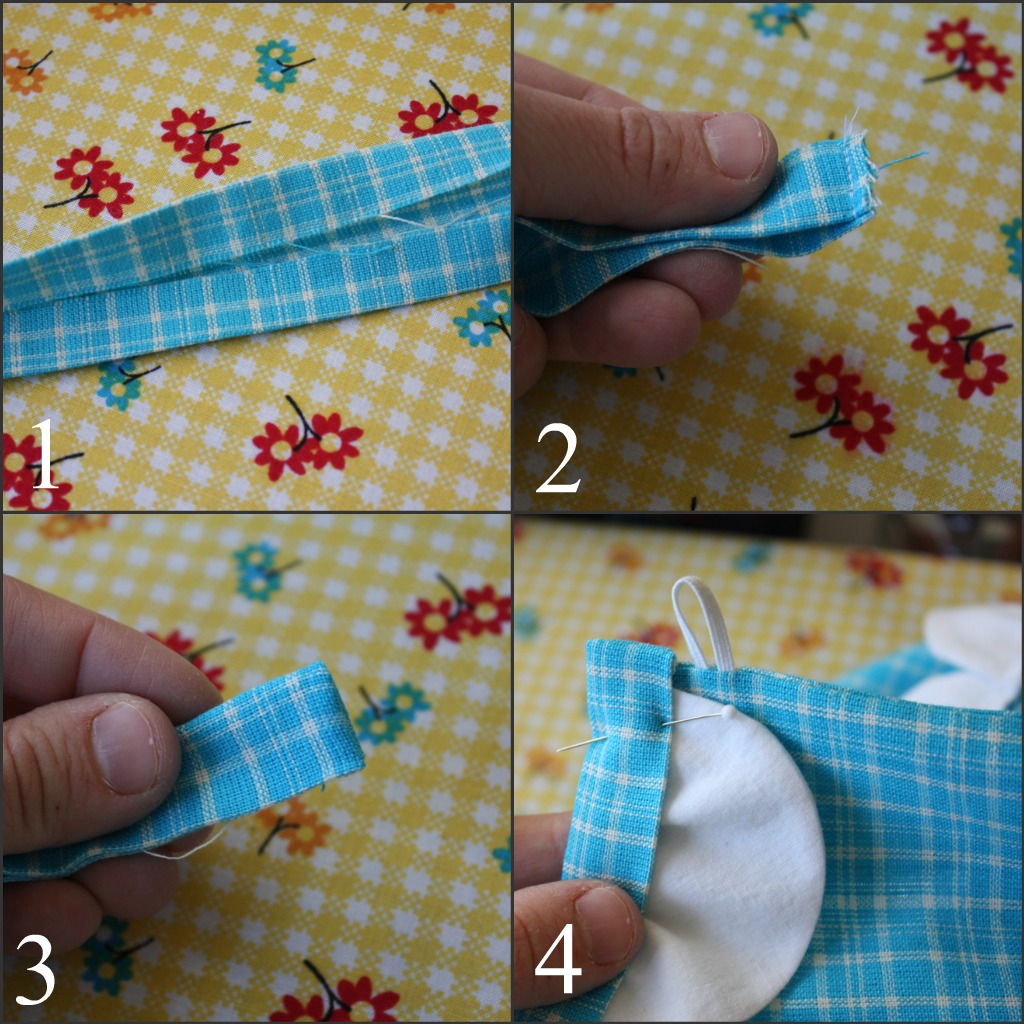
Next: the bias tape!
Cut 2 pieces of fabric, on the bias 2.5″ wide by long enough to go from the front of your v-neck to the back of your shirt+a couple of inches. Very scientific. 😉
Then:
1. Iron in half lengthwise, then fold in each side and iron them in as well.
2. On one end, fold it right sides together, and stitch like so, back stitch across the whole thing.
3. Turn right side out.
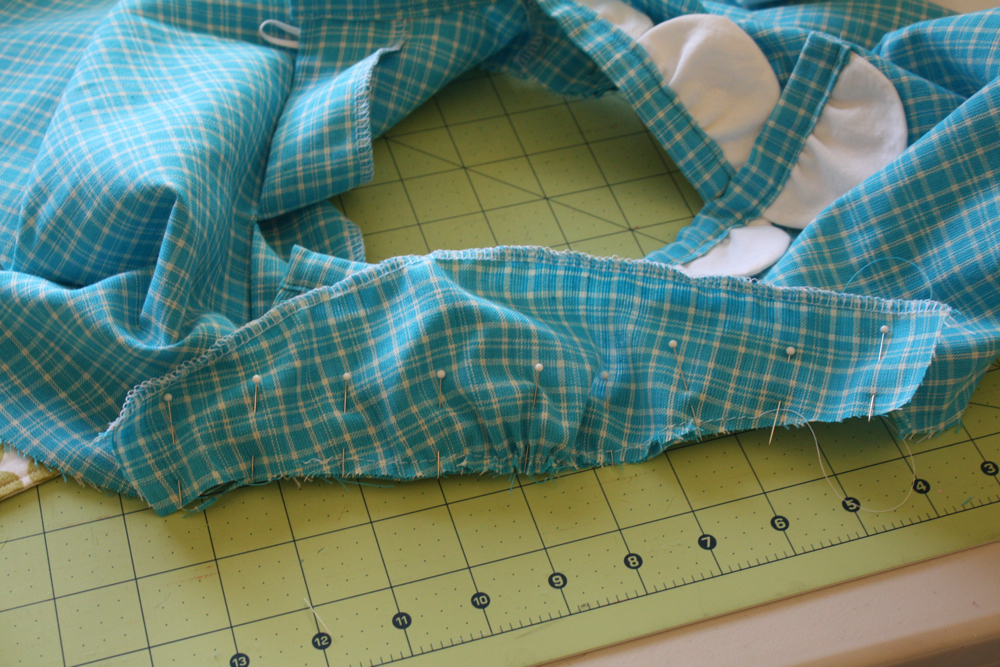
4. Place like so on the edge of the button closure and pin.
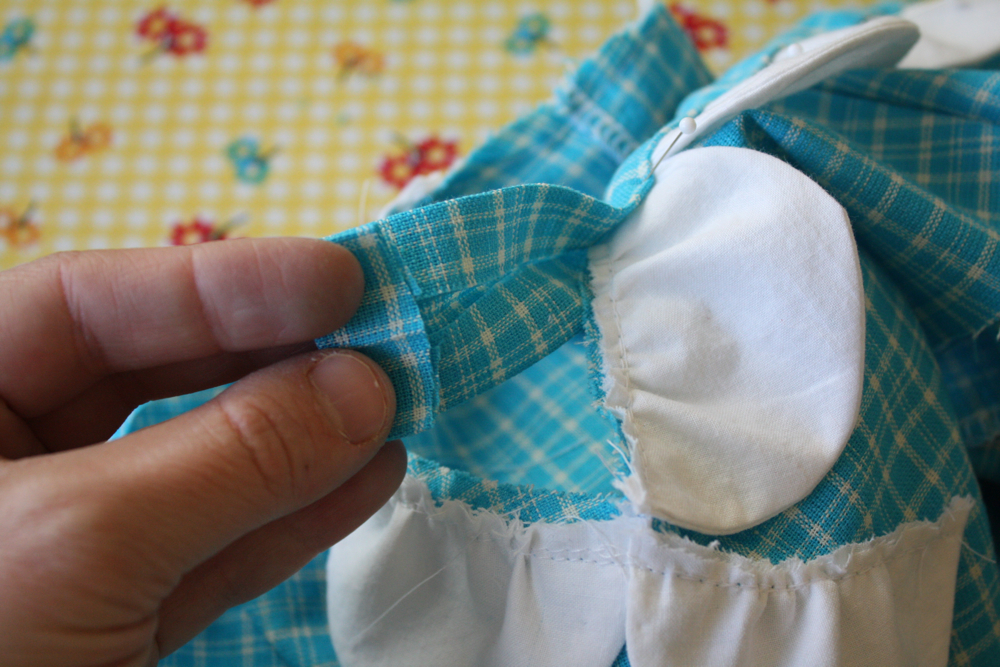
Continue pinning along, enclosing your basting/gathering stitches, until you get to your v-neck.

Trim it to fit, then fold the tape under like so, and pin it down.
Do the same on the other side of your shirt, only it gets a wee bit tricky when you do this side.
1. Pin along the neckline until you get to the v.
2. Cut a tiny slit in the bias tape on the inside side. Do not cut all the way to the middle!
3. Zig zag stitch around this cut.
4. Fold the bias tape around the v-neck…when it continues past the v, the entire piece of bias tape will now be on the front. Hope this makes sense!

Then I sewed the tape on, starting here:
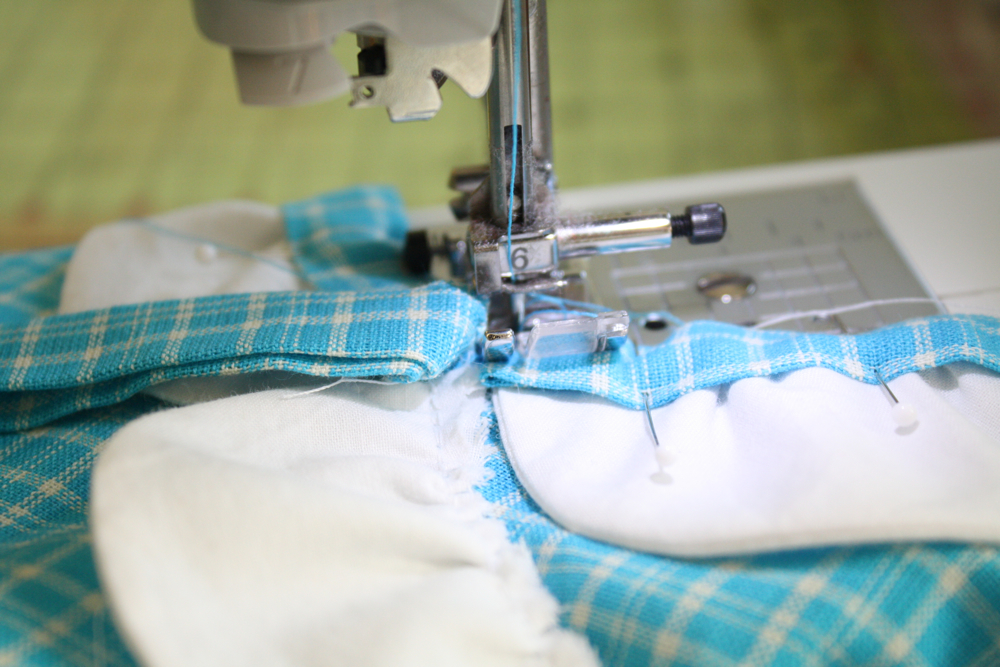
then sewing up the edge, about 1/8″ from the edge…just make sure to catch both sides of the tape, back stitching at the beginning and end.

Repeat on the other side, pinning the flap down of course. I tacked it together with some hand stitches around the v-neck also.
From here, I cut out my sleeve pieces, gathered them…

pinned them into my arm holes, sewed them in.
I didn’t take pictures of the rest because it’s pretty basic, but let me know if you have any questions!
Then I sewed the sides and sleeves right sides together, finished my seams, hemmed the bottom, and made a casing in the sleeves for my elastic, put that in using a safety pin, sewed the ends together, sewed a button on the back, and was done.

cute.
This shirt is adorable(so is your little girl)!
I wish I knew a little girl that I could make this for. Heck, I may just make it and put it away in hopes that one day there will be a little girl to give it to. 🙂
Oh this is soooo precious! Your daughter is bananas lucky that you are her Mama!!
this is adorable!!! love the idea! thanks so much for sharing 🙂
Adorable. I think I must make one for Baby.
SOOO cute Jess!!! I love me some scallops, and that sweet face!! Great job!
LOVE IT! Such an adorable shirt for such an adorable model! Can’t wait to try one of these! Thanks for sharing and for all your inspiration 🙂
Love the shape/size of the scallops, the blue, and Sadie’s piggies.
LOVE her hair!!!! and the shirt is now on my to-do list!
So cute! I’m heading over to check out that tutorial, my little girl needs some summer clothes and this top is too cute…so is Sadie!
This is just too cute. I love the shade of blue and the plaid print. Adorable!
Very cute, love that blue fabric! Great photographs too!
Love what you did with this shirt and the fabric, just gorgeous. Am also thinking could make this style in vintage fabric and use wide cotton lace where you put the scallops. Oh the ideas you inspire me with. Love your blog !
Such a cute shirt. And a super cute little pursed lips face to go with it. 🙂
So adorable, both your daughter and her shirt!
my first time visiting your site…I love the simple way you change things up into whole new ideas! Loved the banners, the scalloped shirt, and my favorite is the vintage dress. Nothing not to like there! The fabric is great, the design, and the model isn’t too bad either. Will visit again, and again……
Just a quick note to let you know that a link to this post will be placed on CraftCrave today [16 Feb 12:00am GMT]. Thanks, Maria
You little girl is just precious! Your little shirt rocks too!
Is it just me, or does Sadie get more a dorable with each photo shoot? x.
Can I say SUPER CUTE hair do!!!! Super cute girl too! Love the shirt. Kinda reminds me of cinderella. My daughter would love it. Thanks for sharing your gift!
I’m so jealous of Sadies hair, clothes and cute face.
Hope I’m able to make such cute clothes like you when I’m a mama.
I love it! I love it so much I rushed right out and made an outfit based on that neckline idea – here’s the link if you get a chance to check it out. My very first attempt a kids outfit – no kids of my own yet, just puppies.
http://courtneysoleil.blogspot.com/2011/02/scallop-shirt-and-bloomers.html
Love you blog!
Take care!
– Courtney
This is great! I’m in love with scallops. I’ve posted it on my blog, The Handmade Experiment in a Must Make Monday post – http://wp.me/pkcUM-DO
OH MY GOODNESS!!! I can’t look at the shirt for looking at that PRECIOUS! PRECIOUS baby girl! WOW! Cutie pie!