


Check out my freezer paper project today over on Kojo Designs’ Gifts for Guys series! There’s sure to be tons of fun projects for the guys in your life. Can’t wait for some inspiration!
Happy (manly) crafting!
I love to sew! Lots and lots of cute girly things for my two daughters.
I just don’t make much for the guys.
It’s kind of tricky to find something they’ll like that’s not too girly, or too homemade, or whatever else isn’t allowed by the male species. So, I was soo excited to hear that Kirstin and Jordan were putting together this Gifts for Guys series! I can’t wait to see what everyone else comes up with.
I stuck with something pretty basic-freezer paper stenciling a t-shirt. Not earth-shattering by any means-but super easy to customize to your recipient.

Like, maybe he lives in Northern California?
and has a lot of state pride?
and will wear whatever I make him? or else?

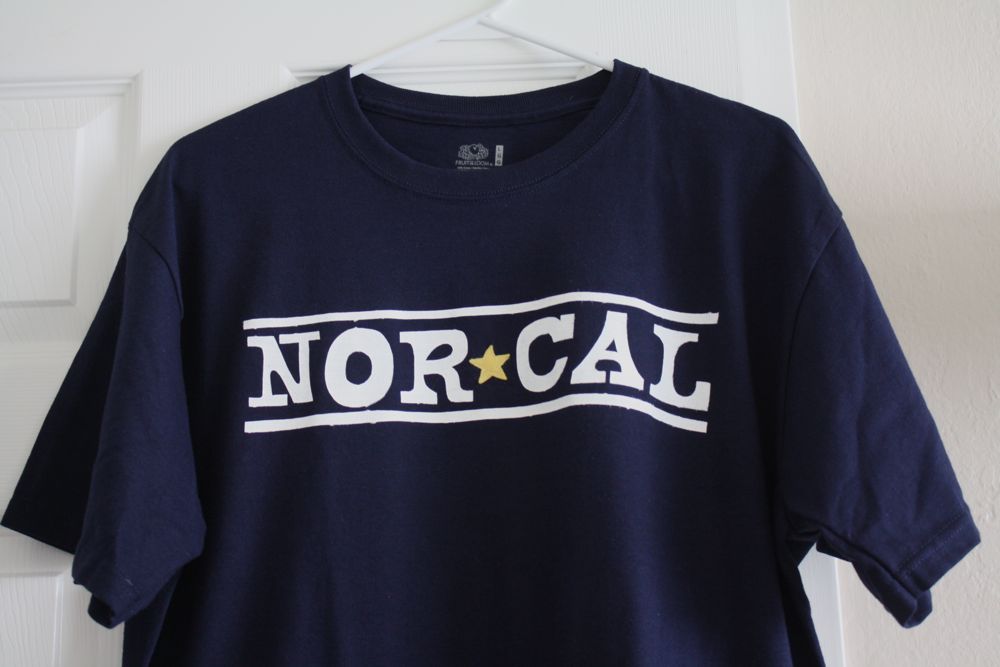
Hence, this Nor Cal shirt was born.
Here’s what you’ll need:
freezer paper
(next to the foil, baggies, etc in the grocery store…one roll will last, I’m pretty sure, your whole life)
cutting tool
t-shirt
sponge brush
fabric paint
pencil

First, decide what you’d like to stencil. For me, it was the Nor Cal logo-but I couldn’t find one large enough online-so I copied it as best I could freehand-ish. Trace with a pencil on the papery side of your freezer paper. (the other side is shiny)

Now using your cutting tool, cut out all the spots you want to be covered with paint. Make sure to keep the middles of letters!

Position on your tee…

…and iron onto your tee-with no steam. Add your middles of letters in too! Make sure all the edges are well ironed and that you have a good seal. Inevitably you will have some leaking but hopefully less than I did this time!
Also, make sure to put a piece of cardboard inside the shirt-or you can iron another piece of freezer paper to the inside of the shirt so the fabric paint doesn’t leak through.

Next: painting! The trick I use is to dab the paint in from the edge of the freezer paper, so you’re not smushing the paint under the paper. Does that make sense? I did a good 4-5 coats of this white-on-navy so it would be nice and bright white.
I also added the star in the middle with some yellow felt instead of painting it-it adds some dimension and I like it cause it’s cute cool.

then tada! You have a cool (not cute) custom tee!
Then hang it up and take a picture-cause there’s NO way my hubby was going to model this for me. 😉
LOVE this! totally great idea… i am doing an all handmade christmas (ok more like mostly) and i was in desperate need for boy ideas! thank you thank you thank you!!!
~selina
what a great idea, it’s always so difficult thinking up handmade gifts for guys (that they’ll really appreciate), thanks 🙂
I have a quick question (or two), Did you let the paint dry in between coats? And also, did you iron on the freezer paper inside the tee or just lay in there? Thanks!
@Stephanie-I do let the paint dry between coats, and I just inserted the freezer paper, no ironing!
Can you reuse the stencil or do you need a new one for every shirt.