


There’s something so tomboyish and adorable about a raglan tee. Right? It’s also…drumroll….definitely a BOY project too! Never thought I’d see the day on this here girlified blog. Welp, won’t happen again for awhile probably. (just kidding. We’re hoping for a boy next. Not for awhile though! eek)
They’re soft and comfy for babies too.

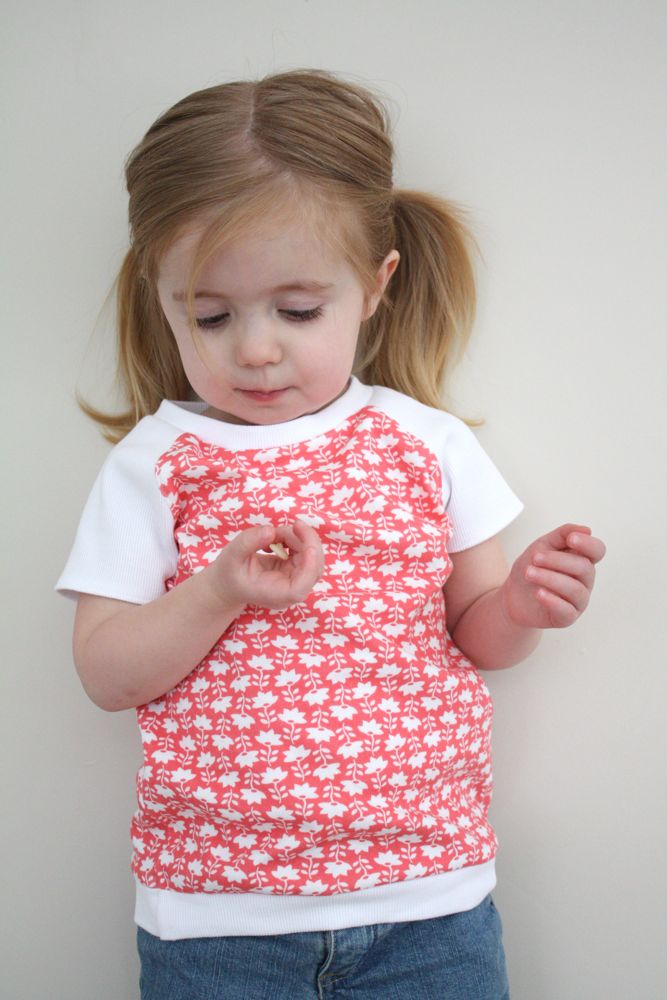
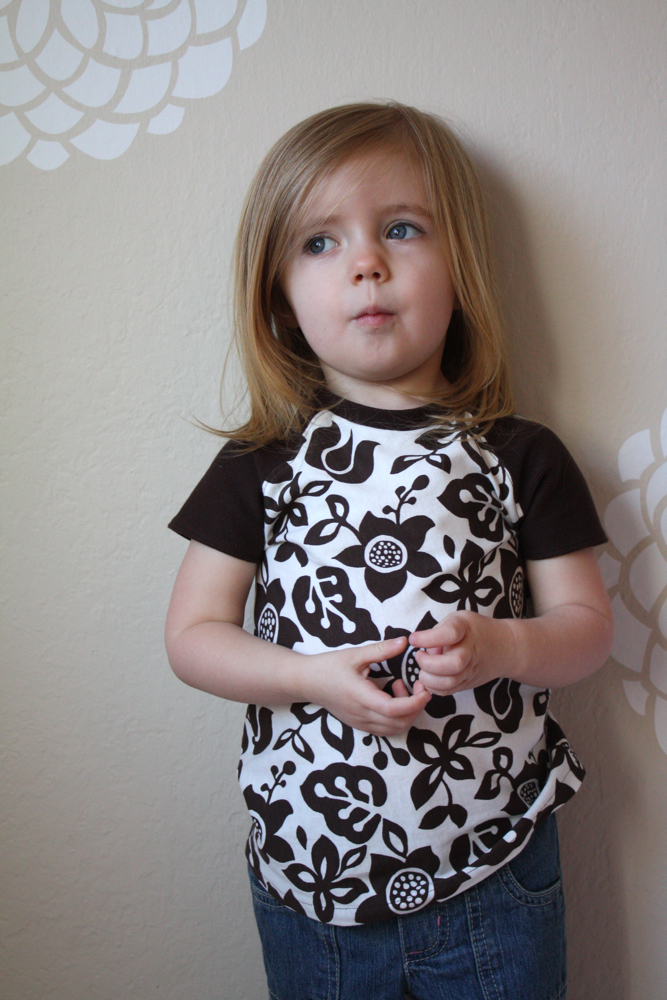
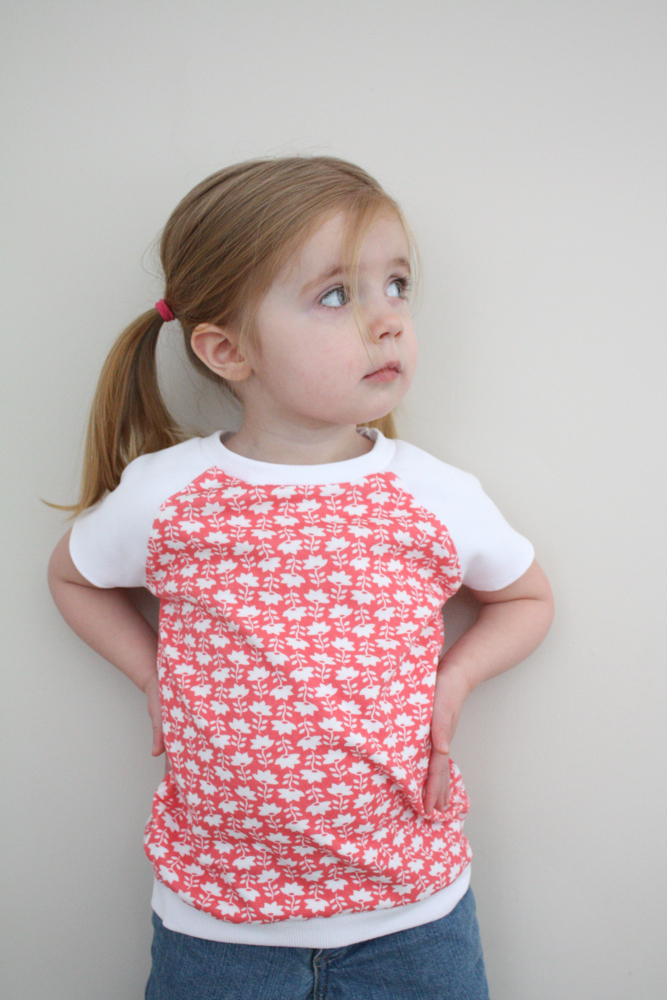
There are some fun options when it comes to this type of shirt-you can go crazy with different fabric choices (I played it safe with coordinating solids for the sleeves/collar), add a band on the bottom (my fav!), embellish with appliques or fabric flowers….the possibilities are seriously fun to contemplate! Also, these shirts are seriously easy and quick to make!
So. Let’s get to the nitty gritty. We’re gonna talk about knits, and I’ll blather on for awhile about sewing. I took about a hundred pictures, but I wanted to be thorough, so sue me. No one’s ever complained about me being TOO thorough! 😉
Click below for the full tutorial!
You’ll need:
1/2-1 yard knit fabric (interlock or jersey for the main fabric)
rib knit fabric (1/3 yd is plenty for one tee)
ballpoint needle (specifically for knits)
polyester thread
spray starch (helps keep the edges flat if they start to curl)
ruler
freezer paper or other paper to make your pattern
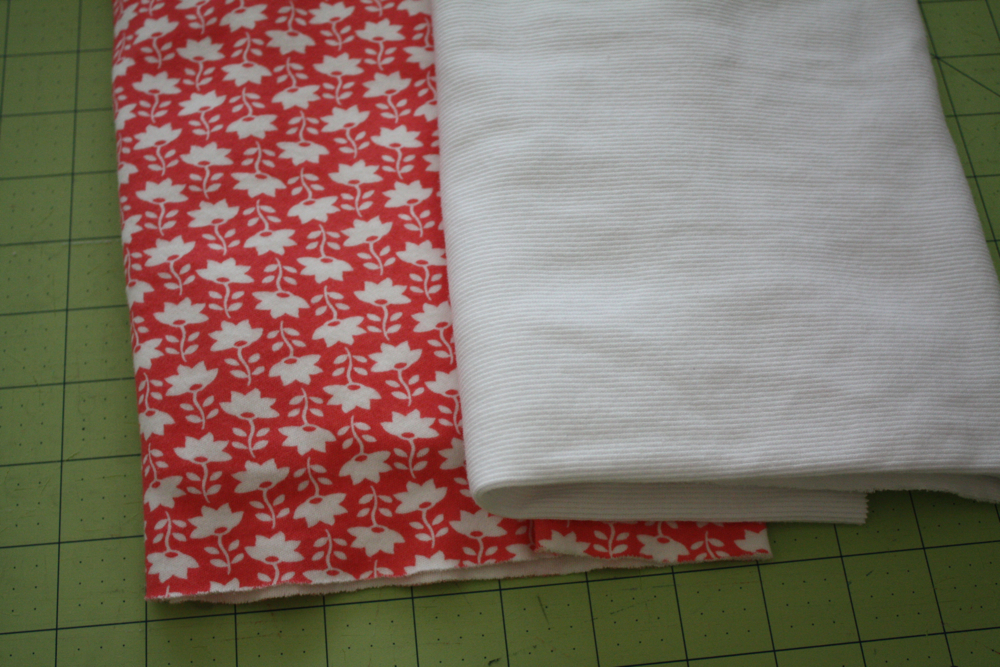
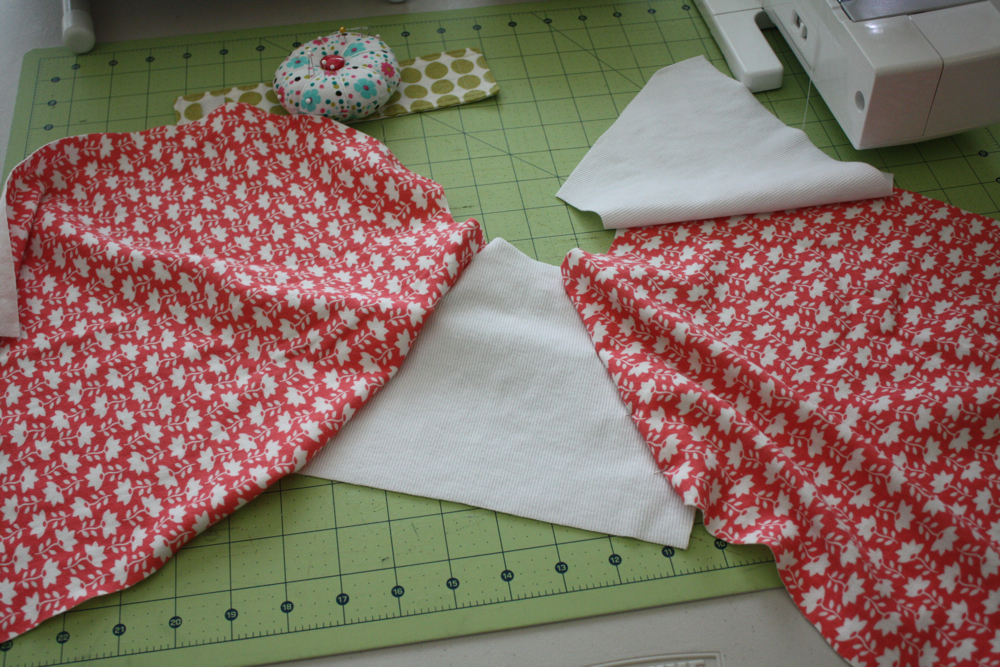
On the left is my interlock fabric (Oliver and S fabric, it was a dream to sew with, so gorgeous!) and on the right is my rib knit. You can see the little ridges, that’s what makes it different from other knits.
So first let’s make a pattern. (don’t worry, this may be the simplest pattern you’ll ever make!)
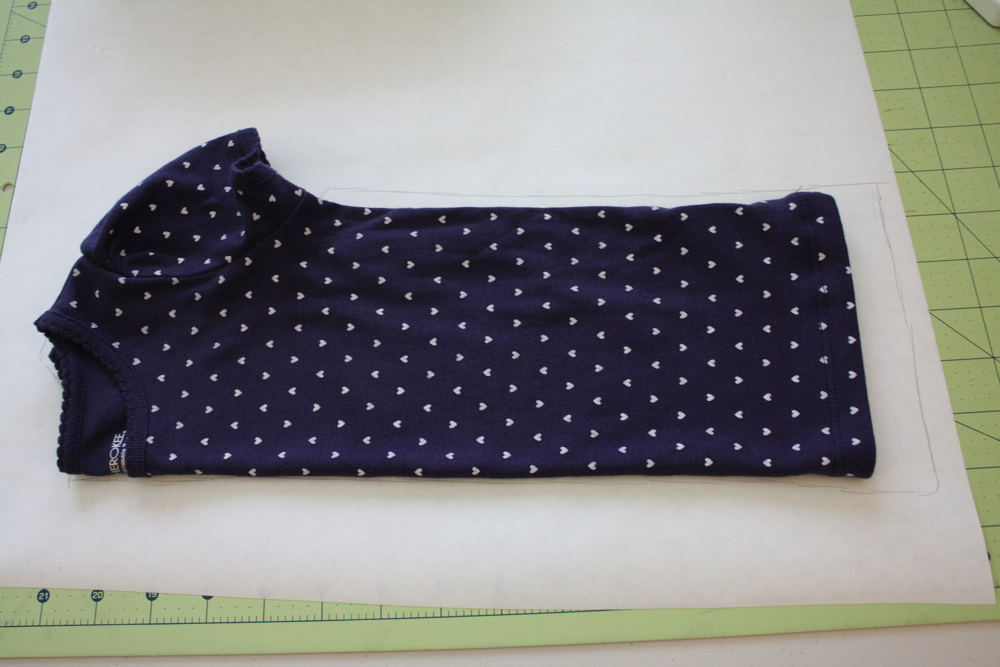
Grab a tee that fits, fold it in half like so, and trace around it, adding seam allowance (I use 3/8″) to the shoulder, armhole, and side seams. Also add an extra inch to the bottom for hemming purposes, unless you’re planning on adding the band around the bottom, in which case you may want to actually shorten it.
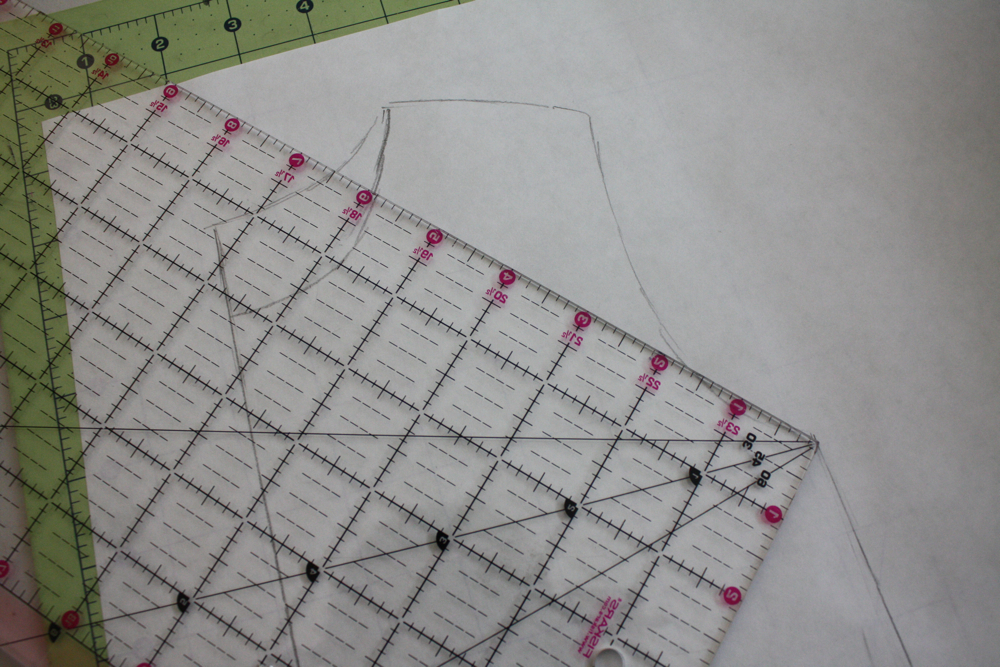
Next, take your ruler and angle it like so from the armpit to the middle of the neckline. Draw a line here.

tada!

Next, line up your ruler (this is where having a quilting ruler came in handy) with the shoulder seam.

Trace around the ruler and also draw a line to close up the bottom.
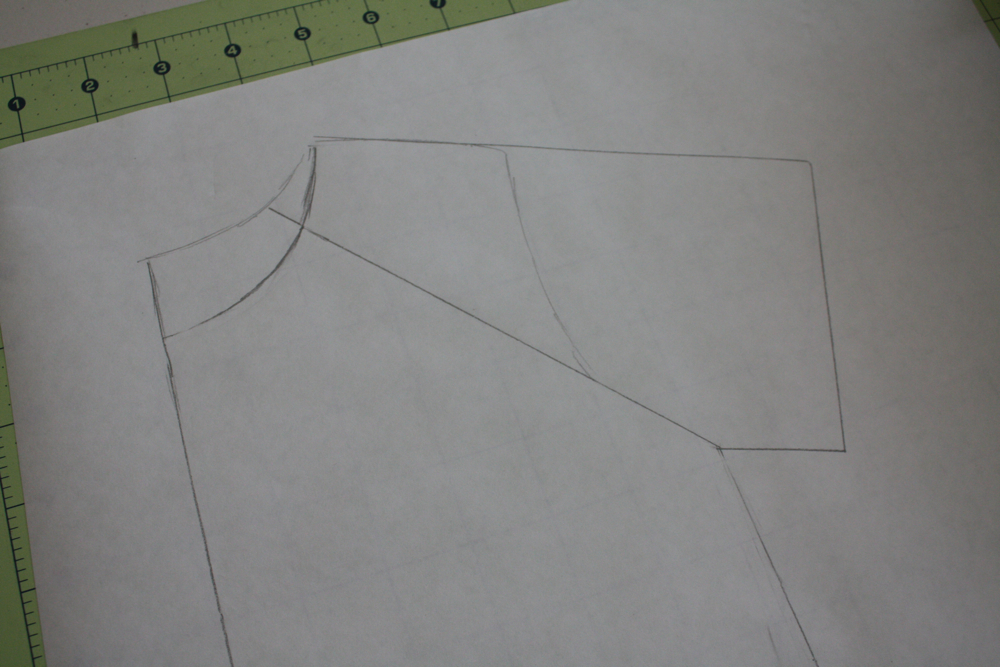
Confusing? This is what it should look like. You can change the length of the sleeve by shortening it or hemming it up more.

Cut it apart and label with the fold lines and pattern info.
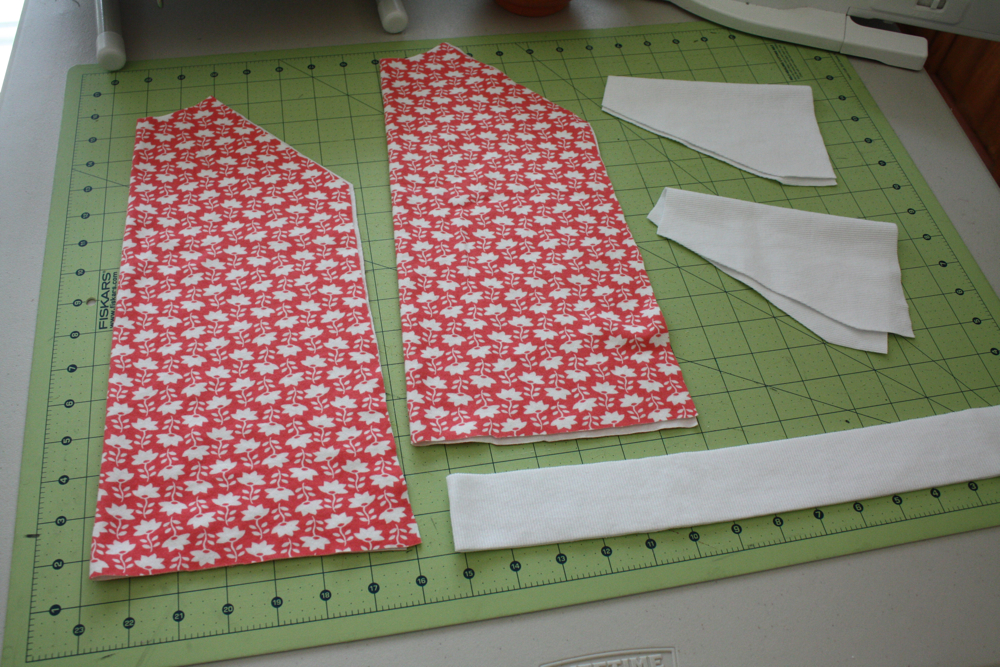
Then cut out two pieces of the shirt piece on the fold of your main fabric, 2 sleeves on the fold of your rib knit, and also one long piece (as long as you can go, we’ll trim off the extra) 1.75″ wide.
(you can cut the sleeves out of interlock or jersey, the collar works best with rib knit though)

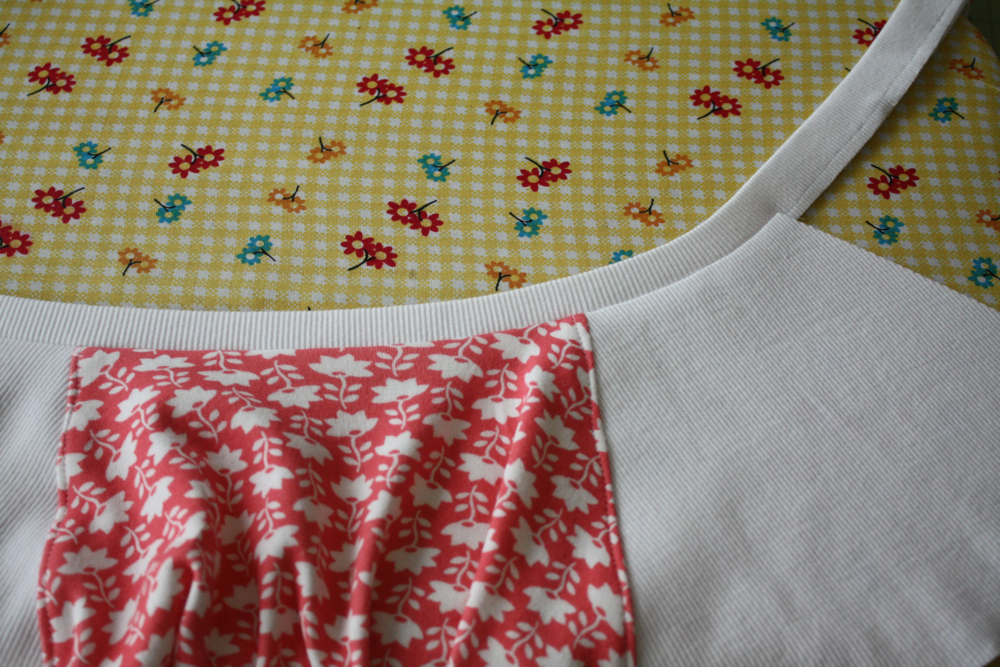
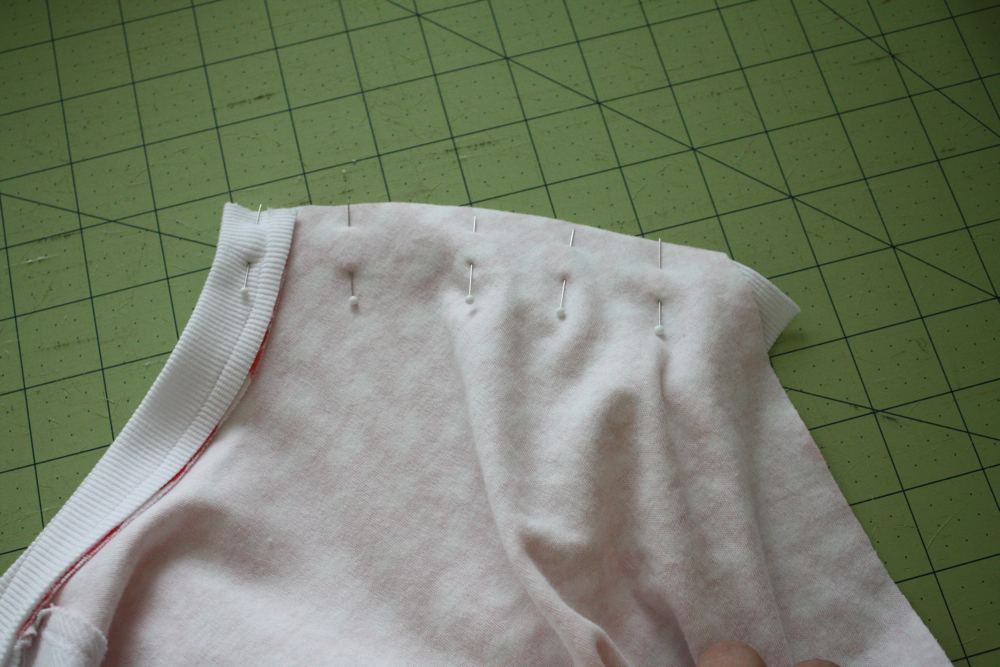
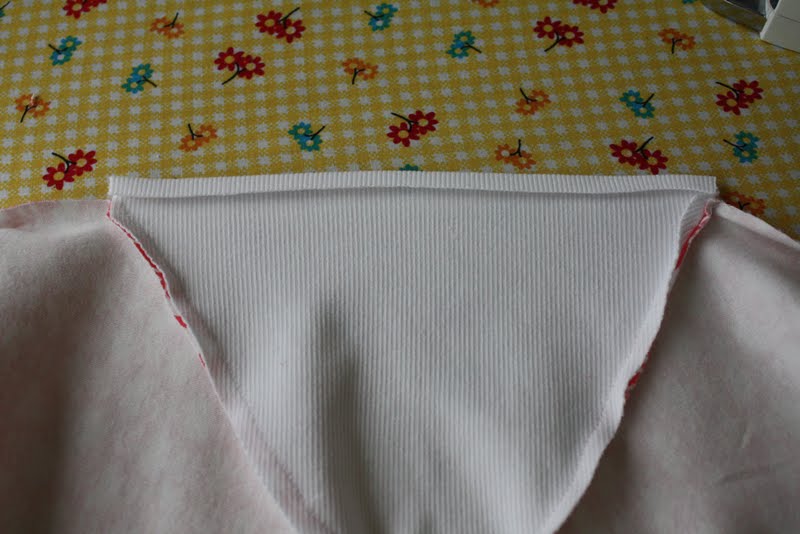
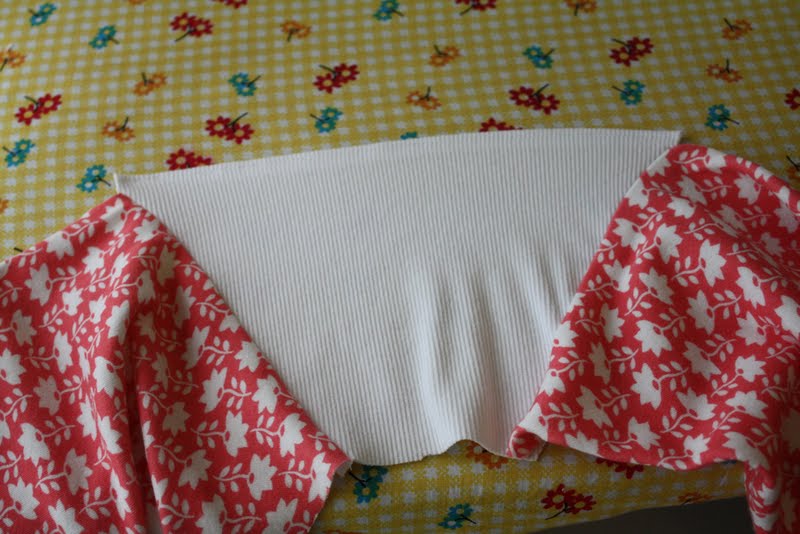
Next pin your sleeves to one shirt piece, right sides together (RST) The right side of the rib knit is the side where the ridges are more pronounced.
Then on one of the sleeves, pin the other shirt piece to that sleeve. Leave the other side open.
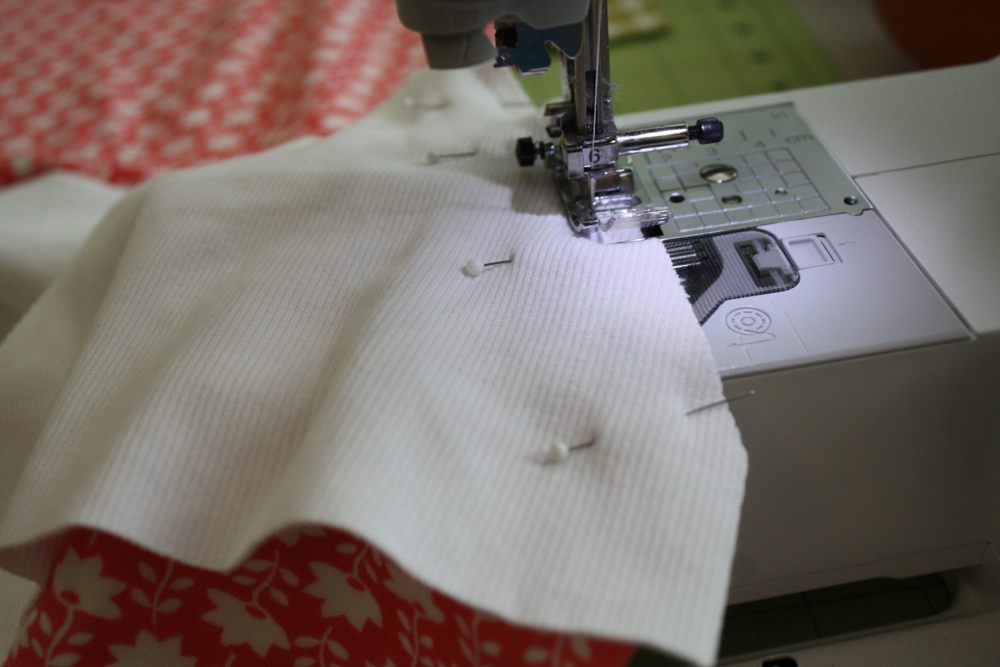
Then sew each sleeve to the shirt with a 3/8″ seam allowance. I don’t use any zig zag or fancy stitches, maybe I should but I don’t. I just lengthen my straight stitch a little bit.
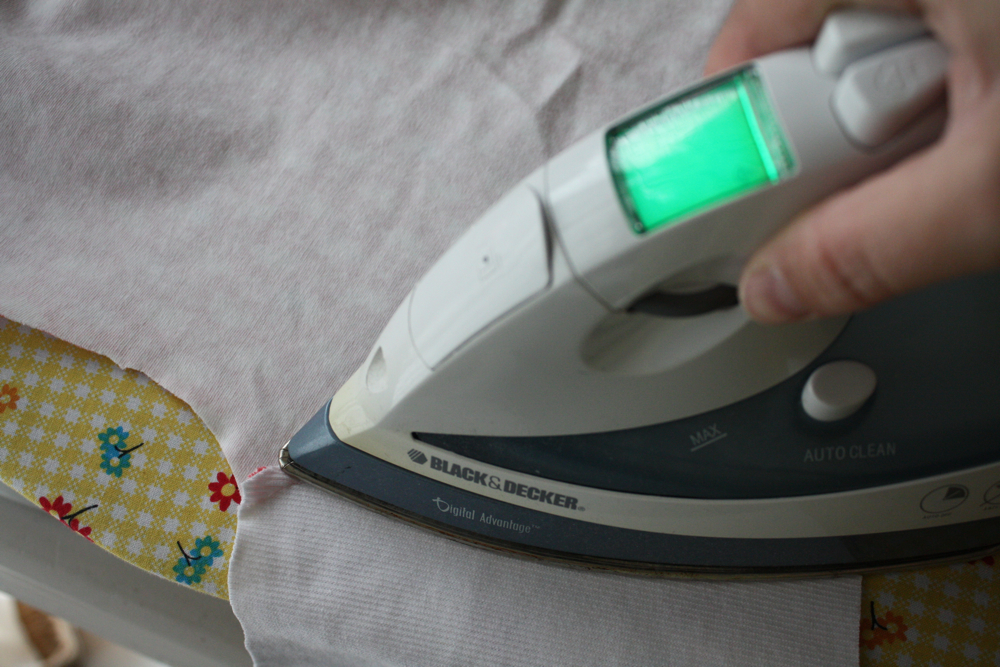
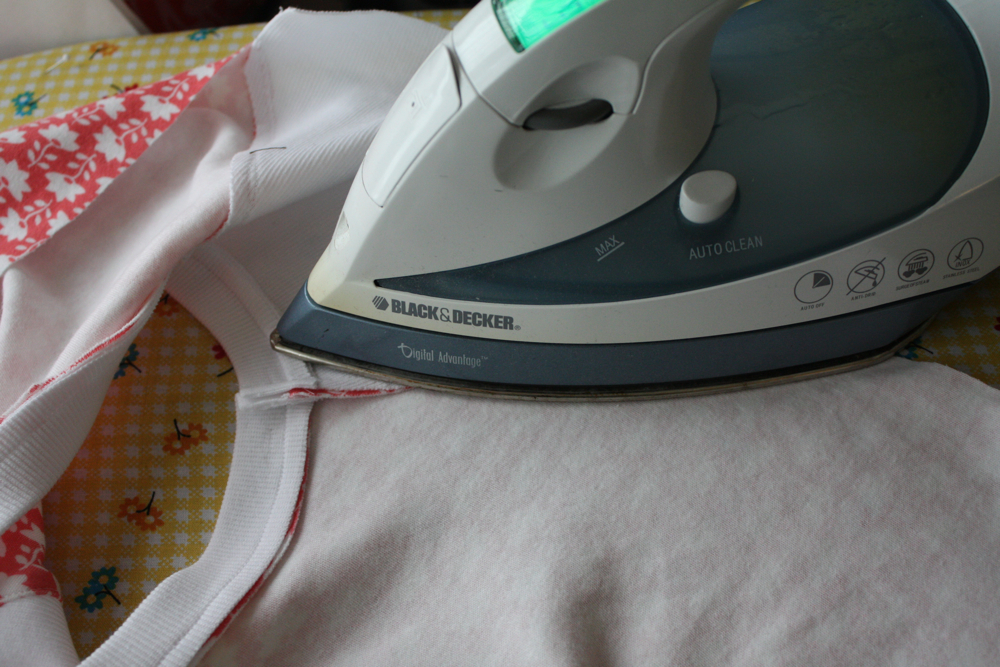
Then press each seam with your iron (Steam it!), towards the main fabric.
Then top stitch each sleeve seam on the front, about 1/8″ from the seam, making sure to catch the seam on the inside. Press the seam again. (pressing makes a WORLD of difference with knits!)
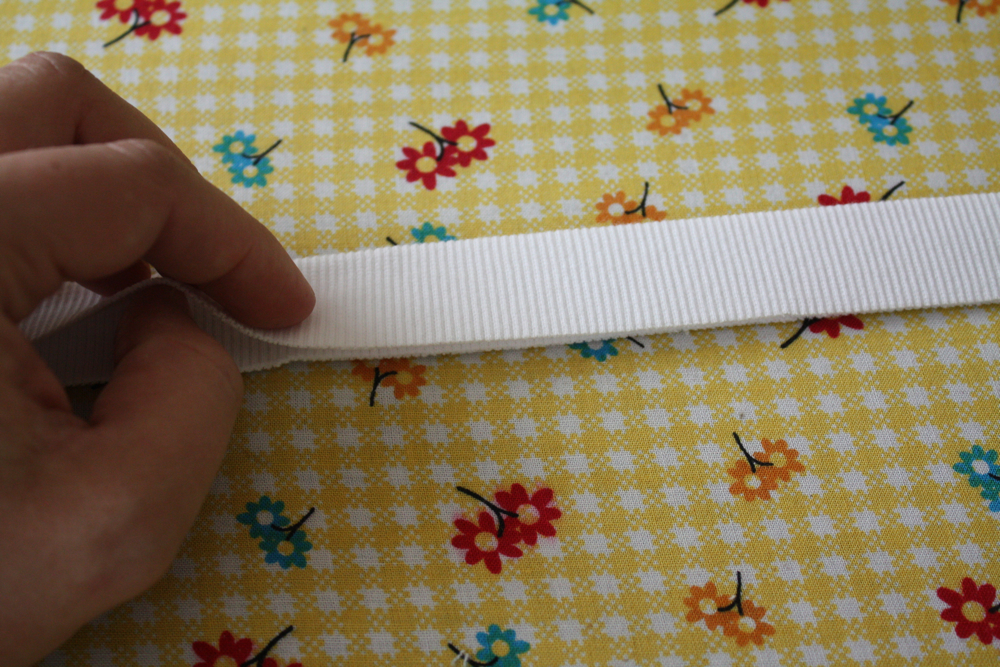
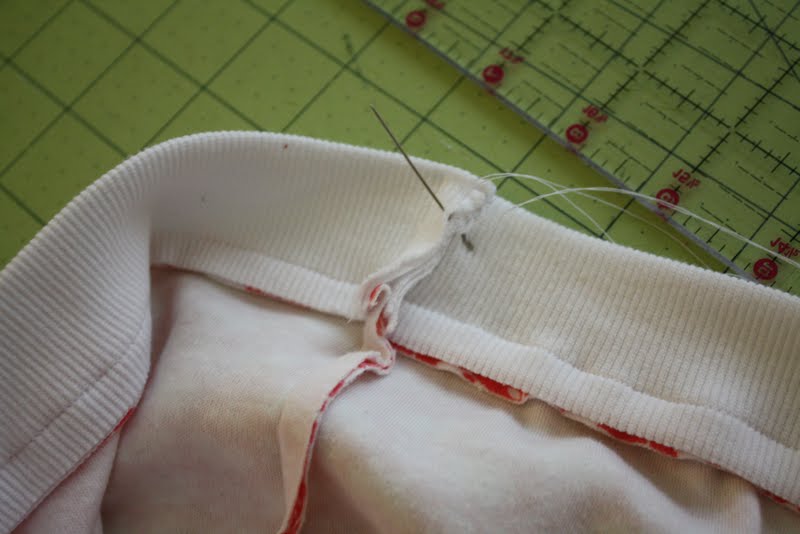
Then, take your long piece of rib knit and press it in half lengthwise.
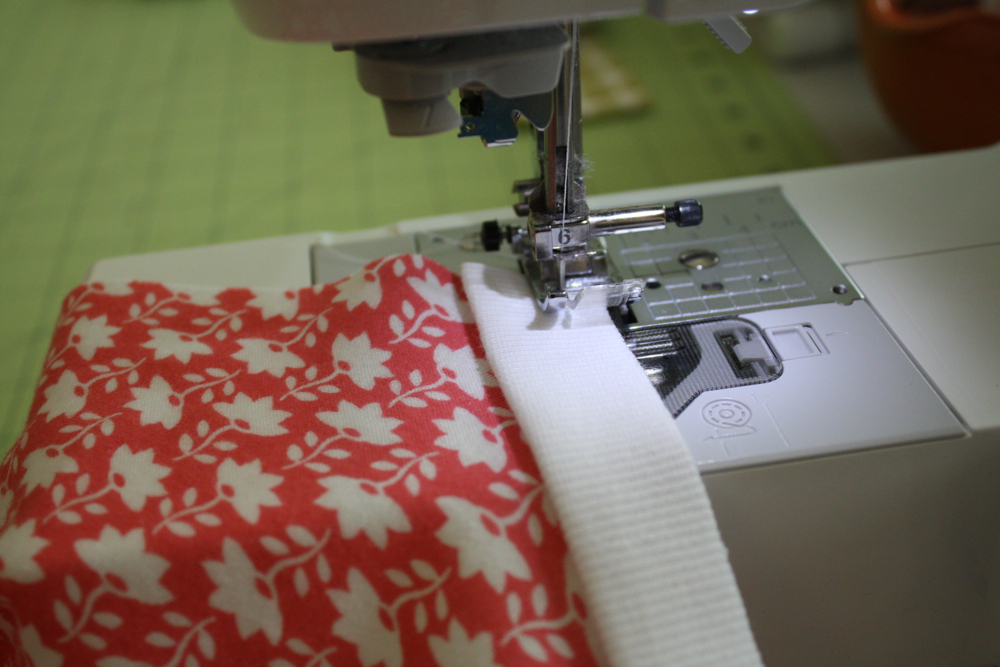
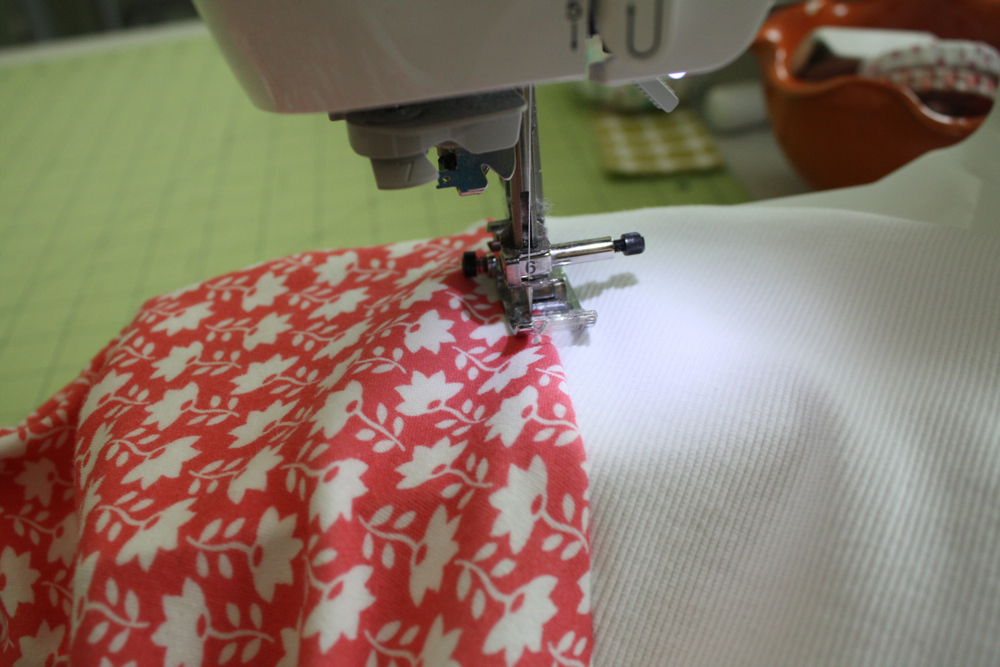
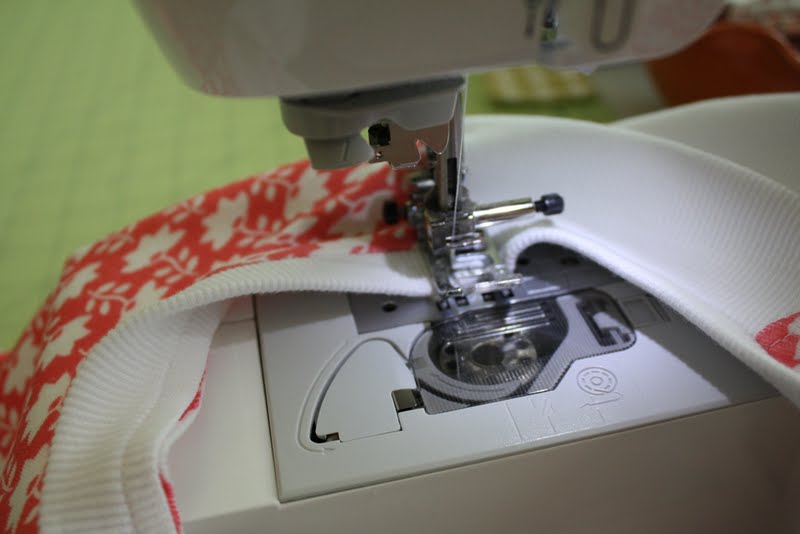
Starting at one end of your neckline, line up the raw edges, and start sewing it on.
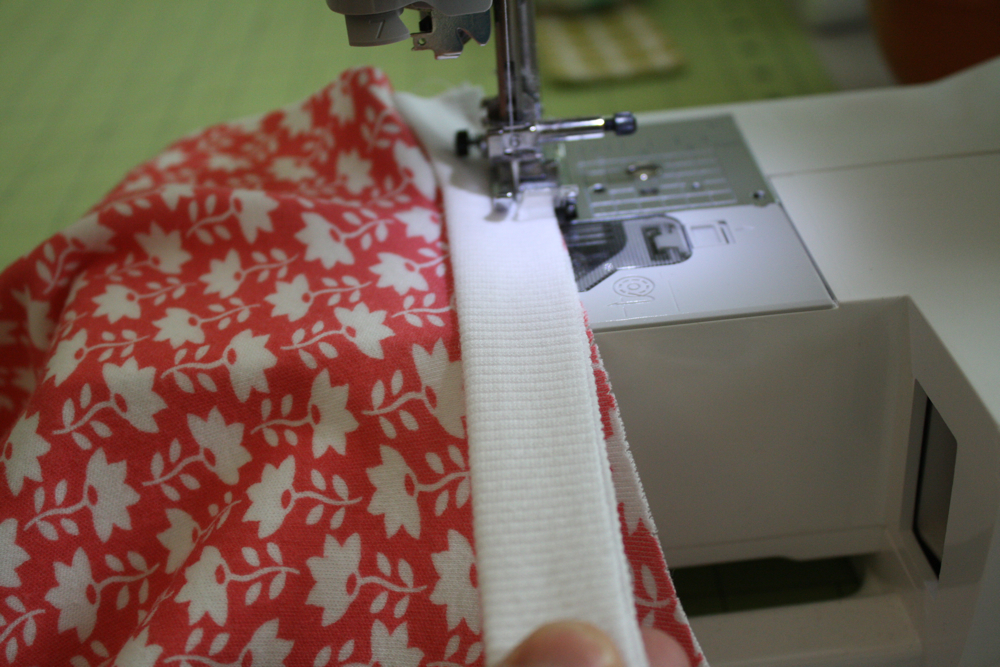
While sewing, pull gently but firmly on the rib knit collar piece (not the shirt piece). This will help shape the collar.
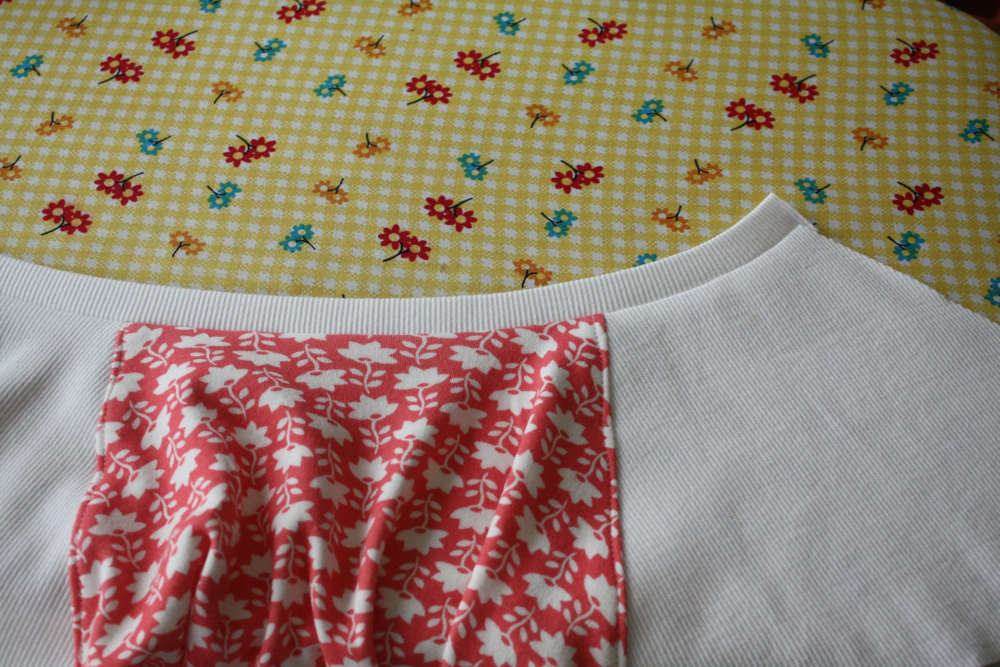
When you’re done, press it with your iron, and trim the end off.
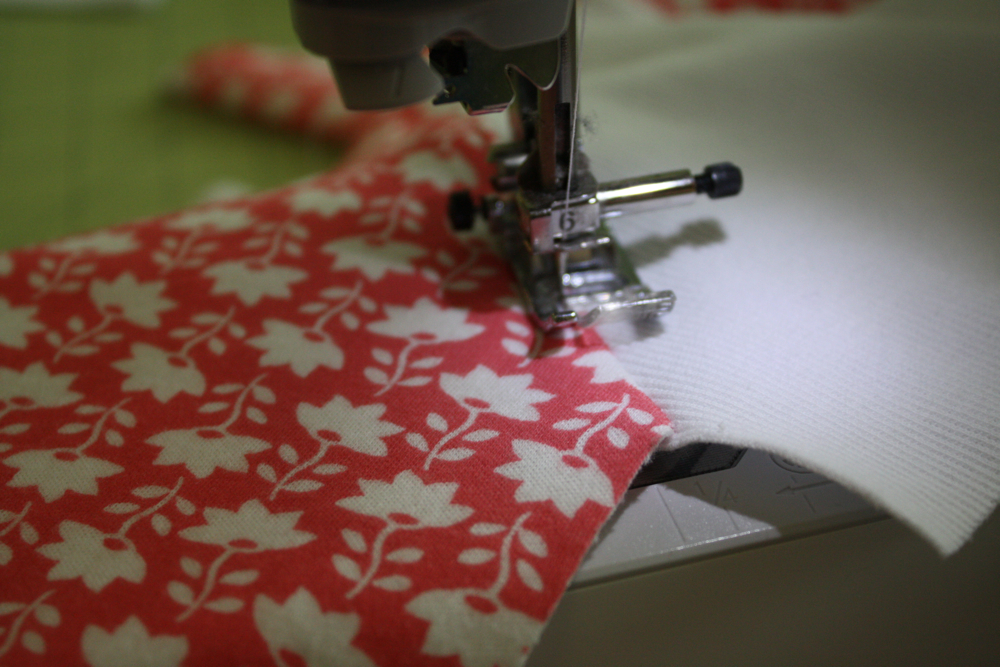
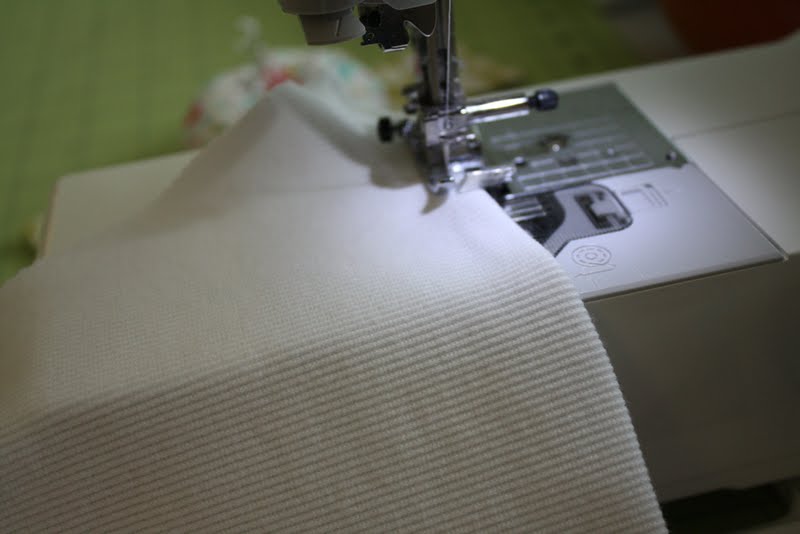
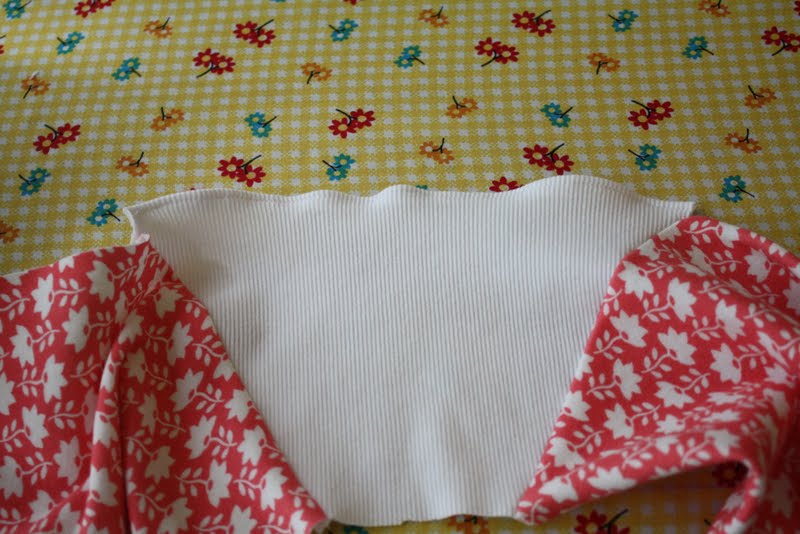
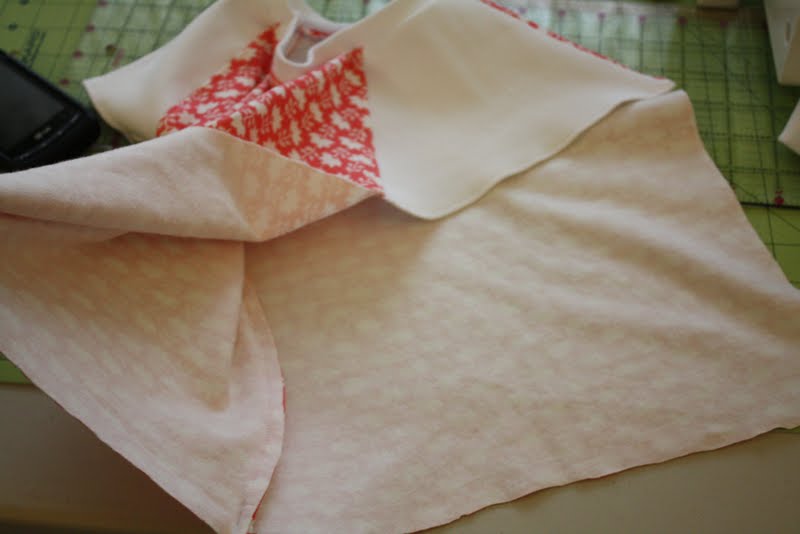
Then pin and sew together the remaining sleeve and shirt piece.
Also press that seam…
…and top stitch it.
top stitch all the way to the collar, tacking down that seam.
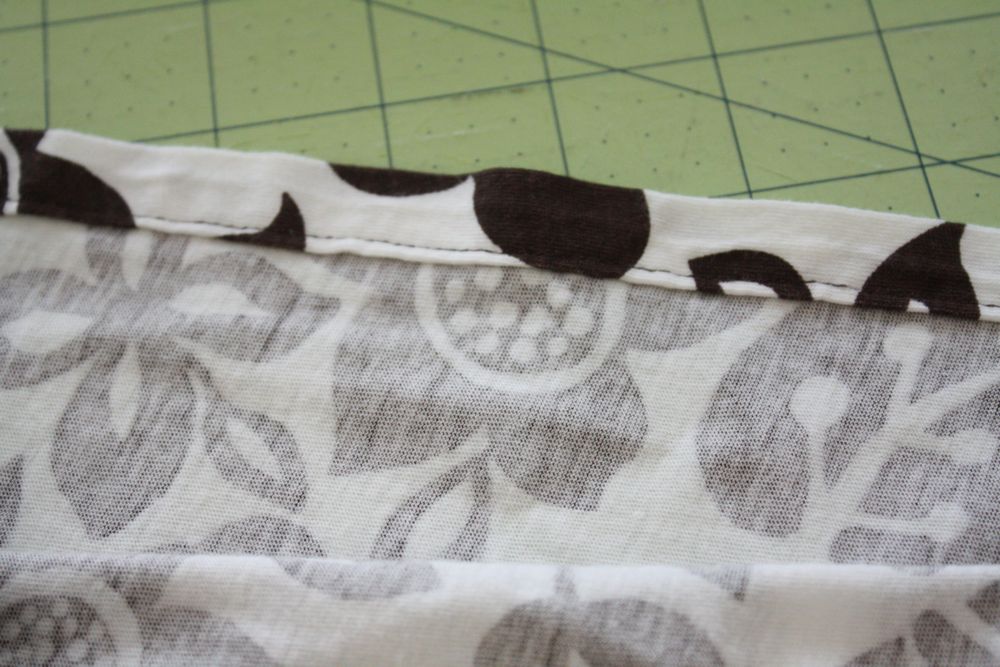
Now hem your sleeves under by pressing the edge under 1/4″ or so (it won’t fray so don’t worry about folding it under twice)
and sew that down.
It’ll look all wonky after this step…
No worries, a quick press will fix that! See? What’d I tell ya?
Then, if you’re going to do the band around the bottom, pin and sew one of the sides together, starting at the sleeve and going down the side of the shirt.
(if you don’t want the band, sew both sides of the shirt together and see the bottom of the post for hemming tips)

Then I cut another strip of rib knit 3″ wide, folded it in half, pressed it, and sewed it to the bottom like I did the collar, pulling gently to shape it.

Then I pinned and sewed up the other side of the shirt. No need to finish these edges unless you want to!
I also tacked down the seam from the band around the bottom.
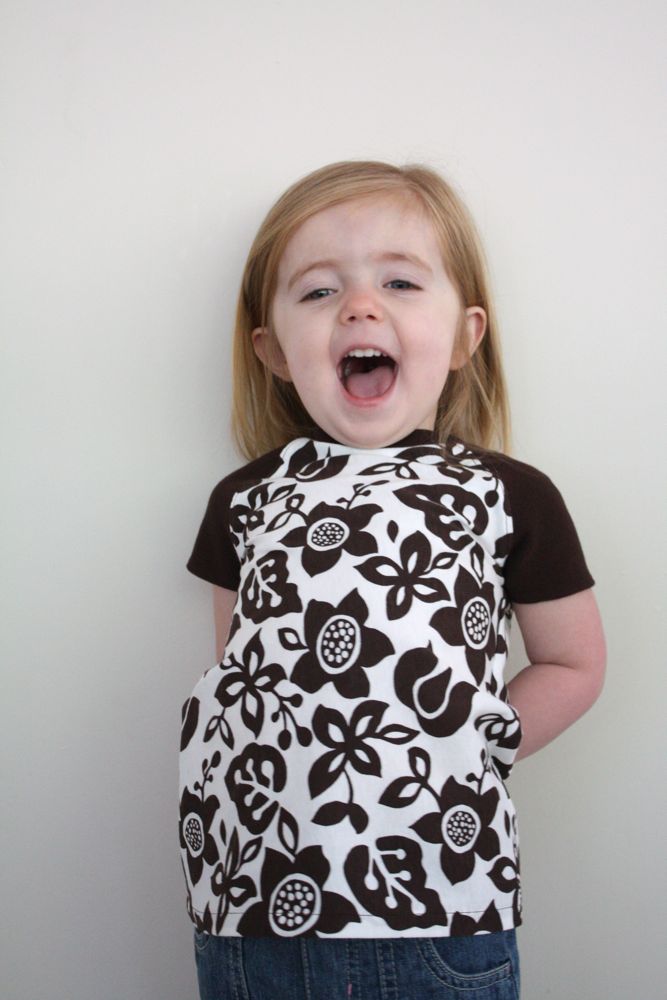
Voila! All done with your adorable shirt. 😀

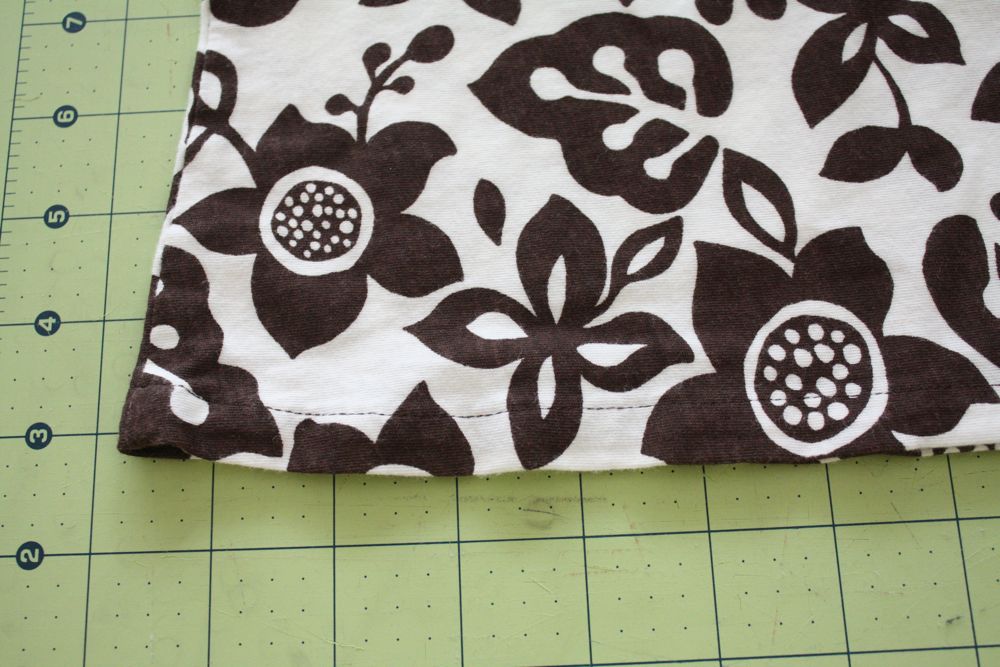
If you don’t want to do the band, simply iron over the bottom a 1/4″ and then fold and iron over another 1/2″, and sew into place. I usually sew my hems from the right side so they look neater. Make sure to press it with your iron and use spray starch if the edge rolls on you.
Then shout for joy!
I’d love to see your raglan tees! Add them to the Flickr group if you make some!
thank you so much for the tute i really wanted to learn raglans
this helps me tremendously today! I am working with ribbing for the first time today as my trim around a knit fabric baby blankie. The extra hints are helpful :).
Tees look fabulous! I have always loved the raglan style 🙂
Very cute!! Another thing to add to my “must make” list. 🙂
I have been looking for an easy to follow raglan tee tutorial forever!!! Thanks so much for this, I have a lovely pile of knits waiting to be transformed! 🙂
This is so cute! Here’s hoping this will help me get over my fear of knits 🙂
great tutorial
thanks!!!
elena
great tutorial
thanks!!!
elena
great tutorial
thanks!!!
elena
great tutorial
thanks!!!
elena
great tutorial
thanks!!!
elena
great tutorial
thanks!!!
elena
great tutorial
thanks!!!
elena
great tutorial
thanks!!!
elena
I can never find cute knit prints in the stores here. Only solids. Bah.
Cute shirts though! For boys too!
I love the little band at the bottom! Makes it look entirely different from your basic raglan tee. Where did you get the O + S knit?
I have never sewed with knits before but this makes me want to tackle it. It is starting to warm up here in PNW and we need some tshirts STAT! Thanks for the great tutorial.
Love these!! (and Sadie’s really fun pigtails!)
Sorry about the lack of link to fabric-I always forget SOMEthing. 🙂 I got it here:
http://www.fabric.com/ProductDetail.aspx?ProductID=fcf95330-c9ca-483c-87a1-148209e89626
I got a half yard and it’s plenty for two raglan tees-Charlotte will get one, someday!
Jess
thanks so much for this, I’ve always wanted to make some for my boy 🙂
Those shirts are all super cute! I wish I knew how to sew!
I just spent all weekend unsuccessfuly looking for a Raglan Tee tutorial and then I log on to my new favourite blog today and here it is!! I cant tell you how much I love your blog. Thanks so much for sharing all your great ideas!
Very very cute! I just started sewing again and I’m thinking this’ll be on my list of things to make!!!
I absolutely love raglan tees and am ever so grateful for this thorough tutorial! Thanks so much for sharing with us, now to find time for sewing some new shirts for the kiddos 🙂
This is the perfect t-shirt tutorial!! I’m so excited to make this. Just a question: When you cut out the body peice, are you cutting on the front neckline or the higher, back neckline? I’m assuming you used either the back or front neckline to create the pattern because you have only one pattern peice for the body. Does this make sense?
Thanks for answering a question I had from a previous tutorial! I seem to be so high maintenance. Sorry!
This is adorable. I love the bottom band, too! It just adds that extra something. Charlotte’s shirt looks so tiny 🙂
I just got a brother sewing machine and wanted to learn how to sew. Thank God I found your blog.
so cute!!!!!!!!
I love a raglan tee!! I linked to your tutorial on Craft Gossip Sewing:
http://sewing.craftgossip.com/tutorial-childs-raglan-sleeve-t-shirt/2011/06/15/
(link will go live later tonight)
–Anne
Hi Jess! I really love the stencil on the wall behind Sadie! Where did you get it? The closest I can find is a zinna grande flower stencil from cutting edge– is that the one?
@ Sunny-they are vinyl decals from Etsy-do a search for vinyl flowers and all sorts will pop up!
I have had this tutorial saved for a while and I am finally getting around to making a few for my one year old! Charlotte’s tee is too cute! Question – are you cutting the main fabric piece with the front or back neckline?
Another GREAT tutorial and another piece of clothing done! I am going to be making these all the time. Thanks again 🙂
Thank you for the great tutorial! And what a lovely model you have!
First of all, I LOVE your site! I mean, truly love it! I created a skirt on Tuesday night and last night thought I would attempt this adorable shirt to match…but something went horribly, horribly wrong. It started with the sleeves and just never went right…I am going to scrap what was created and start over again on another day and hope it goes better. 🙂 Thanks for all of the awesome tutorials and ideas!
Love the t-shirt, have been looking for something to help with re-using some of my hubby’s favourite t-shirts (which have now shrunk) for my G-Daughter.
Thanks so much…I’m you’re latest follower too.
Thanks for the tutorial, Jess! I used it for part of my Project Run & Play entry!
http://pinaforesandpinwheels.blogspot.com/2012/01/project-run-and-play-week-2.html
Thanks for the tutorial, Jess! I used it for part of my Project Run & Play entry!
http://pinaforesandpinwheels.blogspot.com/2012/01/project-run-and-play-week-2.html
Thanks for the tutorial, Jess! I used it for part of my Project Run & Play entry!
http://pinaforesandpinwheels.blogspot.com/2012/01/project-run-and-play-week-2.html
Thanks for the tutorial, Jess! I used it for part of my Project Run & Play entry!
http://pinaforesandpinwheels.blogspot.com/2012/01/project-run-and-play-week-2.html
Thanks for the tutorial, Jess! I used it for part of my Project Run & Play entry!
http://pinaforesandpinwheels.blogspot.com/2012/01/project-run-and-play-week-2.html
oh my gosh! I LOVE this tutorial, you totally helped me conquer my fear of knits! I just finished one of these for my two month old and I am so glad you posted this! thanks so much!
Thanks for sharing this great tute. Just finished one for my dotter. Love your site…
http://edaelida.blogspot.com/2012/03/projek-diy.html
Okay I just made this and realized at the end I put the collar band on with the fabric stretch the wrong way. OOPS. SO now I have an adorable t-shirt that will never stretch enough to fit over my daughters head.
Besides that, it turned out great and the tutorial was super easy. Thanks!!!
Loved this tute–I made three (well, four actually) in a row! I blogged about using upcycled tees to make these and linked to you here:
http://bethbeingcrafty.blogspot.com/2012/05/upcycling-old-tees-and-tanks-into-cute.html
Thanks again! Love your blog–I’ve got several of your projects lined up!
Great tutorial! Thank you!
Finally managed to finish a raglan 🙂
Great tutorial! I’m sort of new to sewing clothes & this was so simple. From trial & error I learned I needed to use the front neckline…I used the back neckline to begin with and ended up w/a shirt that wouldn’t fit over my daughter’s head…oops lol but I redid it & it came out perfect. Awesome job, thank you for sharing it. I LOVE IT 🙂
Do you have to use rib knit or would any knit work?
Thanks so much for this tutorial, I’ve just made my little girl one. It’s the first item of clothing I’ve ever made for her and it’s not perfect by any means, but I’m rather proud of it!
when did you ovulate on clomid 3 7 | where can you buy clomid – clomid for sale online, clomid for men dosage
Thank you so much for sharing! You make me excited to make some shirt for my kids. Whenever I get to have time and materials, I want to make one. Looks doable to me. 🙂
i love it!
Thanks a lot! I just did two shirts for me! They turned out better than I ever expected! 🙂
FANTASTIC tutorial! Baseball tees have always been crazy intimidating to me but now I can’t wait to jump in and make some…I’m thinking a baseball dress might be in the works. Thanks mama!
My kids have grown out of the original raglan tees I made from this tutorial, and I loved it just as much this time around! Thanks!
http://bethbeingcrafty.blogspot.com/2013/06/appliqued-raglan-tee.html
awesome! now i can make some shirts for my dolls 😀
Love this tutorial so far! I just finished drafting up my pattern pieces. I’m going to use these to make Christmas pj’s for my kids but I plan on making them long sleeved with ribbed cuffs. Any tips on altering the pattern for long sleeves? I’m just gonna wing it and see what happens, but I’d love any tips y’all have!
Thanks!
Lori (from Canada, in need of long sleeves!!)
I really like this tutorial.
What I don’t understand is that front and back are identical. The hem on the front should be deeper than that on the back, shouldn’t it.
So I’m a bit confused and would be greatful for a hint.
Greetings from Germany
Britta
I’ve never lengthened my hem in the front, but it’d be easy to add to the pattern if you need to do that!
Great tutorial thanks
http://prolificprojectstarter.wordpress.com/2014/02/04/pretty-in-pink/
This tutorial ROCKS! I absolutely loved how well you put this together. Thanks a bunch! I’ve linked your tutorial here for a refashion for back to school clothes (and have another in the works I’ll link back to you as well): http://expressionsbyred.wordpress.com/2014/08/17/project-bts-refashion-jammies-on-my-shoulders/
Hi there ! Was wondering for a 6-12 month old, would you need 1/2 yard or more than that? I found a few fabrics I like but dont want to over spend. Thanks!
now, 1/2 yard would be plenty!
I used the tutorial to make a little dress: http://www.blumenbriga.de/2014/12/spontanes-kinderkleid/
Hi there, what a fun and sweet tutorials you provide! I love your choice of patterns and fabrics and could not wait to make the raglan tee myself. So, I got an old t-shirt of myself and an old onesie of my daughter and made the t-shirt. I am very satisfied with the result. So after practiced first I am now ready to make some serious raglan t-shirts made of cute fabrics. Thank you so much!
WOW just what I was searching for. Came here by searching for make your own t shirt
Thanks a lot!!!!
Would love to make some for my granddaughter but with distance I don’t have any of her clothes to make the pattern. Do you know of a good pattern for size 2-3T that I could get the template from?
Really superb …..loved the tutorial. ..
Will surely try for my girls?
Amazing! Really you are so talented. I am totally impressed with your work. I can’t wait to try these tees. Thanks for the great tutorial.