


Ready to kick off All you need is Love week?
What better way than with a skirt. Well, in my mind there is no better way.

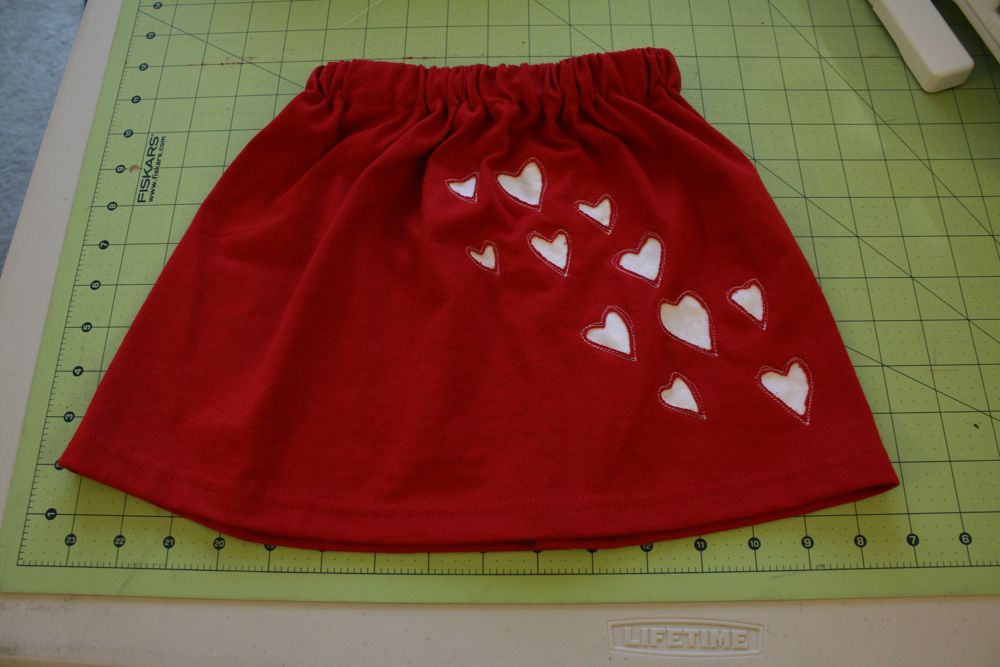
I love the simplicity of this skirt-and the fact that the hearts look like they’re floating across the skirt. (right?….right?) I imagine them as little love kisses being blown to a friend or loved one.
Or sister, like this little one usually aims them at. 😉

Want to make one for your own little Valentine?
Click below for more details!
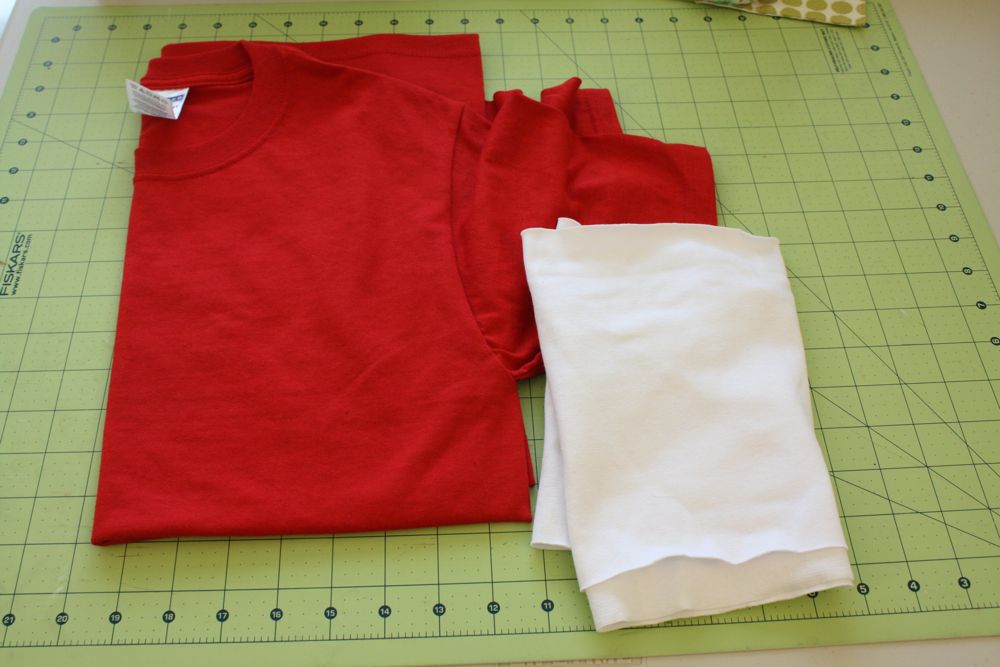
You’ll need:
a colored adult tee shirt (I used a size small for my scrawny small 2.5 year old)
small piece of white or contrasting knit fabric
thread
tailor’s chalk, or fabric pen or pencil
3/4″ elastic (cut to your child’s waist measurement)
white thread
Download and print full tutorial here.
So, why the shirt? Two reasons: one, it cost me $2. (at my local Michaels, on sale) Two, it’s already hemmed.
Aren’t those reasons enough?
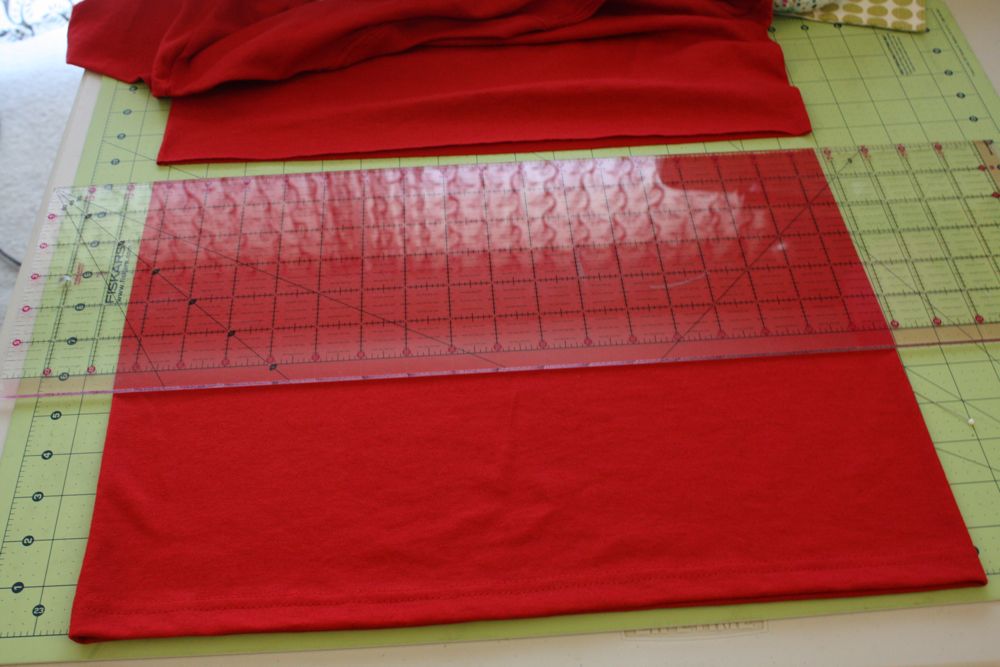
So you’ll need to measure your child to see how long you want the skirt to be. Add an inch to that to account for the casing on top.
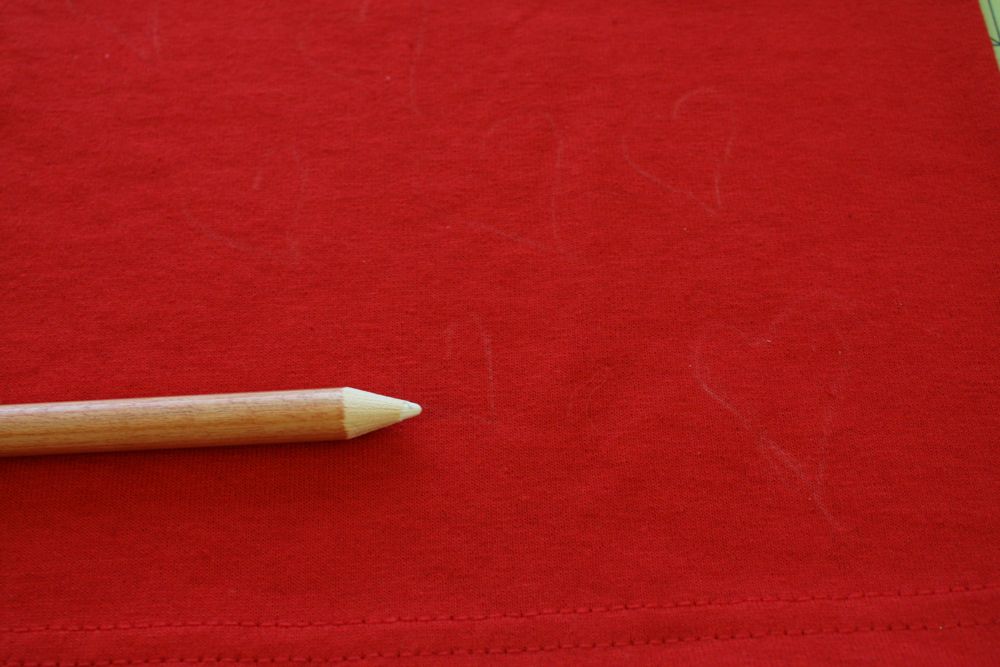
Next I drew on hearts willy nilly with my white fabric pencil. As you can see, they didn’t show up well, so I sketched it out for you below with pen and paper.
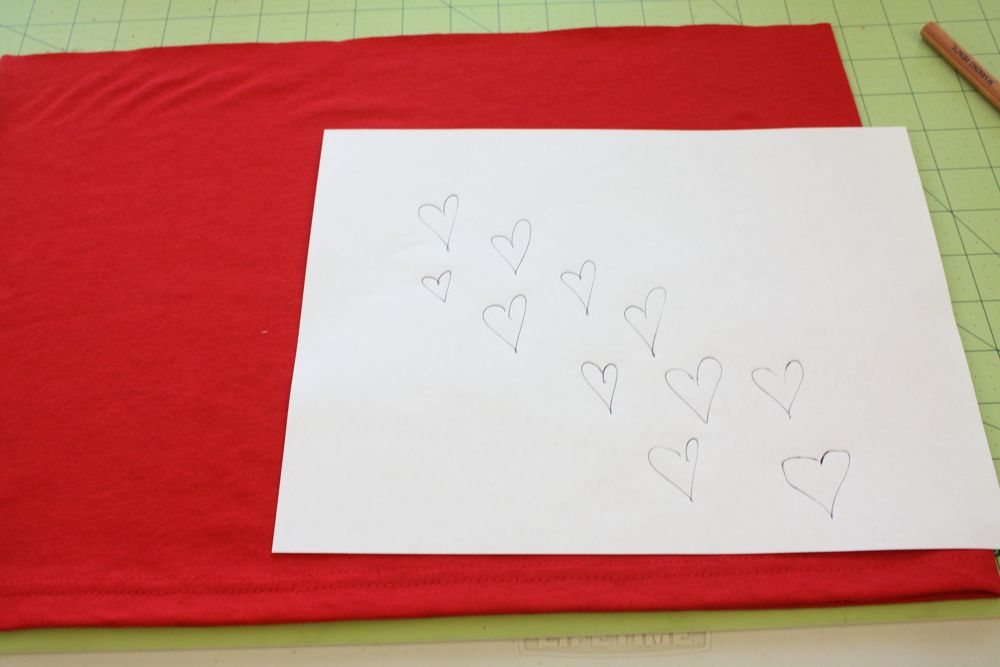
Basically that’s what it looked like. Except for that special, wobbly heart on the bottom.

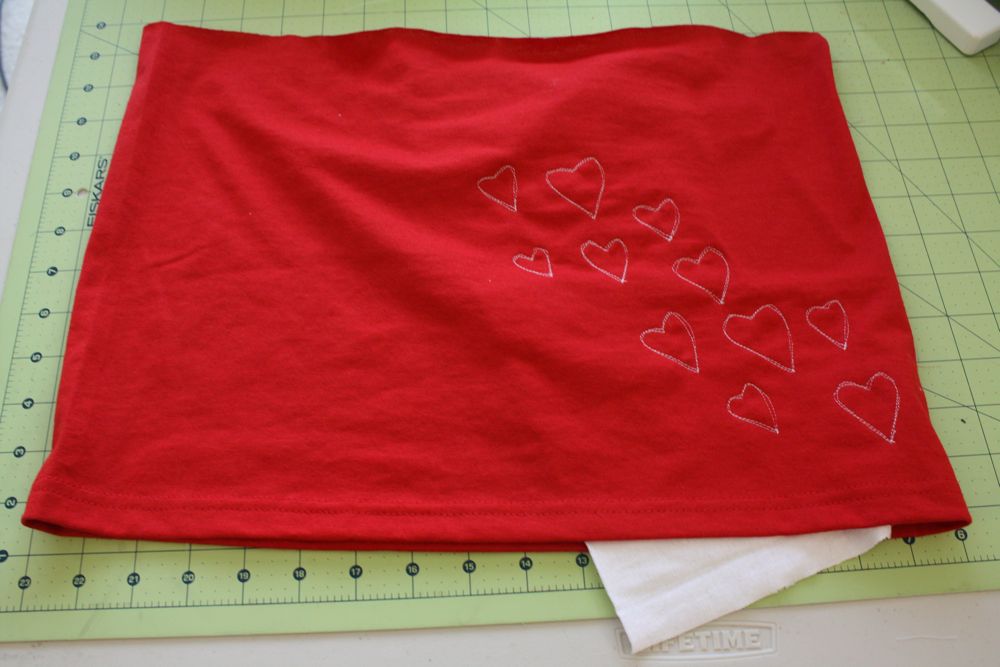
Then I took my piece of white knit fabric and pinned it to the wrong side of the shirt like so..
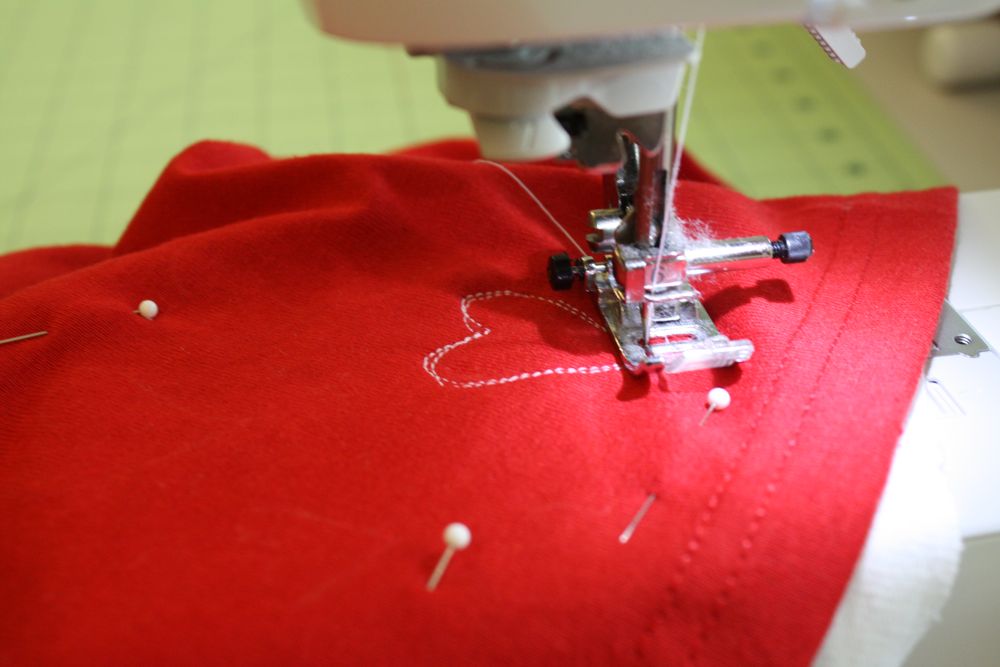
Then, I sewed twice around each heart where I outlined. This was the most painstaking part, and it took me about 20-30 minutes, so it’s way doable!
this it what it should look like when you’re done with this step.

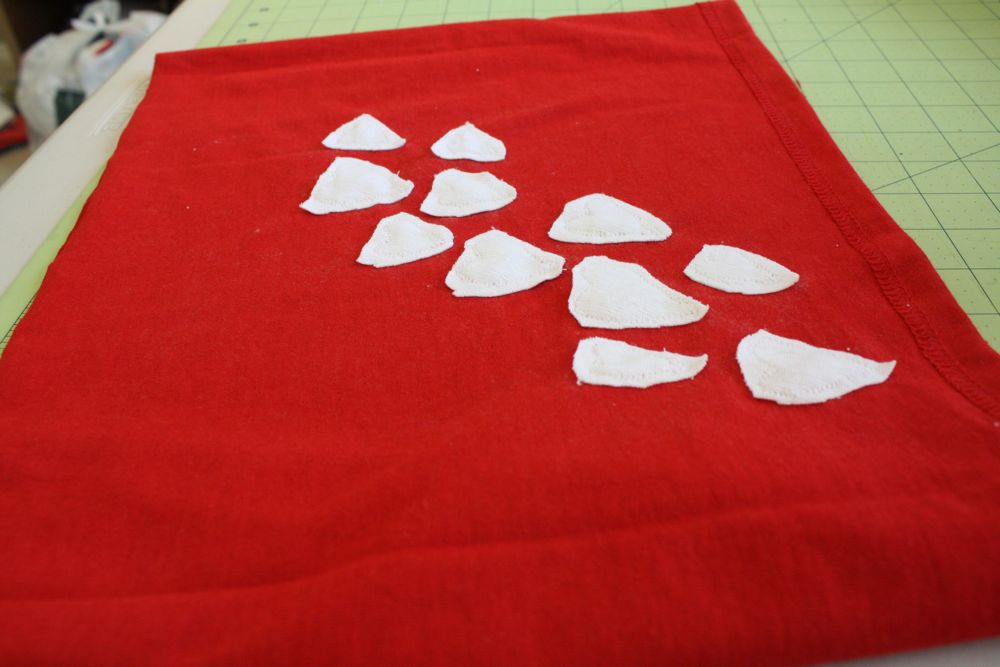
Then, CAREfully cut around each heart on the wrong side, it doesn’t have to be perfect since this is the inside of your skirt.
tada.
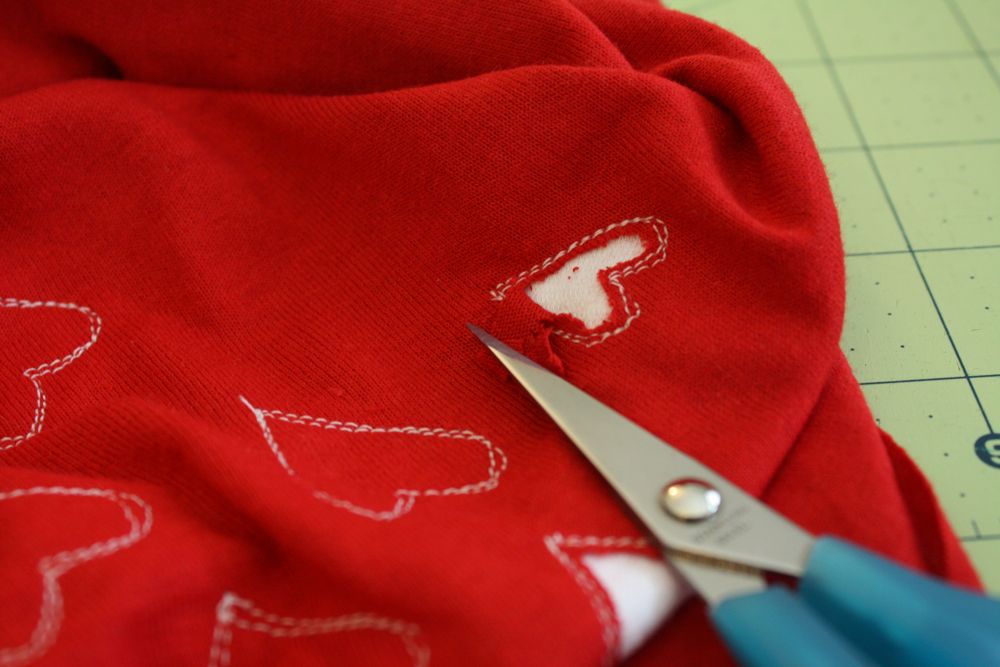
Now, on the front, CAREfully cut away the red material inside your stitches like so, to reveal the white!
Congrats, you just reverse appliqued! sweet.
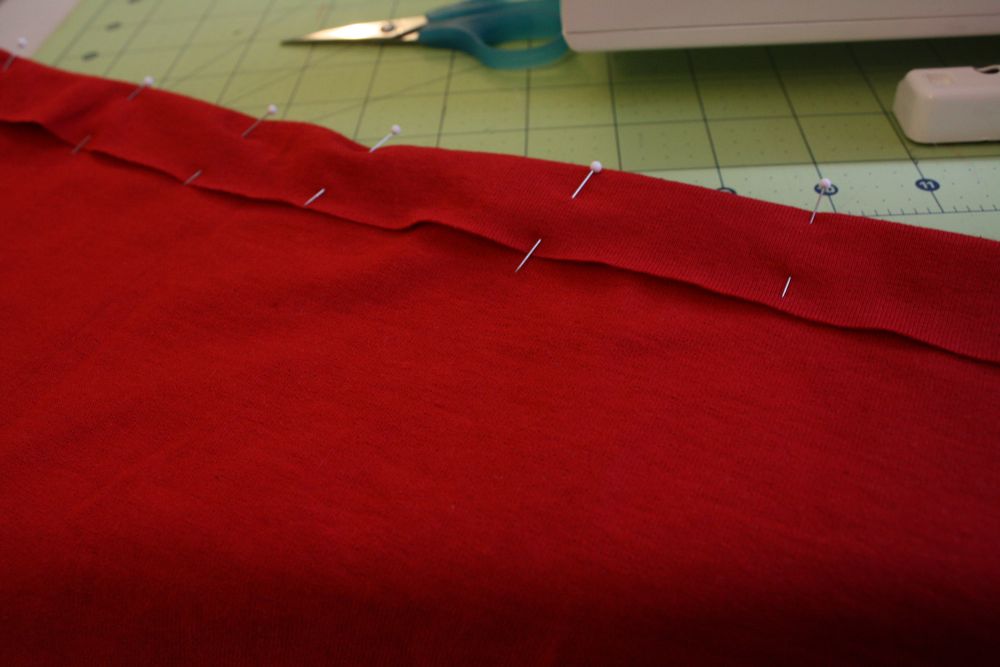
Now for the casing; fold over the top (on the wrong side) about 1 inch, and pin. Sew around the casing, leaving an inch and a half or so open.
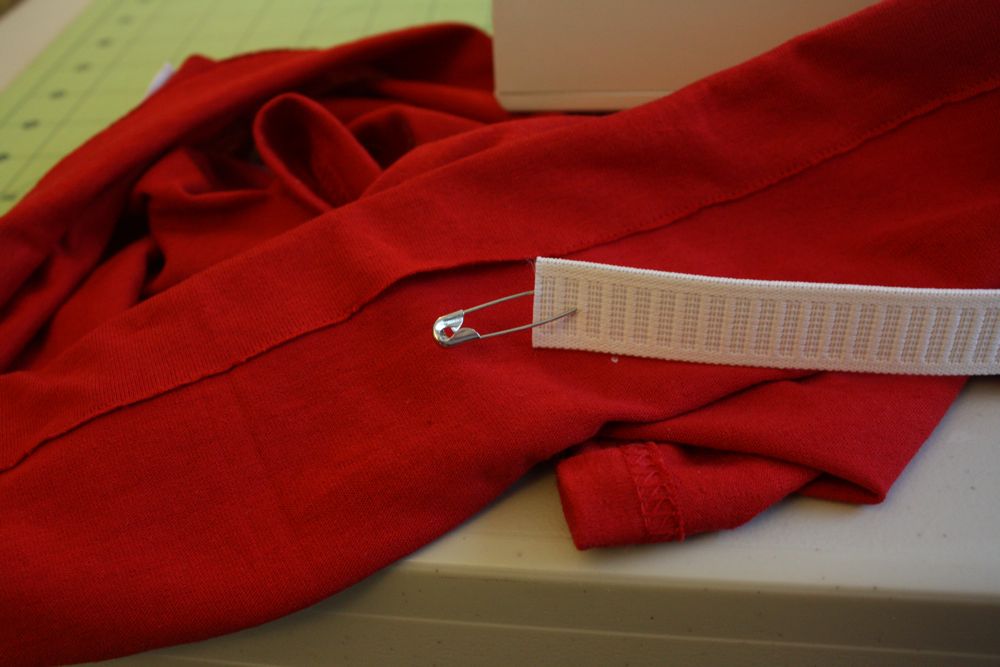
Using a safety pin, thread your elastic through the casing, and sew the ends together. This is a good time to check the fit before you sew the opening closed.
then, all done!
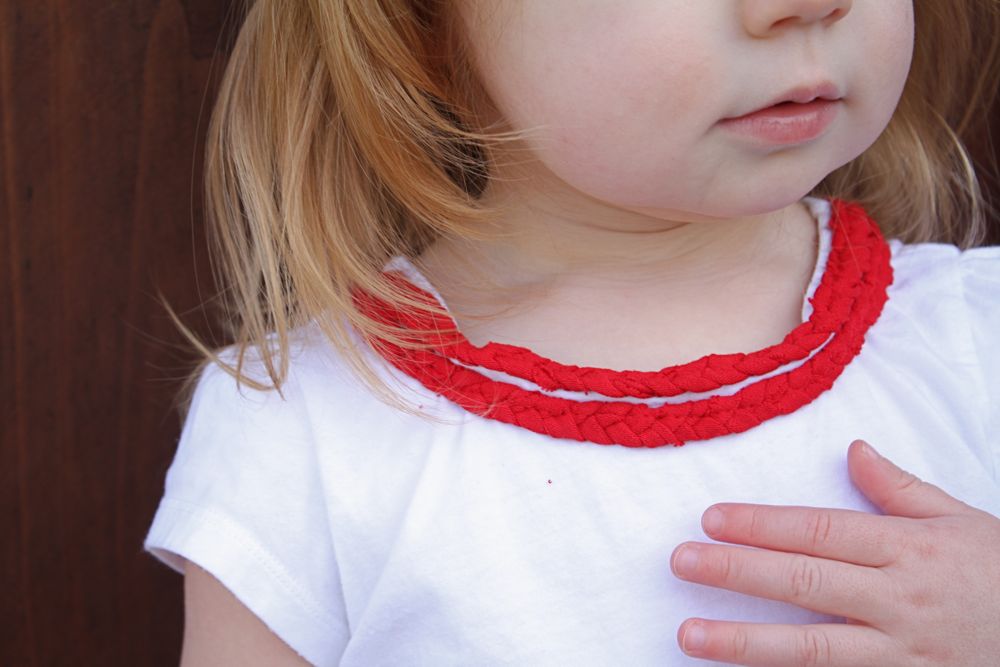
To complete Sadie’s outfit, I used my braided tee tutorial to coordinate the whole ensemble to a tee! (har har)
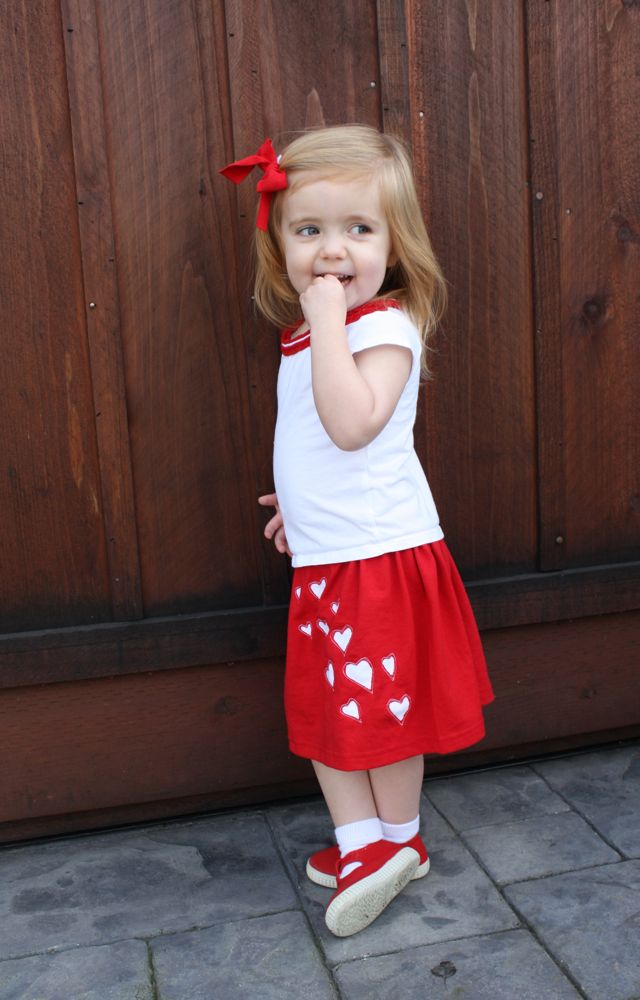
I doubled it in the front.
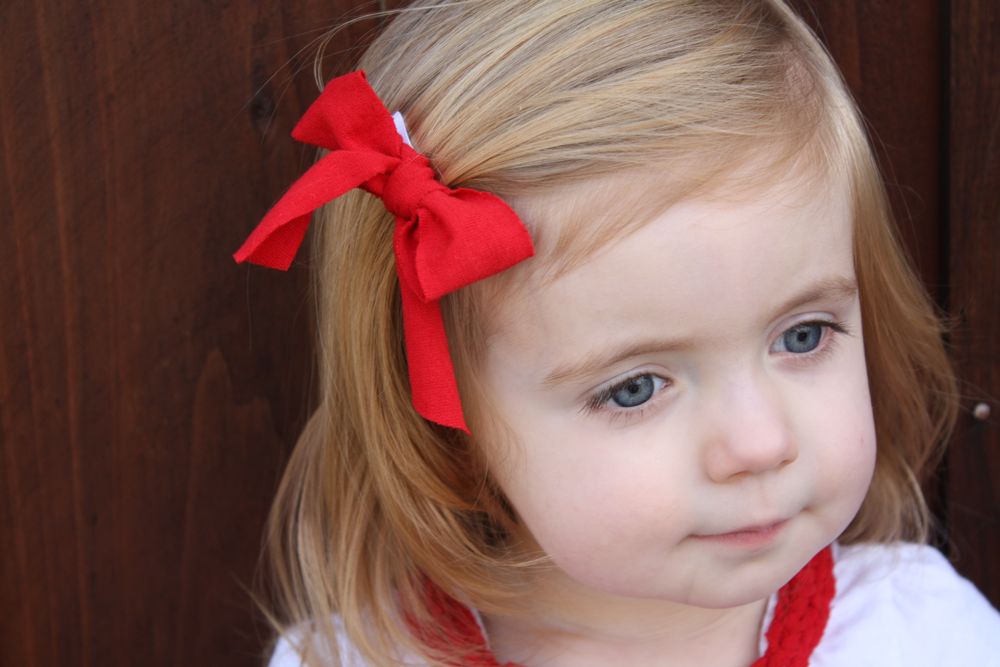
Then I quickly tied a scrap in a bow, and glued it to a clippy. Done and DONE! 🙂
My little Valentine is stylin’!
Tune in tomorrow, because Care will take over the reins, and will be doing a lovey dovey tutorial on her blog! yay! can’t wait!
Featured on Craft Gossip!
So. Stinkin. Cute.
Oh, I love the whole outfit all together! Perfect! :o)
I love it all. I can’t wait to try this myself.
oh, VERY cute and VERY sweet! normally with reverse applique I dig the hand stitches way more but on this project the double round of tiny little machine stitches are just too cute! And I love that you created a full ensemble out of it.
so sweet!
Very cute! I think I will try this! Thanks
Oh, so cute! I want to make one right now for my three year old! Hmmmm, need to find a red t-shirt…..
cute,cute,cute and so easy!!!!
Jess. Seriously. This is super cute. I have got to make one. Today.
Love this valentinesy outfit and these darling pictures of Sadie!
I love it. I have a thing for inset hearts these days!
Very cute and do able!
I love it! Lately, I am totally into reverse applique! Mia might actually get a valentine’s outfit this year.
Love it! Wonder what size shirt I’d need to make one for my not-so-scrawny 23-year-old SELF 🙂 because I want one…
So, so cute!!!
I heart this! I love the reverse applique technique…makes such a great impact.
I love the outfit thanks so much for sharing. I have a red shirt that has a stain at the top was wondering what to do with it this will be perfect.
Michelle
This is so very very cute!! I linked to your tutorial over at Craft Gossip Sewing:
http://sewing.craftgossip.com/tutorial-blowing-kisses-valentines-skirt-for-little-girls/2011/01/31/
–Anne
Too cute! I love that it’s made out of a t-shirt. The hearts are such an adorable idea.
Very cute! The t-shirt was a great idea! I’ll have to get busy to make some for my girls (althought they might not be red, since I don’t think I have any red shirts lying around 🙂
Well done!
Andrea
super cute! love the idea of using a shirt to take advantage of the hem already there!
Oh, I love the outfit!! Especially paired with those sweet little red maryjanes!! Adoreable!
LOVE this!
Fantastic idea!! Will try it out! Except since I am a novice I dont have much idea on what type of fabrics shd I try this on?..wont the cut red t fray?
Adorable!! I especially love the name!!
This is so adorable. That picture of your daughter standing there with her feet crossed is just PERFECT, she is so darling!
Megan.
Aside from the fact that your little one is just insanely adorable, I love this skirt! I think I need one for my 6 year old.
Kimie
So cute. I made one, and got carried away and also did a matching shirt and leg warmers. Have you got a place for us to share what we make from your tutes?
OK, just ignore the above comment. Apparently I have to look around a little better before posting silly questions. I found the flikr group.
I just made one last night for my 5 year old to wear to her Valentines Party at school!! I linked up on my blog to your tutorial here http://munsons.blogspot.com/2011/02/valentines-day-upcycled-blowing-kisses.html
I must confess that I am not a mommy yet, so I used this tutorial to make myself a skirt! I love how easy this skirt is to make — thanks for posting it! I linked back to you! http://mandjhooray.blogspot.com/2011/02/t-shirt-skirt.html
Thank you for sharing this easy way to personalize clothes. I’ve make a T-shirt and linked your blog in mine. Hope u don’t care.
http://enuntita.blogspot.com/2011/02/otra-camiseta-tuneada-y-van-2.html
Cheers from Malaga.
Ive just discovered you blog and have been reading it and wow are you talented and creative!
perfect!!!
perfect!!
Thank you for the inspiration! Love your skills, girl!
http://www.amytriedit.com/2012/02/ps-valentines-outfit.html