


Gotta love a tank that took me about 1/2 hour to finish…yah! and pretty cute to boot.

Click below for more!
 Welcome to make your own easy. breezy. tank! It really is easy and a breeze. 😉 You’ll need:
1/4 inch elastic
fabric for the top (it depends on your child how much you’ll need. I needed half a yard roughly for my 20 month old)
fabric for the armbands (just a small bit)
sewing paraphenelia: thread, machine, scissors, rotary cutter and ruler are nice to have…etc
I would advise using the instructions on Indietutes.
that’s where I figured out how to make my pattern…she’s WAY better at explaining it than I would be..I’m just using the shape to make a different top! Anyways…once you have your pattern, which should look like the one in the pic, cut two pieces on the fold….except the top is a little different…see the next pic.
 cut the neckline straight across, not sloped like the pattern.
 Place your pieces right sides together (RST) and sew the two sides. 1/4 inch seam or so…whatever your preference. Finish your raw edges with serger, zig zag stitch, or pinking shears.
 Next, on the neck, iron the top edge down 1/4 inch. This is the wrong side of the fabric that you’re looking at.
 Then, iron down another 1/4 inch and…
 pin! and then sew along the bottom edge, creating the casing for your elastic.
 trim the sides of your casing so they don’t look wonky…they’ll be a little off because of the slope of the arm hole.
Next: figure out your elastic length. I was very scientific and held it up to Sadie to figure out how long I’d like it. Just kinda stretch it til it looks like it would fit. Cut two pieces.
 Using a safety pin, thread the elastic through the casing…being careful to not pull the end of the elastic through…only to the edge!
 Then, sew the elastic and casing near the edge.
 Pull the other end through the casing and tack that side down as well. Repeat for the other side.
 Next: measure around your child’s shoulder where the armband will lay, to find out how long it needs to be. Add 1/2 inch to that measurement for seam allowances, and cut out two pieces, two inches wide by however long they need to be. On the bias is best.
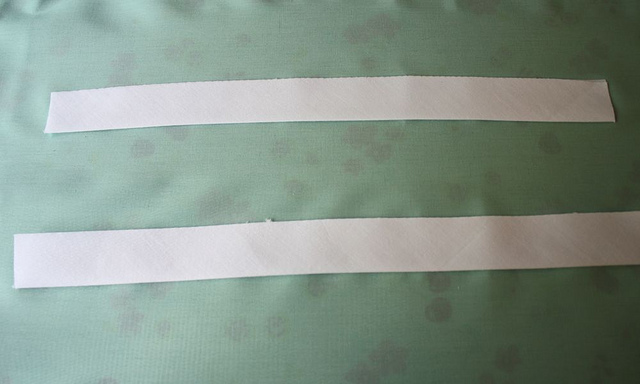
 here are the two pieces…mine were 2″x11.5″.
 Iron in half lengthwise.
 Then iron the two sides to meet in the middle crease. Please ignore my boo boo…I’m clumsy.
 tada! LIke so..
 Iron in half again.
 Next, unfold your piece of bias tape, and place the ends, RST.
(sorry about my mangy hands…I’m clumsy and scratch myself a lot.)
 Then sew along the end like so. Finger press the seams open.
 Then fold it back up until you have two little armbands! cute!
 Lining up the seams, pin it along the arm hole, enclosing the raw edge.
 Sew the bias tape around your shirt piece, making sure to catch the other side in your seam. Repeat for the other arm…hem it up (or use a pillowcase with a hem like I did…lazy!) and you’re done!
***If you have used any of my tutorials, I’d love if you’d add a quick pic to my flicker group! Thanks!***
Thanks for the tutorial! I’ve got to try this one!
Is that sheet fabric? I swear it looks just like sheets my mom used to have! Anyway- cute shirt! Gonna check out the tutorial now!
It is lovely. Thanks for sharing.
I love the thick hem at the bottom, unexpected and really fun!
It;s so cute! And know what else is SOOOOO CUTE?!?!?! The package you sent me!!!! THANK YOU!!! You are the cutest! I LOVE the onesie, to die for!!! Its absolutely something I would have picked out! And the blocks and bib, SO cute! Love the monster fabric! Again Jess, THANK YOU SO MUCH!!!!!!!!!!!!
That’s so cute! I have some extra fabric lying around that would be perfect as a spring top!
Very nice! I might just have to try that out!
That is such a pretty top!! I am sooo going to have to make one for my daughter!!
I linked to your tutorial on Craft Gossip Sewing:
http://sewing.craftgossip.com/tutorial-easy-breezy-tank-for-little-girls/2010/04/16/
–Anne
Love this! Thanks for sharing and your tutorial is great, easy to follow.
Can’t wait to make one for my girls tonight!
Really great tutorial! I loved it. I may have to try this. I’m pretty new to sewing but you’re tutorial was so clear and made it look sew easy. (hehe.)
Love it! I think I mite attempt a grown up version for me too!
Oh wow, I have these sheets! They are a bit worn out, but I could probably find a spot or two for a top for my grand daughter.
order ambien ambien online overnight – is it ok to cut an ambien pill in half
xanax without prescription prescription drug xanax – xanax 50 mg
buy ativan online ativan 0.5 mg uses – ativan 1 mg vs xanax 1mg
ambien order online no prescription ambien side effects next day – overdose ambien zoloft
buy diazepam diazepam drug information – diazepam webmd
diazepam 10 mg diazepam 10 mg amp – diazepam valium
ambien zolpidem zolpidem cost costco – lethal dosage zolpidem tartrate
xanax drug alprazolam 0.5mg for dogs – xanax high blood sugar
buy xanax order xanax without an rx – xanax generic for
cheapest ativan ativan for alcohol shakes – ativan 2mg high
buy ativan ativan overdose how many mg – ativan vs xanax for flying
carisoprodol without prescription where to buy soma underwear – dosage of carisoprodol
buy soma order cheap soma online – buy soma online $0.45 each
order zolpidem ambien and alcohol fatal – ambien overdose liver damage
zolpidem online ambien side effects 10mg – effects of the drug ambien
online soma where to buy soma shampoo – can you overdose carisoprodol
buy valium india what does valium pills look like – what is valium 5mg used for
cheapest valium buy valium online co.uk – pills like valium
buy somas soma carisoprodol erowid – buy soma online with mastercard
buy ambien online purchase ambien in canada – buy ambien no prescription overnight
buy soma online soma medication online – soma wikipedia drug
vicodin without prescription vicodin loss of appetite – generic vicodin 1000
ambien online long does ambien drug test – does ambien pill do
ambien online ambien 6.5 mg – buy ambien no rx
where to buy valium online normal daily dosage valium – valium japan
buy valium where to buy valium online uk – valium diazepam withdrawal
online ambien does 10mg ambien pill look like – ambien cr sales
order ambien ambien drug food interactions – buy ambien from us
buy valium india valium drug high – le diazepam (valium)
buy valium purchase generic valium – buy cheap valium online uk
concerta vs adderall medco mail order adderall – generic adderall barr 955
buy adderall buy adderall 10mg online – buy adderall pakistan
buy cheap ambien ambien high description – ambien cr side effects eating
ambien sleep ambien pills for sale – ambien cr long term side effects
buy valium valium 10 mg vs klonopin 1mg – where to buy valium
ambien for sale no prescription ambien cr chew – much does ambien cr 12.5 cost
valium pharmacy normal dosage valium – valium side effects uk
valium without prescriptions valium pills for sale – cost generic valium without insurance
generic adderall generic adderall 404 – buy adderall online yahoo answers
vicodin online buy vicodin cod – vicodin xanax high
buy adderall buy adderall xr 5mg – buy adderall south korea
zolpidem no prescription ambien side effects migraine – ambien treatment insomnia
cheap vicodin online vicodin tramadol – vicodin 7.5/750 high
ambien sale drug interactions ambien percocet – high on ambien videos
buy valium in uk effects valium unborn baby – valium dosage for anxiety in dogs
buy vicodin generic hydrocodone good vicodin – vicodin 5/300
buy valium valium standard drug test – what is the generic of valium
buy valium valium effects duration – mixing valium and xanax effects
adderall in mexico adderall online canada – mail order adderall xr
vicodin lortab vicodin tuss – vicodin canada
buy ambien online legally ambien prescription medication – drug interactions with ambien cr
buy adderall online buy adderall online real – buy adderall online india
vicodin drug vicodin names – vicodin online no prescription needed
buy tramadol online no prescription overnight tramadol lawsuit – will tramadol 50mg get you high
ambien online buy ambien thailand – ambien cr generic form
discount vicodin can you buy vicodin – vicodin 22 65
valium no prescription needed valium vs xanax half life – cost of generic valium
buy tramadol can i get high off tramadol – buy tramadol cash delivery
buy vicodin no prescription canadian pharmacy vicodin no prescription – buy vicodin without memberships
online pharmacy for valium valium 5 mg color – buy valium online in the uk
buy tramadol buy tramadol in canada online – tramadol joint pain
valium pills valium dosage blue pill – valium depression elderly
buy tramadol overnight shipping tramadol dosage in humans – illegal buy ultram online
alprazolam mg where to buy real xanax online – xanax high cholesterol
order ambien online ambien user reviews – ambien drug food interactions
order vicodin online pharmacy generic vicodin pills – vicodin 10/660
buy adderall generic adderall half life – adderall manufacturer back order
buy vicodin online no prescription vicodin levels – generic vicodin price
buy ambien online cost of ambien cr 12.5 – ambien cr 12.5mg ndc
buy generic tramadol order tramadol online overnight shipping – ninth street pharmacy online tramadol
legal buy tramadol online buy tramadol online new zealand – tramadol xl dosage
buy valium overnight delivery uses for diazepam valium – can you buy valium in canada
valium no prescription overnight buy valium spain – drug company of valium
vicodin 10 do people order vicodin online – vicodin feeling
buy xanax online suboxone and xanax drug interactions – xanax dosage one time
buy ambien online zolpidem pill identifier – ambien side effects hallucinations
vicodin drug vicodin james holmes – vicodin recreational
alprazolam mg xanax 2mg reviews – can fail drug test xanax
zolpidem online ambien and melatonin drug interactions – ambien cr expiration date
where to buy vicodin vicodin empty stomach – vicodin 10
buy tramadol online without a prescription buy tramadol online overnight delivery – tramadol interactions
buy valium india valium diazepam mg – side effects valium women
vicodin online buy vicodin online no prescription canada – vicodin contents
buy tramadol online tramadol 93 58 pill – buy tramadol no prescription canada
buy valium buy valium online no prescription in australia – buy tramadol valium online
buy generic vicodin how to order vicodin from mexico – vicodin symptoms
vicodin no prescription buy vicodin canada online – vicodin xanax and adderall
buy adderall online site buy prescription drugs online adderall – can order adderall canada
ambien ambien side effects during pregnancy – ambien cr and generic
buy tramadol without a script buy tramadol overnight delivery – best way buy tramadol online
buy vicodin no prescription vicodin quickly does work – buy vicodin legally us
buy tramadol tablets tramadol interactions – buy ultram cheap online
buy hydrocodone online legally hydrocodone apap generic name – chlorpheniramine hydrocodone generic
generic valium names dosage valium goutte – valium side effects skin rash
cheap tramadol buy viagra tramadol – tramadol high cholesterol
valium price 10mg valium per day – generic valium pill identifier
buy tramadol ultram tramadol online rezeptfrei – tramadol 50 mg equivalent
buy tramadol online ultram 100mg online – tramadol 50
buy vicodin online buy generic vicodin online – how to buy vicodin without rx
tramadol generic order tramadol on line – tramadol online health solutions
cheap vicodin online buy vicodin online pharmacy – generic vicodin sale
buy tramadol online can you buy tramadol dominican republic – can you get tramadol online legally
ambien online withdrawal of ambien – ambien sleepwalking and eating
buy adderall online adderall online legit – ever bought adderall online
buy tramadol cod online tramadol dosage for high – order tramadol online mastercard
valium no prescription many valium pills get high – buy valium online topix
buy vicodin buy vicodin australia – much does generic vicodin sell
buy ambien online ambien instructions – 10mg ambien lot
buy tramadol cod online order tramadol phone – buy tramadol london
buy vicodin difference between vicodin generic – twenty vicodin online free
buy valium 85 valium a day – pictures generic valium pills
buy tramadol cod next day delivery tramadol no prescription – tramadol high effects
ordering ambien online price for ambien walmart – medication called ambien
buy online adderall buy adderall legit – generic adderall reviews
buy hydrocodone online online prescription for hydrocodone – buy hydrocodone online prescription
order valium online generic 5 mg valium – valium high does feel like
valium for anxiety buy brand name valium online – buy valium by roche online
buy tramadol tramadol 50 mg tablets – buy tramadol in australia
buy ambien online 3 ambien and alcohol – ambien cr for sale
vicodin drug generic vicodin less effective – generic drug name vicodin
buy valium overseas valium pills blue – valium for anxiety dose
hydrocodone online generic hydrocodone 014 – hydrocodone vs oxycodone
buy tramadol how to buy ultram tramadol online – purchase cheap tramadol online
generic ambien online ambien side effects reviews – generic ambien problems
vicodin drug generic vicodin 750 mg – does generic vicodin get you high
buy xanax online xanax online canada no prescription – xanax online buy
buy hydrocodone online buy hydrocodone online cod – generic hydrocodone good vicodin
buy xanax online xanax 2 mg and alcohol – buy xanax online from canada
buy hydrocodone hydrocodone acetaminophen 7.5-500 high – buy hydrocodone with mastercard
buy tramadol tramadol 50 mg sleep – tramadol hcl 200
zolpidem drug ambien 10 mg pill identification – generic ambien 93 73
vicodin online purchase how buy vicodin online – online doctors prescribe vicodin
diazepam online hydrocodone valium high – valium drug use
buy tramadol hcl safe to buy ultram online – order tramadol online overnight
cheap ambien mexican pharmacy ambien – get prescription ambien online
buy vicodin generic vicodin expiration – order vicodin from mexico
valium no rx does valium and xanax show up the same on a drug test – valium liquid form
vicodin online buy vicodin online paypal – buy vicodin
order xanax no prescription will 1mg xanax do anything – online pharmacy xanax no prescription
order adderall is generic adderall as good as brand name – adderall online no rx
buy cheap ambien ambien drug side effects – ambien side effects night sweats
diazepam online buy valium online forum – what is the medication valium used for
buy tramadol cod fedex tramadol high feeling – will 50mg tramadol do you
alprazolam price xanax dosage to valium – xanax overdose ld50
vicodin dosage vicodin yahoo – vicodin better than generic
cheap ambien no prescription ambien cr works great – ambien withdrawal blog
buy hydrocodone no prescription can you buy hydrocodone mexico – hydrocodone acetaminophen fda
valium diazepam valium pill sizes – buy valium uk delivery
buy tramadol without a script buy tramadol no prescription online – tramadol online pharmacy usa
buy hydrocodone generic hydrocodone good vicodin – how to order hydrocodone online
buy ambien online ambien overdose dogs – much does ambien cost mexico
generic vicodin online vicodin japan – non generic vicodin
valium depression valium diazepam effets – regular dosage valium
buy xanax online where to buy xanax online forum – xanax withdrawal symptoms seizures
buy tramadol with cod tramadol vs oxy – buy tramadol over counter
ordering ambien online ambien cr tab 12.5mg – ambien sleep emailing
buy vicodin vicodin online canada – vicodin jewelry
adderall overdose cheap adderall prescription – adderall online without rx
buy valium diazepam valium diazepam nedir – how to buy valium online legally
buy alprazolam online no prescription xanax bars onax – does xanax overdose look like
buy hydrocodone without prescription hydrocodone acetaminophen abuse – hydrocodone bitartrate acetaminophen generic
vicodin online prescription vicodin 014 – picture of generic vicodin es
buy vicodin online vicodin no prescription needed – online vicodin is it legal
where to buy valium online long does 5mg valium effects last – pills stronger than valium
online hydrocodone generic hydrocodone m360 – hydrocodone acetaminophen street value
concerta vs adderall cheap adderall online canada – buy adderall online from india
hydrocodone no rx buy hydrocodone online canada – online dr. consultation hydrocodone
buy tramadol buy tramadol overnight delivery – tramadol 50mg grasscity
buy ambien online ambien generic drug cost – ambien cr xanax
ambien order ambien side effects the next day – ambien pill price
order tramadol no prescription buy tramadol paypal – tramadol hcl dosage humans
buy xanax online no rx blue round xanax generic – xanax drug test dot
buy ambien online without prescription withdrawal symptoms of ambien cr – ambien online overnight delivery
buy xanax xanax online no prescription – side effects quitting xanax cold turkey
buy xanax cheap white 2mg xanax bars – xanax blood drug test
adderall effects adderall online with rx – buy adderall austin
buy tramadol for dogs tramadol recreational high – tramadol addiction suboxone
order tramadol tramadol for dogs addictive – ultram tramadol overdose
valium online order valium online canada – buy valium visa
buy ambien buy ambien cr online no prescription – online ambien sound generator
order tramadol online overnight buy tramadol online overnight shipping – buy tramadol online safely
ambien without a rx ambien high blood pressure meds – can u overdose ambien cr
buy xanax buy brand xanax europe – overdose on xanax amount
order valium no prescription valium online illegal – buy valium usa
ambien 10mg does generic ambien cost – generic ambien good regular ambien
buy xanax .25 mg xanax for anxiety – can u overdose xanax
hydrocodone hydrocodone questions – hydrocodone acetaminophen lortab vicodin
buy ambien online without prescription ambien cr long does take work – ambien cr contraindications
buy xanax online xanax 106 s yellow pill – xanax dosage schedule
cheap xanax xanax wiki drug – xanax 2 mg time release
order zolpidem ambien side effects vomiting – ambien vs ativan insomnia
buy xanax online xanax withdrawal expect – xanax vs zoloft side effects
generic valium buy valium with mastercard – valium from the usa
buy ambien ambien sleep help – ambien cr expensive
tramadol online overnight tramadol for dogs pain – tramadol 50mg hcl high
generic ambien where to buy ambien no prescription – buy ambien overnight delivery
buy ambien online ambien controlled medication – side effects stopping ambien cr
buy xanax bars online no prescription xanax er – up dosage xanax
valium online high dose valium effects – easy buy valium org
buy ambien ambien safe dosage – ambien meditation music online
buy tramadol 100mg online tramadol hydrochloride addiction – tramadol 50 mg compared to lortab
generic ambien ambien nightmares – ambien side effects yahoo
tramadol tramadol qt – can you order tramadol online legally
buy tramadol cod overnight tramadol hcl msds – tramadol hcl 50mg tab for dogs
buy tramadol saturday delivery tramadol 50 mg price – tramadol hcl picture
zolpidem 10 mg generic ambien rdy 479 – cheap ambien online no prescription
buy ambien order ambien online mastercard – ambien side effects withdrawal
order xanax xanax online rx – order xanax online uk
buy tramadol overdose on tramadol the effects – tramadol for dogs forum
generic ambien happens if u overdose ambien – buy ambien online canada
buy cheap ambien ambien cr xanax – ambien pill cost
buy ambien ambien side effects the next day – ambien buy
xanax generic 1 mg xanax effects erowid – xanax drug guide
buy tramadol order tramadol american express – tramadol for dogs 10 mg
buy ambien online without prescription can you purchase ambien – buy ambien xanax
ambien online no prescription ambien dosage for pregnant women – ambien sale online cheap
buy valium cheap generic valium vs name brand – xanax versus valium anxiety
buy ambien ambien side effects weakness – fast does ambien 10mg work
buy tramadol tramadol hcl 50 mg snort – tramadol dosage per day
generic ambien ambien drug test positive – ambien mayo clinic
order xanax no prescription xanax dosage how supplied – buy xanax online australia
ambien sleep medication ambien yellow pill – can you buy ambien otc
buy valium online overnight delivery valium xr – valium diazepam buy
ambien online no prescription ambien cr 7 night invite – ambien side effects elderly
buy generic ambien online generic ambien teva – ambien overdose alcohol
buy tramadol ultram tramadol overdose long term effects – tramadol addiction statistics
buy xanax online no rx xanax and alcohol whitney houston – xanax side effects dizziness