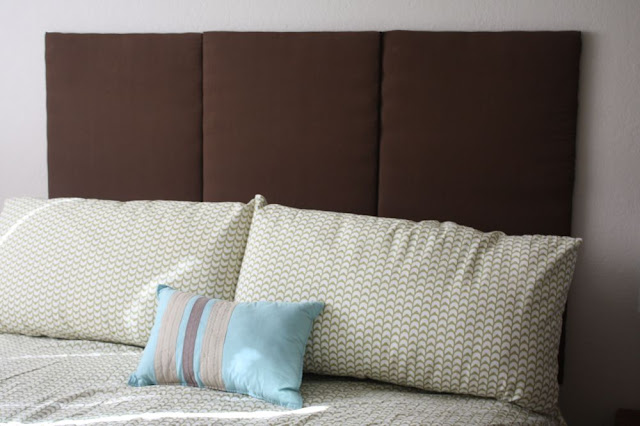
so, about a week ago we woke up to a crashing sound…one of our picture frames had fallen down, luckily not on anything valuable. (like our heads) i muttered something to rory after taking down the other two pictures: i want to make a headboard….i saw it online…..looks pretty easy….ZZZZZZzzzzz.
surprisingly, i actually remembered my sleepily made plans the next day, and decided that’s what i wanted for my birthday! so….voila! here is my birthday present from rory! (thanks hun!)
 still looking for new bedding, so excuse the poorly staged picture and wrinkled duvet cover. har, har. the room used to look like this.
i got the idea here, and pretty much copied it, but i did make the panels long enough to (mostly) hide behind the bed.
the panels are 36″x 20″, if anyone’s wondering, and we have a queen-size bed. i used about 2.5 yards of material to cover it. we also got an awesome staple/nail gun to add to our collection of tools!
 one thing i learned was to staple around the edges very closely so that it doesn’t bulge. ours did a little bit, and i might go back and fix it but for now i am too lazy.
the total cost for the project was about $65. not too shabby, i think!
what do you think?
featured on Room Remix!
Great job you two!!!!
Jeff and I did that a while back too…it was really tall though. I like yours. The size is great, and it wont hurt your head in a horrible earthquake (something that terrifies my hubbs). I actually just did a new headboard like 2 days before you did yours! I just painted an old wooden one. I like it, but I like your padded fabric one too! Why can’t I have both?!?!?!
I was just thinking about doing something almost exactly like this earlier today before I saw your post. Now I won’t have to think up my own directions! Perfect timing! Thanks! (Oh, and your bedroom looks WAY more coordinated than ours, so no need to apologize. Unless you have a Christmas quilt (that has been on the bed since before Halloween), and three different kinds of pillowcases (one with a Mickey Mouse stamp and my name on it from when I was like 14) on four pillows, you are looking pretty good.) Haha. Oh, to be out of college someday! 🙂
I love that you used this idea, and it turned out great! I’m going to include it in a blog post, if that’s okay. Great job!
pk @ Room Remix
Nice job! I love chocolate brown. And HAPPY BIRTHDAY Jessica!
Excellent work on that custom headboard!
I checked out the before and after pics of your bed – and REALLY like the after! the headboard looks great. Love the chocolate brown! it goes with some many things that you can go any direction from here!
I love that. I really want to make one now. WE live in Earthquack zone too and so I decided to not put any pictures above my bed.