


**Just so you don't think I'm some sort of Supermom, most of the projects I'm posting in the next few weeks were made before I had Ava. Just wanted to clear that up. We have lots of junk all over our floors and laundry to be folded over here. (and a baby to be snuggled so it's not all bad!) Not much sewing going on! ;) I got my hands on a copy … [Read more...]
Archives for November 2012
simple doily cardstock ornament tutorial
November 28, 2012 By 8 Comments
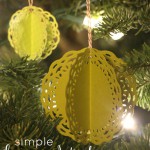
I just adore making ornaments! I have so many ideas that I may or may not have gotten overwhelmed, curled up into a ball, and listened to Christmas music instead of making them.Just kidding....not that that sounds like a bad idea or anything....So! Here's my short little how to! These would be adorable in felt, and plain circles would be really … [Read more...]
basic bodice design series guest post
November 26, 2012 By 13 Comments
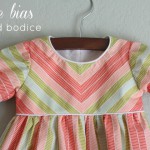
I'm so excited to be posting over on iCandy Handmade for their Basic Bodice Design series! What a great idea, right? Most everyone has a basic bodice pattern in their sewing arsenal, which is what makes this such a brilliant idea for a series? (Why can I never have these great ideas? lol!) It's a simple dress, but the way the bodice is cut on … [Read more...]
stained glass advent calendar giveaway!
November 23, 2012 By 115 Comments
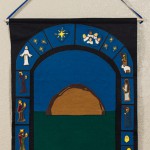
***This giveaway is now closed. See the winner below!*** You may remember I did a giveaway last year for this super cool nativity advent calendar that my mom made out of felt! She made one when I was a kid and we all loved taking turns each night adding one piece to the nativity scene. Of course, with 8 kids we only got 3 turns, but still was … [Read more...]
strawberry and robot cookies
November 21, 2012 By 12 Comments
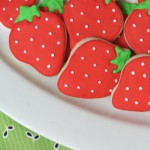
I love making cookies for parties! woohoo! It's like my own personal party in my kitchen. Wow, dork alert. But seriously......I made these strawberry cookies for my best friend's daughter's strawberry shortcake party awhile ago. (who is Sadie's best friend, of course. We totally didn't pressure them into that...lol just kidding they love each … [Read more...]
pink ice cream dress
November 19, 2012 By 21 Comments

Since I have more Oliver and S patterns to try, I dove right into the ice cream dress pattern, and made this little pink number for Charlotte. (a few weeks ago.... No, I'm not sewing much yet!)I have one cut out for Sadie too, just need some pretty specific colored thread to make it work. (don't you hate when you don't have matching thread and … [Read more...]
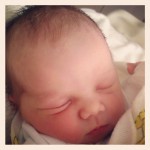
newborn pictures
November 16, 2012 By 74 Comments

THANK YOU for all the lovely well wishes on Ava's birth here on the blog, FB, and Instagram!!! All the support and love is so fantastic and nice to read in the wee hours of the night while I'm up with her.Soo....I took some newborn pics yesterday-I just couldn't help it-she is so photogenic! (she doesn't get it from me) Our little Ava is doing … [Read more...]
baby 3 is here!
November 15, 2012 By 138 Comments
Just a quick post to pop in and let you know that I had my baby on Tuesday! Her name is Ava R....did anyone guess that "A" name? I've only had one person guess it, my sister in law...and it was her first guess! lol. It was a long labor but she's healthy and strong and gorgeous! I'm in love! So are big sisters and dad, of course! I'll be back … [Read more...]
bicycle class picnic blouse
November 12, 2012 By 22 Comments
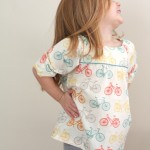
Confession: I had never sewn with an Oliver and S pattern before this top.I know, I know! And I called myself a sewing blogger! lol. I have copied their looks a few times, but after having used one of their patterns, I am a convert.Another confession: Get ready for a slew of Oliver and S projects because I am now obsessed.I made a class picnic … [Read more...]
Fabric Warehouse Direct fabric giveaway!
November 9, 2012 By 182 Comments

***This giveaway is now closed. See the winner below!*** I've got a fun fabric giveaway for you today, from my sponsor, Fabric Warehouse Direct! They have a ton of fabrics at great prices, lots of home dec stuff and some adorable cotton prints too! I must have been feeling the blue, because that's what I picked out as my fav prints, lol. I love … [Read more...]