


***This giveaway is now closed. See the winner below!*** Hey! I've got a great giveaway for you today-and a great pattern shop to introduce you to, if you haven't heard of it already! It's called Too Sweets, and seriously...these patterns are lovely! I am in love with her fabric choices, too...all the little details and touches are fabulous! Check … [Read more...]
Archives for August 2012
Rainbow Dash costume
August 29, 2012 By 59 Comments
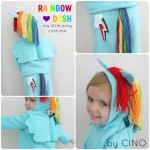
Sadie is flat out obsessed with the My Little Pony show-she has all the characters in toy form (and some doubles), sleeps with them at night, acts out the plots of various episodes....and her favorite pony has always been Rainbow Dash. No wonder, I mean...she can fly and her mane and tail are the colors of the rainbow! So when I asked her what she … [Read more...]
wood & wire display frame
August 27, 2012 By 20 Comments
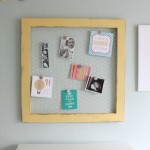
I've been working on this little wire frame for the nursery off and on for like a month-it turned into one of those projects, ya know? Every little step turned into an ordeal...ok maybe not that bad, and maybe it really was my pregnant back aches from leaning over to paint it...haha! Either way it turned out just how I imagined so all's well that … [Read more...]
the sweet & sassy dress: a tutorial
August 24, 2012 By 21 Comments

This dress pretty much named itself because Miss Sadie was being super sassy during this photo shoot! I couldn't believe the smiles I was getting out of her! Surprisingly it only cost me a leftover piece of saltwater taffy from her party....I was all ready with Squinkies and such nonsense. I think it's a fluke...pretty sure next time she'll be as … [Read more...]
embroidery hoops-and a few mini tutorials!
August 22, 2012 By 18 Comments
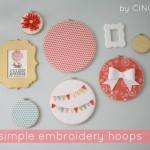
You may have seen bits and pieces of the embroidery hoop decor I made for the new nursery, but here they are all together! With a few mini tutorials also! I gotta say I'm loving this posting less often thing I've started doing. I'm a lot less stressed out about projects, and I'm even working on a new dress tutorial! My mojo is on it's way … [Read more...]
scalloped garland tutorial
August 20, 2012 By 15 Comments
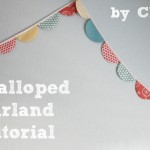
Hey Howdy Hey....channeling Woody the cowboy today I guess. I don't know why I say these things sometimes. Moving on....so I had a bunch of random scraps of fabric leftover from the quilt and other projects, so I decided to make a fun scalloped garland to swankify a wall in the new nursery. Yes, that's a word... I am so close to being done … [Read more...]
baby’s first dress
August 17, 2012 By 22 Comments
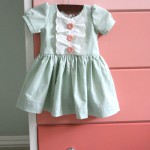
I really wanted to sew something the other day-nothing too complicated or mind boggling (my mind is boggled enough with being 6 months pregnant), so I pulled out this mint fabric from my sponsor The Ribbon Retreat and some eyelet trim my sister in law gave me, and whipped up a little Charlotte dress for the new baby! Only I didn't cut the back out … [Read more...]
Sadie’s Under the Sea party!
August 14, 2012 By 79 Comments

Sadie's party was last Saturday...and today is her actual birthday! A big Happy Birthday to the Sadester! We have big plans: swimming lessons and In n' Out for dinner (plus some more My Little Ponies from mom and dad coming her way...if you follow me on Instagram you know what I'm talking about!) I mentioned it was probably going to be hot … [Read more...]
baby gifts are adorable, no? plus a mini tutorial!
August 13, 2012 By 80 Comments
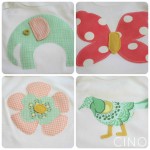
A good friend of mine had a darling baby girl a few months back, and I totally forgot to share what I made her! Just some simple gifts-appliqued onesies, a blanket, and a onesie/skirt combo. I used some new dies for my Go Baby cutter, and they were perfect for this type of project. Easy and quick...the bread and butter of us crafters, … [Read more...]
Word Whipped wood sign review and giveaway!
August 10, 2012 By 163 Comments

***This giveaway is now closed. See the winner below!*** Hey guys! I have another sneak peek at a few nursery projects, plus a fabulous review/giveaway for you today! Holly from the adorable Etsy shop, Word Whipped (cute name, right?) was sweet enough to send me this wooden sign for the new nursery...and I big ol' fat heart the heck out of it. I … [Read more...]