


*This tutorial was originally posted over on Living with Punks!
She’s doing a Scrap Your Stash series right now and there have been some awesome tutorials using scraps, with many more to come!
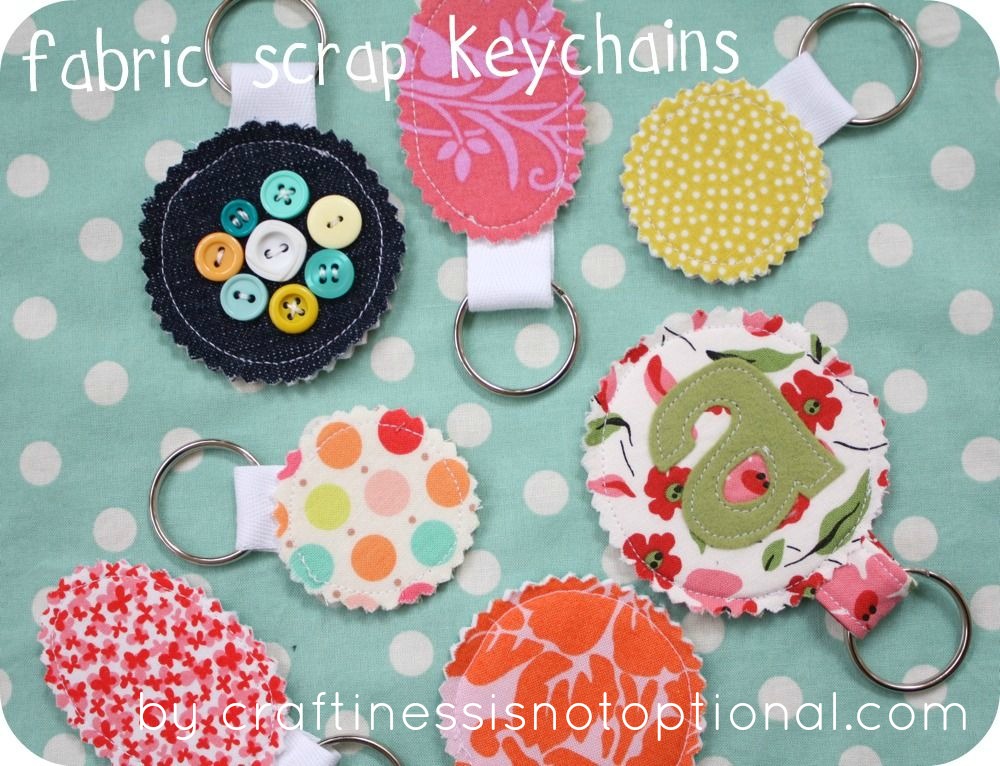
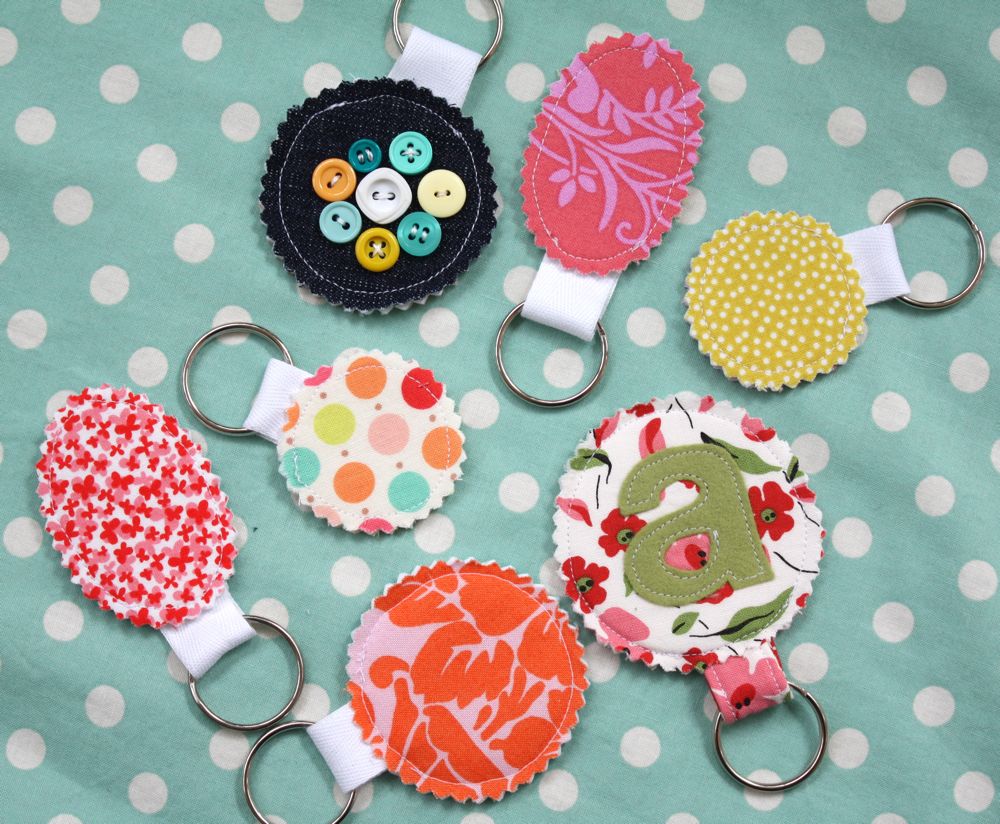
I think I may be in love with these adorable little key chains. So much in love that I made a bunch with no plans for them. After all, I don’t need 7 key chains…but I have friends and family who do! Whether they know that or not. lol.
Anyways, thanks so much to Susan for asking me to participate in her Scrap Your Stash series, I love using up scraps in fun ways, so it was so fun for me to think up a new project!

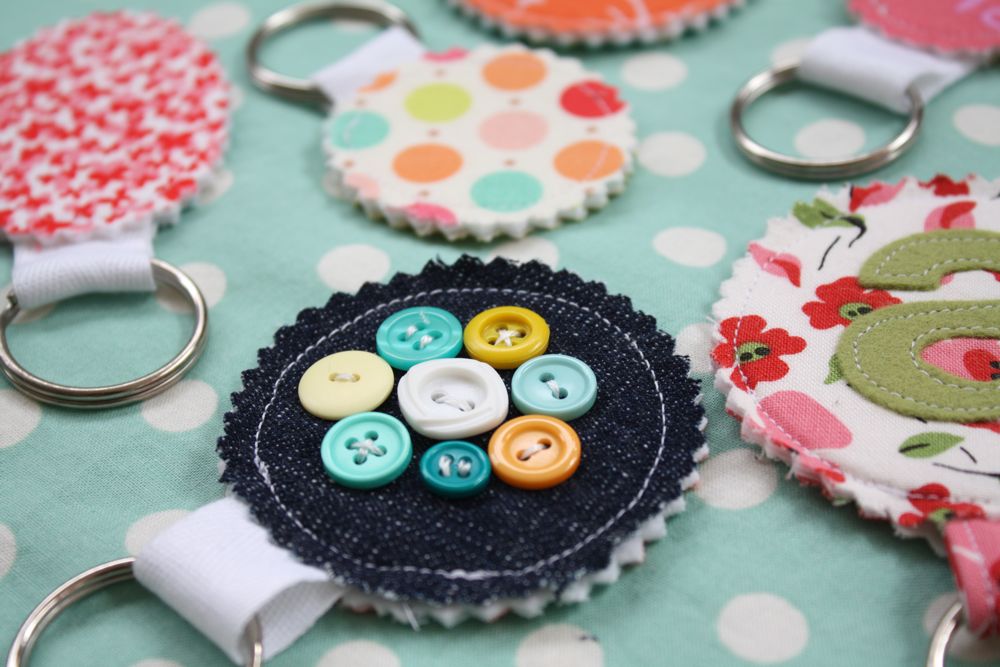
These little key chains are perfect for showcasing your favorite scrap of fabric, or embellishing with button flowers, felt monograms, or whatever you can dream up!
Tutorial below!

Here’s the how to!
You’ll need:
*fabric scraps
*medium weight iron on interfacing
*small piece of Pellon Peltex one sided iron-on interfacing. This stuff is really stiff and is almost like cardboard but you can sew right through it. It’s awesome! I get mine when the interfacing at Joann’s goes on sale, but you really only need a tiny bit so it shouldn’t break the bank.
*twill tape or grosgrain ribbon
*key ring (you can get these on etsy, or re-use an old key ring from an unwanted key chain)
*pinking shears
*buttons, felt, for embellishing
*thread, sewing stuff
*something to make a pattern with, I traced a few of the round things in my sewing room to get some different shapes, and sketched out the oval.

So, first off decide what scraps you’d like to use, and iron on the medium interfacing to the wrong side of the fabric.
(that white piece is the Peltex)
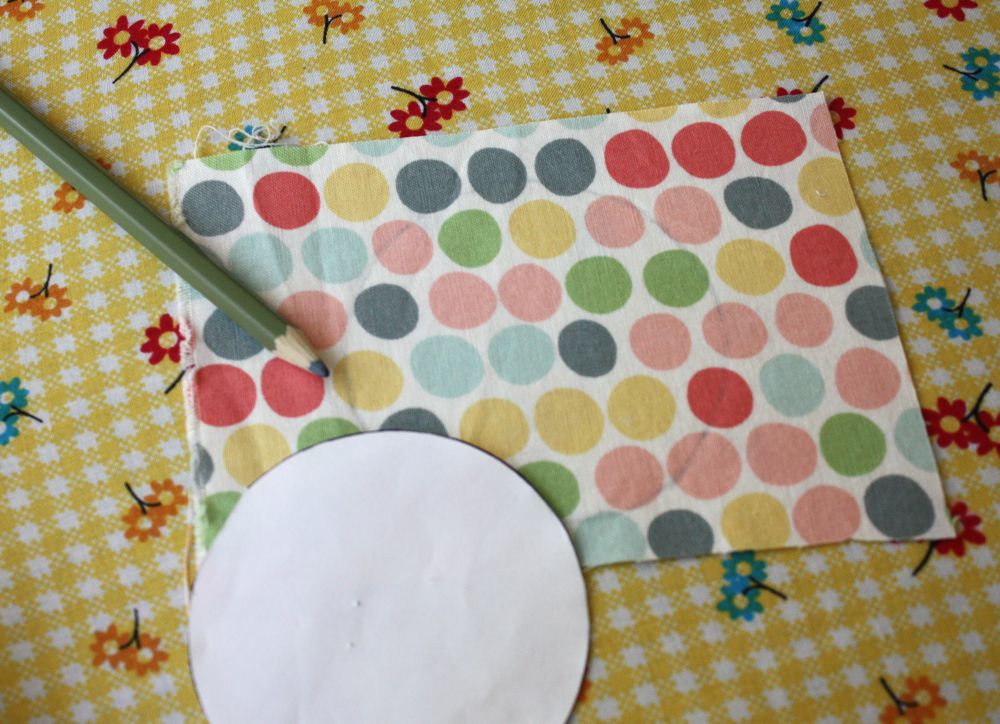
If you’re going to do an applique or buttons, trace around your pattern onto the right side of the fabric so that you know how to place it.
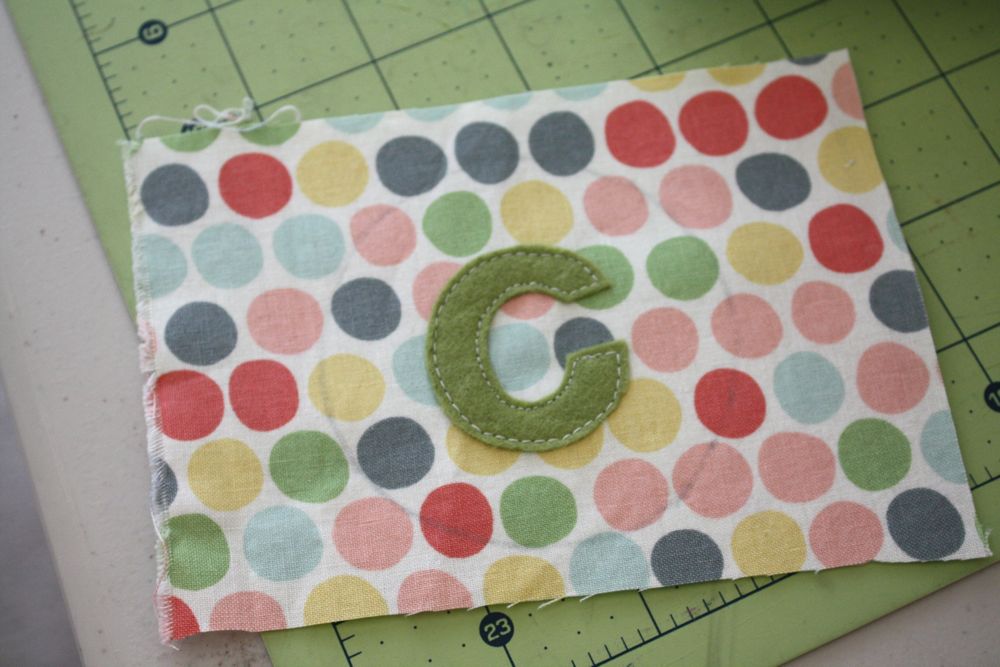
I added a quick appliqued C to this one (cruddiest applique sewing job ever though, lol)

Then I ironed on the Peltex to the wrong side of my fabric according to the directions. (there’s a shiny side, which is the side that should be ironed on the wrong side of the fabric. I placed it down, covered it with a pressing cloth, and pressed with my iron for about 10-15 seconds.) Make sure you iron it to the side you want to be the “front” of your key chain.

Then cut it out, along with the back of your key chain.
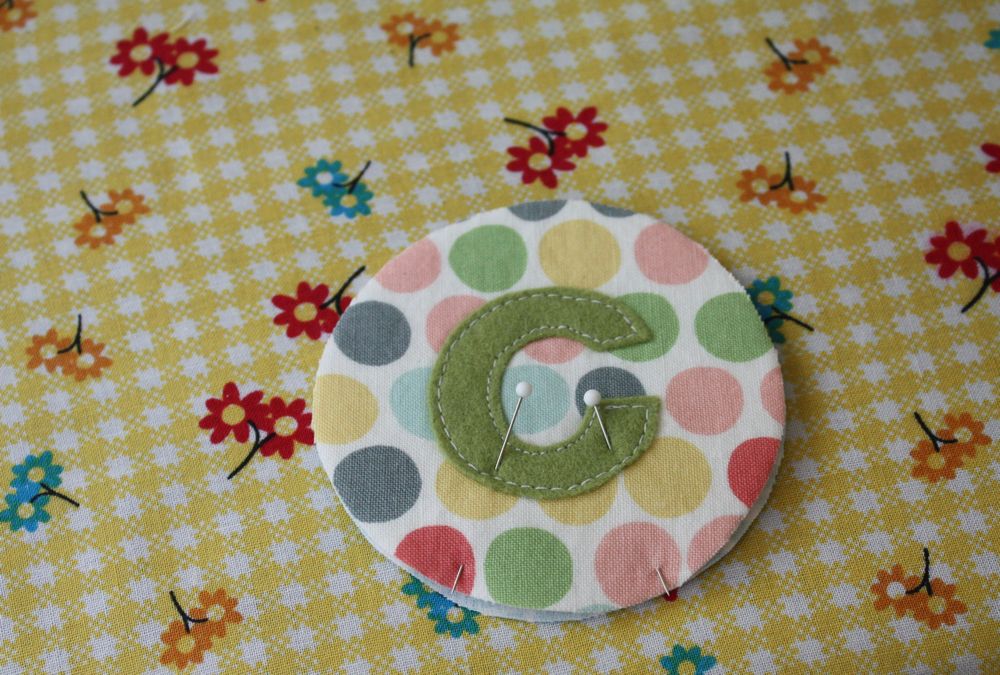
Place wrong sides together, and place two pins about 1″ or so apart on the bottom.

Sew from pin to pin, around the circle, about 1/4″ away from the edge.

Then trim the edges all the way around with pinking shears.
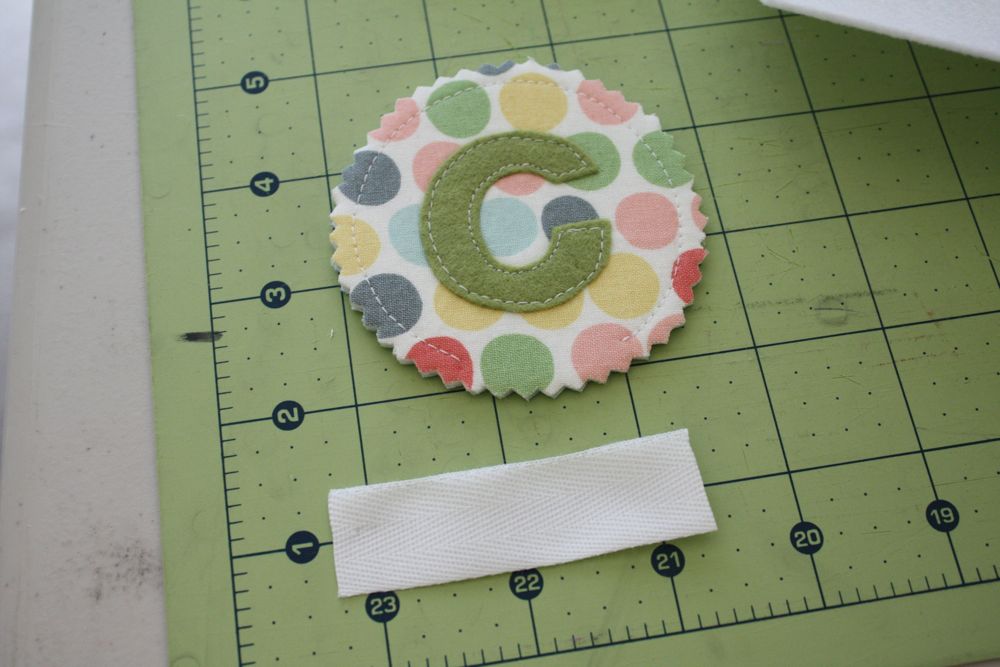
Cut a piece of your twill tape or ribbon about 2″ long. (ignore the fact that this piece is longer, 2″ works better!)
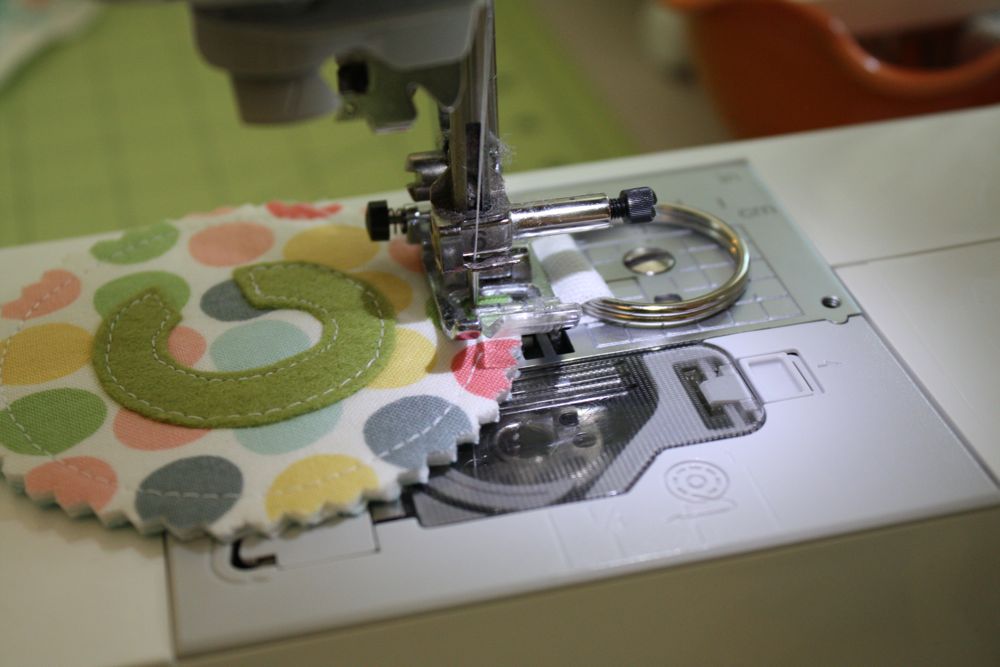
Fold it over your key ring, insert into the opening on the bottom of your key chain, and sew the opening closed, back stitching at the beginning and end.
Trim threads, and you’re done! Make a ton more for friends and family!
You can also sew up a fabric loop to match, but those were a bit bulky and I found that the twill tape was a lot easier to sew and made them a lot quicker to make also!
Hope you enjoyed them! See you later!
Oh! Son preciosos, cómo me gustan!
Saludos!
did you have any idea of the measurement ?
they are all different sizes, from 2-3″ I would say
UM…I LOVE theses. Seriously…now I need to go and buy some key rings!
What a sweet gift! Thanks for sharing.
Oh I love love love these!! They would be so fantastic as party favours for a birthday party. Thanks for sharing the tutorial.
These are so wonderful! I am having some friends over for a sewing night and these are perfect to add to my list, yipee! Thank you! ☺
So cute Jess! I love them!
hi! what a nice idea…….i like it.
bye, nico
Fun idea!
i repined this on pinterest this morning not knowing it was your project. I should have known, you’re awesome!!
You can use the ones with letters as as gift tags! Unless it’s for a Lance cause you all have the same first initial 😛
adorable – fabulous idea for a scrapbuster! 😉
Beautiful idea! Can’t wait to try my hand at these!
I LOVE these! I saw them and immediately knew I wanted to make some. Thanks for the tutorial so I don’t have to figure it out myself!
These are so great!
I’ve been going through my scraps and this is a wonderful and cute idea.
I saw these on Pinterest this morning and had no idea they were yours. Too cute! Off to check out the tute.
genius. did you make the “a” one for me? I love it!
Oh my goodness! I love the monogrammed one! This is the BEST idea ever for fabric scraps – not that I ever have scraps…or fabric for that matter! But if I did/do, I totally want to make these!
gosh they are just adorable
Hi Jess,
This is unrelated to the key chains (although they are very cute)…I was just reading your ‘about’ page and noticed that you like chocolate and french fries. But not together. I really just have to ask: have you ever tried Wendy’s fries dunked in their chocolate frosty? It’s surprisingly good.
Thanks all. oh, and great blog! I am dying to learn how to sew and you are inspiring.
-Kathryn
So cute! Just gave a large Joanns bag full of scraps to a girlfriend. She makes quilts out of the scraps. What a great idea!!!
so precious, i like it.
Thanks for sharing outstanding post.
I have made something similar but I sew love this idea much better. Great inspiration, great sewing/gift/scrap idea. Just plain Great!
thanks
Heather
Can you do this without a sewing machine? Or perhaps, without sewing at all? Thanks!
Do you have to use both types of interfacing?
Such a cute and crafty idea! I shared it on my CraftBliss Facebook page and linked back to you. ~Dee
Brilliant idea….going to file this idea for stocking fillers!
I’ve having a sewing machine for almost 2 years and never learning how to use it. After finding this craft makes me want to learn even more. This will make cute gifts for christmas!
These are so great. Super project to do with my 11 year old daughter – she loves sewing but we search for small projects that don’t overwhelm her (or me!). Thanks so much. I’m going to pin this on Pinterest so people can try your great idea!
Adorable idea! Must pin and stumble. Sew cute and clever! 😉
I’ve been meaning to make these for so long and finally did! They turned out perfectly! I shared your tutorial on my blog today: http://crazydazedesigns.blogspot.com/2012/05/package-pals-craft-exchange.html
Thank you so much for the great post.
Andi
These are awesome! What a perfectly cute and useful way to use up your scrap fabric.
Love them! thanks for the tut!
Love it! I found you via Pinterest and did this project as part of my Pin-A-Day project. I blogged about my attempt here (linking both to the pin and directly to this entry!) http://firewifeelly.com/2012/09/10/pin-a-day-day-7-key-chains/
Thanks!
How big are the circles you used?
Cute!!
I absolutely love this idea! I’m mentioning your idea in my blog post about homemade Christmas gifts!
http://theaccomplishedwomen.wordpress.com/2012/12/05/homemade-christmas-gifts/
Yum! I’ve done this since I was a kid!
valium antidepressant valium + treat high blood pressure – valium 10mg buy online
These are fab
Trixie
http://www.trixielixie.co.uk/index.asp
Im looking for a home made gift for my mothers 50th birthday. I came across these and I will definitely be giving them a try to add with other items! Thanks for sharing and posting! I have added a link to this tutorial on my blog: http://suburbanmumchronicles.blogspot.com.au/
Thanks again 🙂
just stumbled upon this and think it’s a FAB idea – I’ve gone and got all the bits and will now whip up a few. What a great idea to add to a card as a small gift. I sell fabric so a great customer gift. Thanks for sharing it! 🙂
These are soo cute and inspirational! Thank you for showing these off and for sharing the “how-to” on it also…. Very Much! I really love these, they’re adorable!! Big hugs of appreciation and “Likes!”… Donna 🙂
I absolutely LOVE this project. I can’t wait to try some. I featured your project on my blog at http://whittskitsfabricscrafts.blogspot.com/2013/04/mining-monday-fabric-scrap-project-ideas.html and put a link directly back here.
Thanks so much!
Carrie
What a great idea. I’m gong to try this I’m always looking for ways to use scraps plus I need to make a few key chains.
Great photos and instructions too very clear.
I’ve had these bookmarked for AGES now and have just made some of the button ones for my little boy’s first birthday (“Cute as a button” themed). LOVE them! Thank you for sharing 🙂
Sheree
I am confused. So total 2 medium interfacing and 1 peltex? Iron 1 medium interfacing to wrong side of each fabric, cut. Then iron the peltex over the fabric that had interfacing already? Thanks!
I’m making some of these now, here are a couple of tips: use a piece of fusible web to hold the two pieces of fabric together so they don’t shift while sewing. I put the ribbon inside and also take in place with fusible web. That way I can sew it in one continuous sweep. I’m also using 3 inch doilies, embroidered hankies from the dollar store, and images I print unto muslin with images from The Graphics Fairy. I’m also finding some of the edges are fraying more than I like, even with pinking, so some fray check is a good idea. Really, the possibilities are endless.
These would also make great luggage idendtifiers – all those identical black bags on the luggage carousel…
ps. found your post via a link in Huffington Post
I LOVE THESE!!! I was looking for gifts for my aunts and these are pperfect. Thank you!
Oh, I love these – they are my next project! Exciting 🙂
Hi Jess.
Thanks for sharing with us. Love your work very much.
Love the idea,
I,m making presents for all the summer people in my family because we are having a family gathering and these will be perfect! Thanks for the idea!
Amazing! I was looking for ideas for #Christmas for this post I wrote http://blog.247square.com/2014/12/unusual-christmas-ideas.html and I added a link to your tutorial there 🙂
These key chains are looking very nice, we can use these for gifts.
I love these and I can do them I believe. Have been sewing since I was 8 or 9 but due to Lyme Disease unable to use my sewing machine now for a couple of years. This is something I can definately do by hand. Thank you for the inspiration! It will be nice to go to Infusion Therapy and work on something instead of falling asleep or just sitting.
I wanted to let you know that I linked this project at my blog as part of a fabric stash busters feature. You can read the post here: http://nur-noch.blogspot.de/2015/02/15-fabric-stash-bustersstoffreste.html, Best wishes Ronja Lotte
thanks for saving my day………………
I made it for my mom’s birthday and she loved it…………………….
thank you loads…………
yay!
I am a long time quilter and am making 30 of these little gems to give as party favors at a quilter’s retreat I organize twice a year. The quilters will love them! They can use them to ID their totes or as key rings. Thank you for the inspiration.
These are lovely. I have shared them on my blog today in a compilation of sewing projects for boys.
http://www.blueradish.com.au/ten-things-to-sew-with-boys/
April, 2015…only just found this Great post! Simple is always best, I love them!!
Love it!! Thanks for sharing!!
Wow that’s so creative and sweet idea! I love it! 🙂
But actually I m not good with sewing things lol ..is there any other idea I can replace with sewing like I want to write “alphabet in middle part but with something else? Maybe u can advice me something! I hope u got me what I mean to say
I thought that this was such a cute idea! Totally going to try it, not only is it cute but it is affordable! thank you so so much for the idea! love you mom!
Ameeei as idéias!!!
Hi Jess,
These key-chains are super cool! I featured your project in my roundup post “30 Fun and Easy Sewing Projects for Kids and Teens” https://hellosewing.com/30-fun-easy-sewing-projects-kids/
All the best,
Helen
Those are too adorable! I have tons of leftover material that I could use 🙂 But how do you get the material to not ravel on you at all??
pinking shears! also fray check could help.
Wow… it’s awesome… I love the fabric
thanks!
I love this clever way to use fabric scraps. So eco-friendly and so cute! These will be great diy gifts.
I love the way you made these key chains. I really gonna try this.
I love these Fabric Scrap Key Chains from Craftiness is Not Optional. No big key chain to poke you in the thigh when you have your keys in your pocket. Just this nice,
https://www.ammarakhizerkhan.com/
Fun and amazing, Thanks for sharing.
Fabric scrap keychains from Craftiness Is Not Optional
Hi this is best post. I have ever seen. I hope you’ll keep provide this kinda post in future as well.
I love these so much! The perfect things to include on my list for my sewing night with some friends! I appreciate your help!
Great idea. Will be sharing it on my blog.
Find out how to get the perfect design for your embroidery project! This guide will teach you everything you need to know about embroidery digitizing, from finding the right design to creating a stitch file.
Thanks for the great idea!