


Here’s the tutorial for Sadie’s pleated headband she wore with her Winter Wonderland dress.
Click below for more!
You’ll need:
scrap of fabric (mine was about 3″x11.5″)
scrap of interfacing (same size, ish)
elastic headband (I found mine at both Target and the dollar store)
pearls or buttons if you want
scrap of matching felt
glue gun

First, cut your piece of fabric out..

Iron on your interfacing…(obviously mine wasn’t exact, it doesn’t need to be, just close enough)

Then, I serged (or you could zig zag stitch), each short end.

Folded it over, towards the wrong side of the fabric, and ironed it.

Then, I folded it in half lengthwise like so, (right sides together) and serged down the edge…making sure to keep the ironed edges tucked down like so.
(no pic, sorry!)Then I used a safety pin to turn it right side out and ironed it.
I then sewed pleats into the fabric by folding it under every inch or so, and sewed them down. Similar to this shirt. Only I pleated all one direction.
I also dabbed a little bit of fabric glue between the fabric on the short ends to keep them closed.

I then cut a piece of felt to fit, rounded the edges…
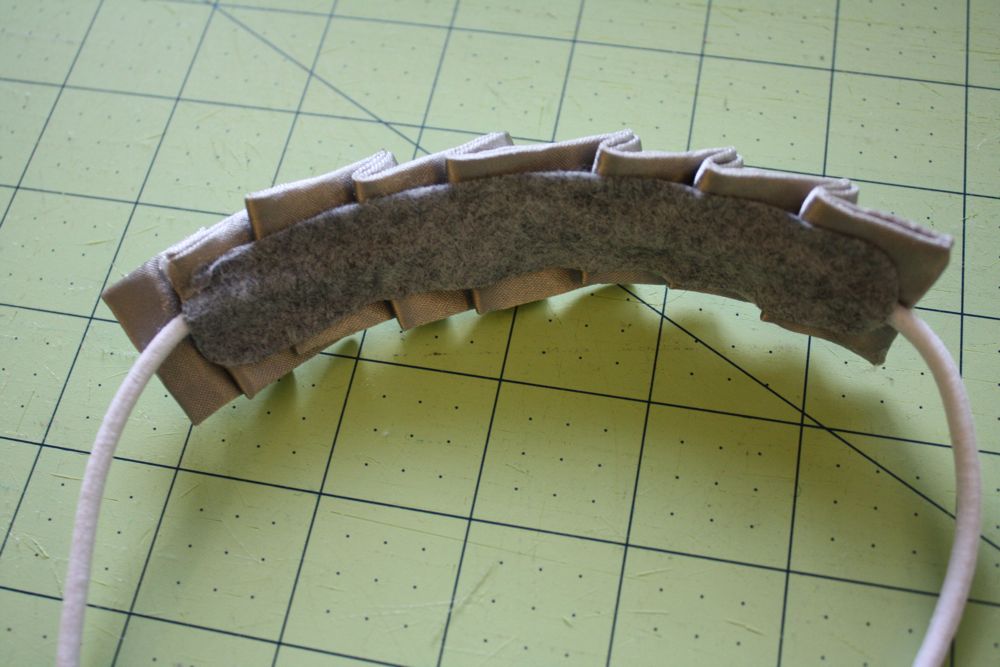
and, sandwiching the elastic between the felt and your pleated fabric, I glued it together like so.

Then I also glued on some flat backed pearl beads for some extra glamour!
tada! I think it turned out pretty cute, I want to try it with some cotton too, that would be adorable!


I have a headband really similar and had been really wanting to make one for my daughter! This is perfect! Thanks for the tutorial! I LOVE it!
So cute!
Very cute and fairly simple! Thanks for sharing. Great pic’s of Sadie, I think she needs some M&M’s for these;)
I love your blog and have a blog award for you to pick up if you want to participate 🙂
http://www.flutterbysandfrogs.com/2011/01/versatile-blogger-award.html
I love this and it seems so fast and easy! Thanks!!
xoxo
Kelli @ loveoursimplelife.blogspot.com
just found your ruffly heart tshirt tutorial yesterday-this would go perfectly with it! so cute!
I love this headband! Thanks for the tutorial. You are amazing.
Uhm…ADORABLE! I want one for myself too! You make the coolest and classiest things.
Love your stuff!
Very cute. I like that you put felt on the back. Great idea.
Oh my! How swwet is she?! and I love the headband!
I just want to say that your daughter is PRECIOUS! I love her little button nose and sweet grin. She’s a great model for your clothes! 🙂
Sooo pretty!!! I linked to your tutorial on Craft Gossip Sewing:
http://sewing.craftgossip.com/tutorial-pleated-headband/2011/01/21/
–Anne
The pearls finish it off perfectly. I think I’ll try making one for Kirsten. Thanks for your inspiration!
Very cute!I love it!
soooo cute! Must make! I’m a new follower and I just blogged about you! Come check me out!
came from I <3 naptime, pinning this for my baby girl 🙂
Great tutorial! It will be so fun to make headbands to match the dresses I sew for my girls. Thanks so much.
So adorable!
how cute! so creative. might try this! thanks for sharing ♥
Just wanted to let you know that I mentioned this tutorial in my blog, today. You can check it out here if you’d like:
http://craftanyway.blogspot.com/2011/08/birthday-dress.html
I’m in love with these headbands! They are awesome! I found pics of them on Pinterest through a link from Tip Junkie.
Going to make some for my baby girl!
Eeeek! So excited. I just bought me a brand new sewing machine too! ♥
Oh, thanks so much! These are so great! My daughter always wears those stretchy headbands…the only thing that holds her fine hair back. This pattern makes them so much more fun!
Super cute! Thanks for sharing! Jill♥
Oh my gosh! That is so cute! That is a great design! Great Idea! ☺
I just found this idea on Pintrest. They headbands are very cute! Thanks so much for making the tutorial!
like the headband…look perfect..I really like it.
Send Gift To Pakistan From Australia
Send Gift To Pakistan From Australia
Send Gift To Pakistan From Australia
I love this tutorial! I found it via Pinterest. So cute.
Just so you know, I also found your tutorial on a Russian website using your pictures as well….
here is the link
http://knitly.com/14910
So cute!!!
So cute and lovely little girl. I wanted to make one hair band for my daughter. Although she is too young but I like this hair band and think for my daughter!….
send gifts to Pakistan
gifts to Pakistan
These are adorable!!! Do the buttons stay on longterm when they are glued on? Do you suggest using flat elastic for an infant one? Or a shorter strip of fabric? Thank you!
Simply fabulous. Easy to learn piece. Thumbs up!
Hey Jess,
This is your second project we chose to feature in the Kids sewing projects post at Hello Sewing https://hellosewing.com/30-fun-easy-sewing-projects-kids/
regards,
Helen
Amazing project for the little princess and something she will actually love to wear. Use fabric, felt and interfacing scraps, a simple elastic headband and any buttons, pearls or accessories of your choice to make this lovely headband. You will need scissors, a needle, some thread and a glue gun. via Craftiness is NOT optional