


Head on over to Handmade Tuesdays on Ladybug Blessings for a fun fabric waffle tutorial made by yours truly! She’s featuring a different tutorial each week for a fun handmade gift! Perfect-cause those holidays are coming up fast-yikes!

Re-post of the tutorial originally posted here.
Nothing better than waffles for breakfast on a Saturday morning, right? Well, if they were smothered in strawberries and whipped cream, maybe. Or syrup and butter, as Rory prefers it. Sadie likes hers with jam on top.
Sorry to get you all hungry. Here’s some fake waffles to look at. 😉 Oh, do you wanna know how to make it, too? Well, if I must….
You’ll need:
batting
brown/tan fabric
disappearing ink pen is handy
sewing stuff
 First, cut your pieces of fabric and batting. I used three layers of batting per waffle, so cut that, plus two of the tan fabric. I cut mine 6 inches x 6 inches, but you of course could go smaller or larger.
 Lay your pieces out like this: your pieces of batting, then both pieces of fabric on top, right sides together. pin together.
 Then sew around with 1/2 seam (I know that in the picture the seam is smaller, that’s because I made it a bit smaller after turning it right side out)
 clip your corners…
 and turn right side out. I use a chopstick, it’s great for getting those corners!
 Slipstitch your opening close.
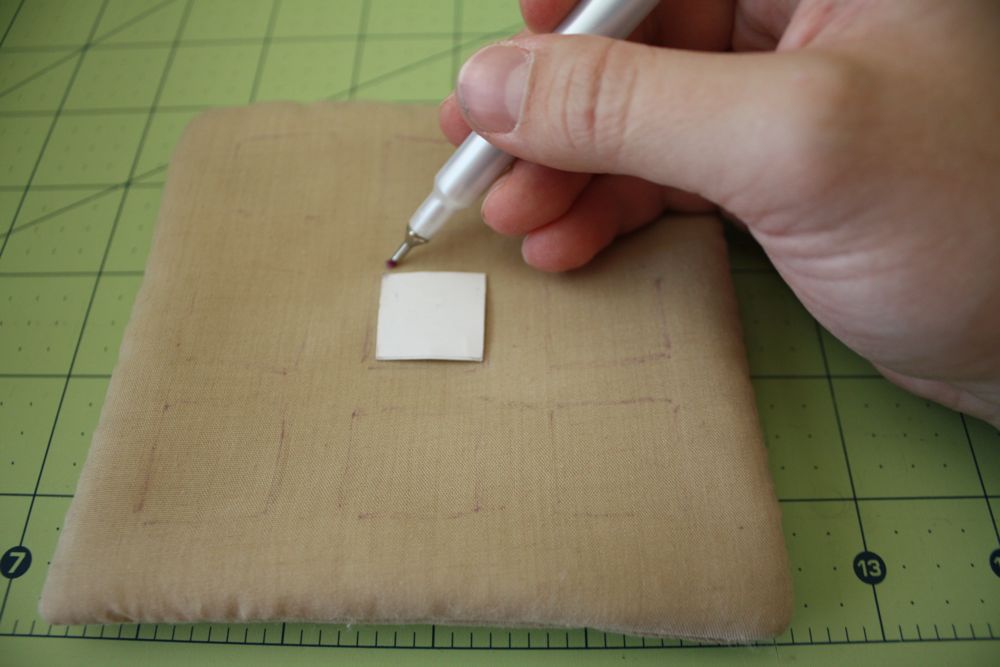 Next, I cut a little piece of cardboard out-3/4 inch square, and using a disappearing ink pen, traced nine squares like so. (not pictured) sew around squares…whala!
(almost) insta-waffle!

***If you have used any of my tutorials, I’d love if you’d add a quick pic to my flicker group! Thanks!***
Felt food is so much fun! I love your new blog design… did you do it yourself, or did you have help?
Always so cute!!
By the way, found some great skirts at the thrift store today. Going to attempt your tutorial! We’ll see how it goes, and if it goes well, I’ll post it in your flickr group! Wish me luck!!
Thanks for this fantastic tutorial! I’d love for you to link this (and any other felt projects you’d like to share) up at my Felt Food Roundup on OneCreativeMommy.com. I hope to see you there!
Must. Make. This. For. My. Niece. Co cute!